Summary
This guide describes how to complete an inventory in MackinVision.
The Inventory process is used to identify items that no longer exist in the library and changes their Status to Missing in the catalog. You can also use Inventory to identify items that are incorrectly shelved and then shelve them correctly.
Warning: Weeding should NOT be performed during an inventory.
Perform any weeding before beginning the Inventory or after the inventory has been completed.
Weeding copies during an inventory will affect the inventory results and may make it difficult or impossible to reconcile the inventory results.
Step 1: Start a New Inventory
- Navigate to Cataloging > Inventory.
- Click the New icon.
- Enter a Description for the Inventory, for example, 2026 School Library Inventory.
- Optionally, select a Previous Inventory so the Inventory Summary Reports can compare results. If no Previous Inventory is available, leave the Previous Inventory field blank.
- Click the Add button.
Step 2: Add a New Section
If “Use Sections from Previous Inventory” is set to ‘Yes’, Inventory Sections that were automatically added are displayed. Otherwise, this section will be blank.
At least one section must be created before you can begin the inventory process. (See note below on how to inventory the entire catalog in one section.)
- Click the Add Section button. There are five optional section fields:
- BRANCH: Select a Branch from the drop down list of Branches. Leave this field blank if your library has only one Branch or you want to inventory items from all Branches at the same time.
- COLLECTION: Select a Collection from the drop down list of Collections. Leave this field blank if you want to inventory items from all Collections in the one Inventory Section.
- Call Number RANGE: A Call Number Range can be used alone to identify a section, or to divide a large Collection into smaller parts to make scanning of the item barcodes easier to manage.
- To identify a section by call number range, leave the Branch and Collection fields blank.
- To include all items in a Branch or Collection, leave both the Call Number From and Call Number To fields blank.
- To include only part of a large Collection in the Inventory Section, enter a value in the Call Number From field to specify the lowest Call Number to be included. To also limit the highest Call Number to be included, also enter a value in the Call Number To field.
- PREVIOUS INVENTORY: Select a previous inventory to compare the section year over year. The field can be left blank if there is no Previous Inventory to compare this section to.
- Click Save once appropriate values have been entered.
- To add more sections, Click the Inventory button to return to the INVENTORY DETAILS screen and repeat the steps listed above.
Step 3: Scan Barcodes into a Section
Items that are present in the library are identified by scanning their barcode. Items that are circulated during the inventory will be counted when the Inventory Section is Processed. The exception are Missing items returned through circulation, which will need to be scanned directly into the Inventory Section.
Two optional processes can be enabled while scanning barcodes:
- Auto Return: if an item that is “checked out” is scanned in the inventory, that item will be marked as returned and the status updated to “available”.
- Replace Unmatched Barcodes: if a scanned barcode is not recognized, the item record will be updated to match the scanned barcode format.
- From the INVENTORY SECTION DETAILS screen, Click Scan Barcodes.
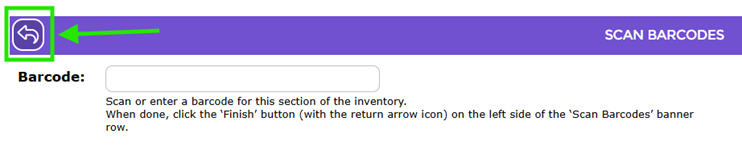
- Scan the barcode of each item in this Inventory Section into the Barcode field.
- To stop scanning, click the Finish icon . While scanning is performed, a lock is placed to prevent the Inventory Section being edited or processed. Selecting Finish releases the lock.
Optionally, barcodes may be scanned into a text file and imported into Inventory. For more details, see:
Step 4: Process Inventory Section
You must always run Process after scanning barcodes into an Inventory Section. Running Process on an Inventory Section will identify the items that have not had their Barcode scanned but are not On Checkout or already have a Status of Missing.
- From the INVENTORY SECTION DETAILS screen, click the Process button.
- The PROCESS INVENTORY SECTION popup window will be displayed asking, “Did you scan in Shelf Order?”
Only click Yes if:
- The items are shelved exactly in Call Number order, and;
- The barcodes were scanned in ascending Call Number order by working along the shelf, and;
- Want Inventory to report any items that were scanned out of order.
After Process has completed, the following copy totals will be updated:
- Shelved OK: Items that have been scanned and are in the correct shelf location
- Off Shelf: Items that are currently in use, e.g. have a status of Checked Out, On Hold, or In Transit
- Misshelved: Items that have been scanned and are in the wrong shelf location
- Unscanned: Items expected to be scanned in this Inventory Section but have not been scanned yet
- Missing/Disposed: Items that have a status of Missing or Disposed, or that have been weeded since the previous inventory
Step 5 - Optional: Run Unscanned Copies Report
After Processing a section, you can view and create a printable Report of unscanned copies.
For detailed instructions, see:
Step 6: Finalize Inventory
Finalize submits the Inventory Section for overnight Housekeeping to complete. When Finalized, the Unscanned items in the processed Inventory Section are made Missing in the Catalog Copies record.
Finalize all sections at once using the Finalize All button on the INVENTORY DETAILS screen.
Or, Finalize Inventory Sections individually:
- On the INVENTORY SECTION DETAILS screen, click the Finalize button.
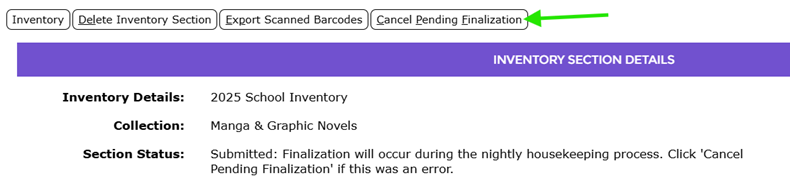
- Check that the SECTION STATUS displays the date and time showing when the Finalization was submitted.
- Once the overnight Housekeeping process has run, check that the Section Status field updates to Finalized.
A pending finalization may be cancelled any time before the nightly Housekeeping process runs by clicking Cancel Pending Finalization.
Finalizing an inventory cannot be undone. For more details about reopening an inventory, see:
Was this article helpful?
That’s Great!
Thank you for your feedback
Sorry! We couldn't be helpful
Thank you for your feedback
Feedback sent
We appreciate your effort and will try to fix the article