Summary
Copies can be weeded in bulk or individually.
This guide will provide the steps required to weed copies in bulk. Separate guides provide the steps required to search for a copy, weed a single copy, and weed a resource with all its related copies.
Related Parameters
Parameter No. 2103 Weeding Reason is Mandatory – the value entered in this parameter determines whether a reason is mandatory or not when deleting copies. If you want a reason to be added by the staff member completing a weed process, choose Yes.

Parameter No. 2107 Copy Weeding Branch Limit - the value entered in this parameter determines the limit on the number of copies being weeded per batch (i.e. in bulk).

Weed Copies in Bulk via the Weed All Option
The following steps explain how to weed copies with a status of Lost. The Status you use to identify copies for weeding may be different.
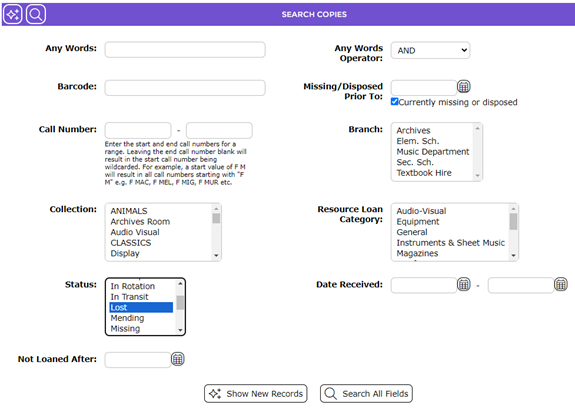
- Complete a search (Cataloging > Copies) for a list of copy records you wish to weed, for example copies with a status of Lost.
- A list of copies with the status of Lost will display. The total number of applicable copies is noted between the Previous and Next arrows.
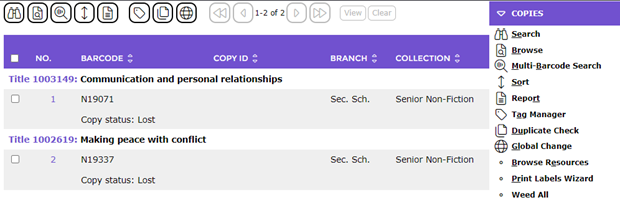
- From the Function menu, click on the Weed All option.
- The Weeding screen will display.
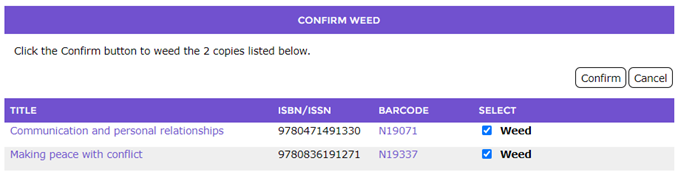
The screen provides:
- Confirmation of the number of copies to be weeded
- The title and barcode of each copy (each is a clickable link providing access to the resource or copy Detail screen)
- A Weed checkbox corresponding to each copy to be weeded. By default, a check displays in the checkbox.
- If any of the copies are not to be weeded, click in the applicable checkbox to remove the check.
- Click the Confirm button.
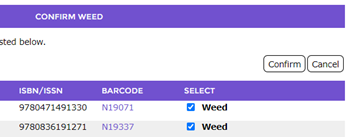
- An indicator that weeding is in progress will display briefly before the Confirm Weed popup box displays.
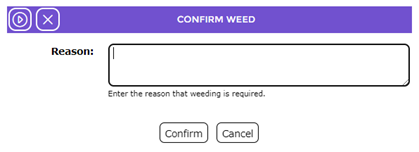
- A Reason text box is included in the popup screen. If it is not mandatory to enter a reason, click the Confirm button. If a reason is mandatory, the confirmation process will not proceed.
TIP:
If it is mandatory to enter a reason (the setting on Parameter No. 2103 determines this), and a reason is not entered, a message popup will display indicating a reason must be entered.
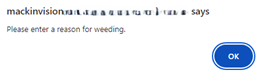
Click OK on the message to return to the Confirm Weed popup box and enter a reason then click the Confirm button.
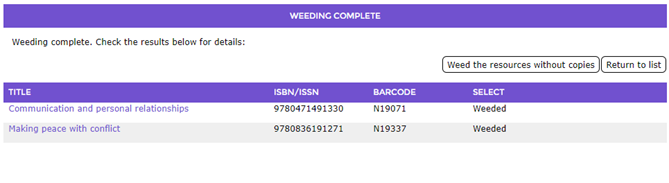
- The Weeding screen will refresh and list all the weeded copies.
TIP:
If any of the weeded copies were attached to resources, which now have no other copies attached, a Weed the resources without copies button displays. Clicking the button will weed the applicable resources as well.
If any weeded copies are Resource Boxes, a List the Resource Boxes that are empty will display. Clicking the link will display a list of those boxes. Only the boxes, not the contents, are weeded.
- If you do not want to weed those resources, click the Return to List link.
- None of the previously listed copies identified as weeded will display.

Weeding Copies Via Cataloging > Weeding
- Navigate to Cataloging > Weeding.
- The Weeding screen will display.
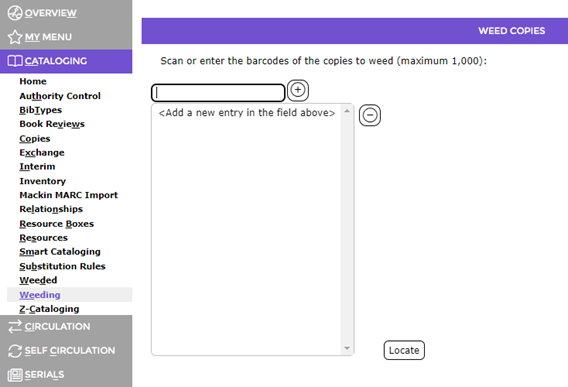
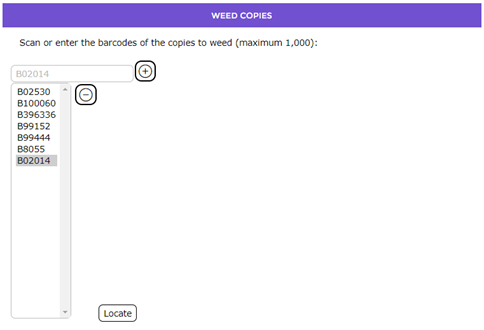
- Scan or manually enter the barcodes of the copies to be weeded.
 Note:
Note:
If you are manually entering the barcodes, click the Add icon after entering each one. Do not click the add button if scanning barcodes.
- The barcode will transfer to the list-box below the barcode entry field.
 If a barcode was scanned, or entered incorrectly, highlight the barcode in the list-box and click the Remove icon.
- When all barcodes have been entered click the Locate button (picture below).
- The Confirm Weed screen will display. All the barcodes scanned in along with their corresponding title and ISBN number will display.
- Each entry will include a checkbox next to Weed in the Status column and each checkbox includes a check.
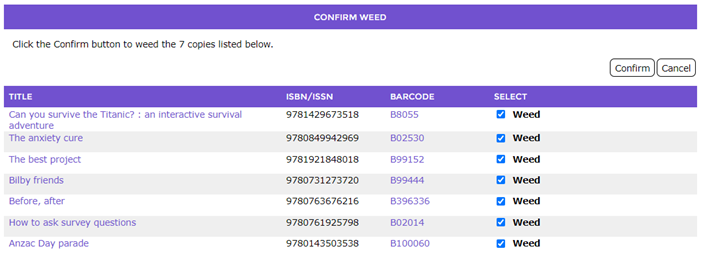
- If one, or more, of the barcodes is not to be weeded, click in the checkbox to remove the check.
- Click the Confirm button.
- The Confirm Weed popup screen may display, based on the applicable parameters mentioned at the beginning of this help guide.
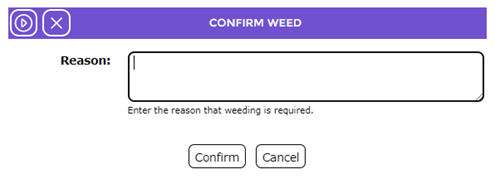
- Click the Confirm button (there is also a Confirm icon that can be clicked if preferred).
- If a reason is required, a popup message will display asking that you enter a reason. Click OK to display the Confirm Weed popup screen again.

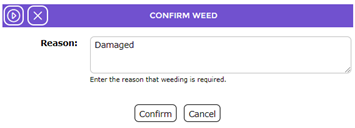
- Enter the reason for weeding the copies in the Reason field then click the Confirm button again (there is also a Confirm icon that can be clicked if preferred).
- The Weeding Complete screen will display.
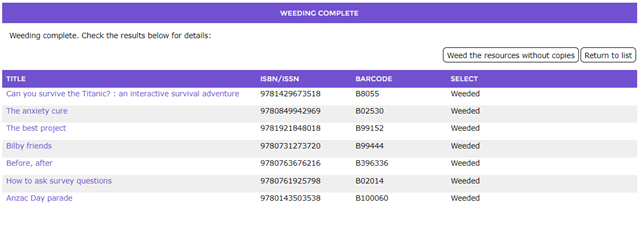
- To weed any resources without copies, click the Weed the resources without copies button. See the next section for the process required if you have clicked this button.
Weed the Resources Without Copies
If preferred, you can weed the resources that no longer have copies attached after the weed copies process has completed.
- If you clicked the Weed the resources without copies button that displayed at the end of the weed copies process, the Confirm Weed screen will display.
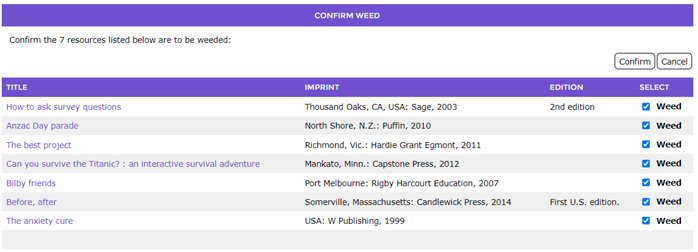
- If one, or more, of the resources is not to be weeded, click in the checkbox to remove the check.
- Click the Confirm button.
- The Confirm Weed popup screen may display, based on the applicable parameters mentioned at the beginning of this help guide.
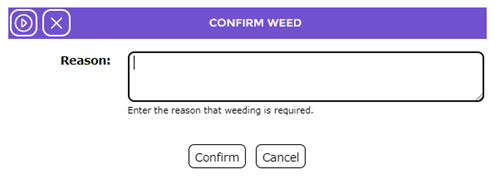
- Click the Confirm button (there is also a Confirm icon that can be clicked if preferred).
- If a reason is required, a popup message will display asking that you enter a reason. Click OK to display the Confirm Weed popup screen again.

- Enter the reason for weeding the copies in the Reason field then click the Confirm button again (there is also a Confirm icon that can be clicked if preferred).
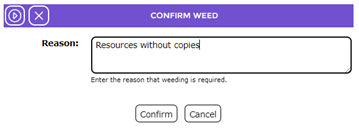
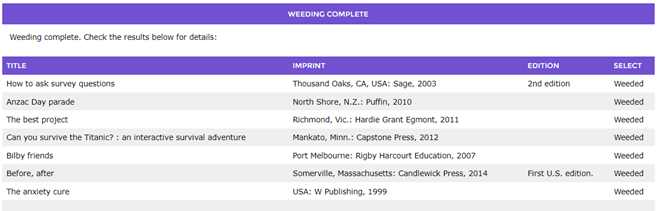
- The Weeding Complete screen will refresh and list the titles’ resource records which confirms they are now weeded.
Was this article helpful?
That’s Great!
Thank you for your feedback
Sorry! We couldn't be helpful
Thank you for your feedback
Feedback sent
We appreciate your effort and will try to fix the article