Summary
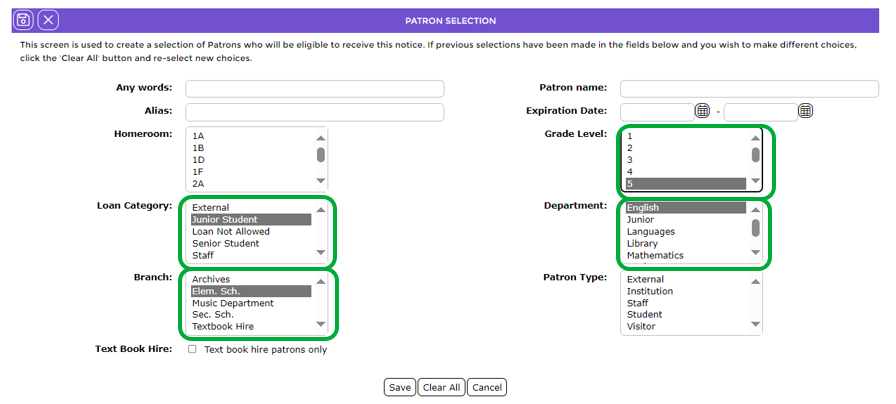
Staff can edit an overdue notice to restrict the Checkout Categories, Collections, Resource Types, Branches or Resource Types that apply to the overdue items using the Resource Selection page. Also shown in this guide, the overdues can be restricted by Patron fields in the Patron Selection page.
Edit an Overdue to Apply to a Specific Branch
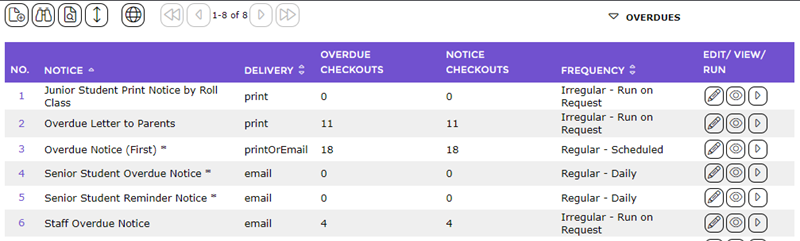
- Go to Circulation > Overdues
2. In the List screen click on the number link corresponding to the Overdue Notice to be edited.
3. The notice’s Detail screen will display.
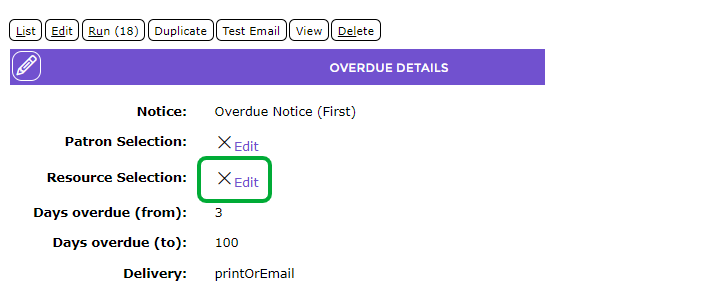
4. Click the Edit link in the Resource Selection field. Note that if the notice is not currently restricted, a Cross icon displays to the left of the Edit link.
5. The Resource Selection screen will display.
- Select the branch, whose overdue notices you wish the notice to include, from the Branch list box, for example, Elem. Sch.
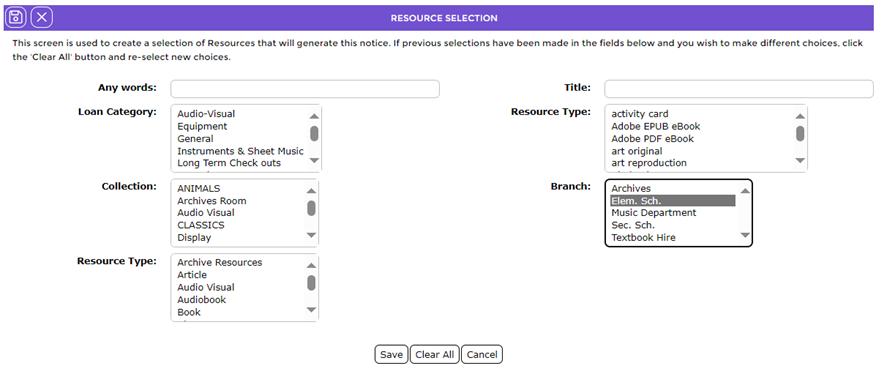
Note: In instances where the restriction is to apply to more than one branch (e.g. Elem Sch. and Archives), hold down the Ctrl key and highlight each branch to be included.
7. Once the applicable branches have been selected click the Save button or Save icon.
Edit an Overdue to Apply to Different Criteria
In step 6. above, you can restrict by multiple combinations of different choices (e.g. Branch, Loan Category, Resource Type, etc.), or just one selection.
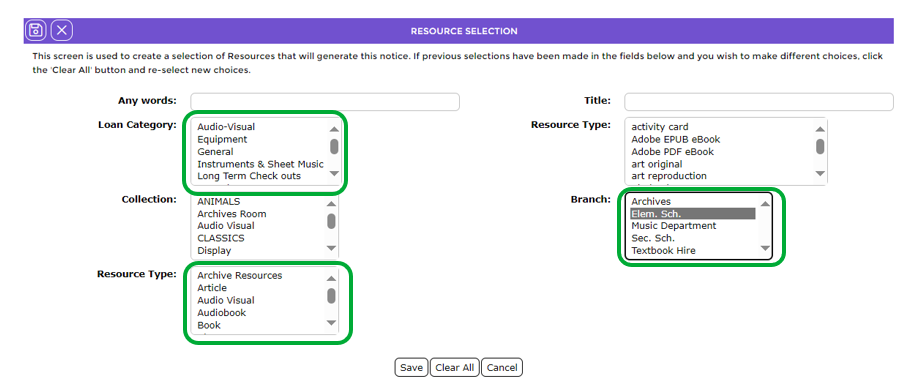
Additionally, Patron restrictions can be made in the Patron Selection page (step 3 above)
Generate the Overdue Notices
8. The Overdues Detail screen will display.
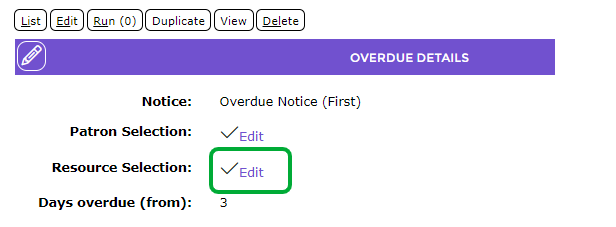
9. A Check displays in the Resource Selection field replacing the Cross.
10. The number in brackets next to the Run link indicates how many overdue items apply to the notice. In the screen example above the number 0 displays within the brackets.
Printed Notices
The overdue notice can be run once you have returned to the List screen. Alternately the notice can be run by clicking on the Run (xx) button in the Detail screen. For this example:
- Click on the List button.
- Click on the
 button for the option (e.g.) Overdue Letter to Parents.
- The Report screen will display.
- Click on the Overdue Notice report link and complete the reporting process in the usual manner.
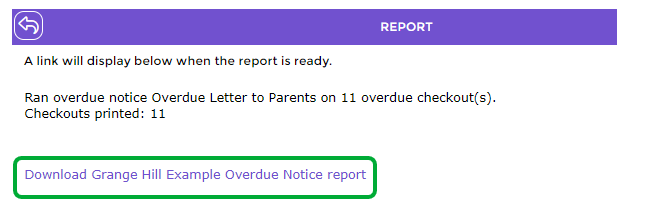
- The Overdue Notice will include only those overdue resources tied to the branch selected for the notice.
Email Notices
Likewise, with Email notices, the overdue notice can be run once you have returned to the List screen. Alternately the notice can be run by clicking on the Run (xx) button in the Detail screen. For this example:
- Click on the List button.
- Click on the button for the option Staff Overdue Notice.
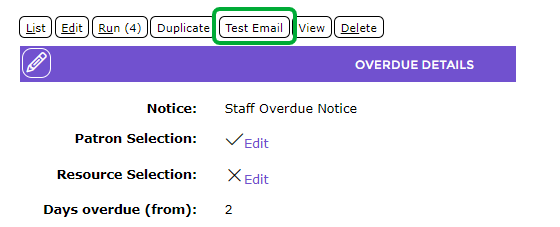
- To see how the email will be displayed in the recipient’s email client, click the Test Email button. The Send Test Notice Email page will be displayed
- Enter your email address(es) and click the Submit button. An email from the first patron or patron group is emailed to the specified email address(es).
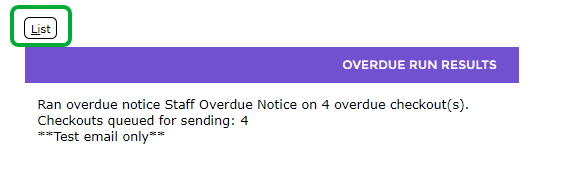
- A confirmation is displayed on-screen
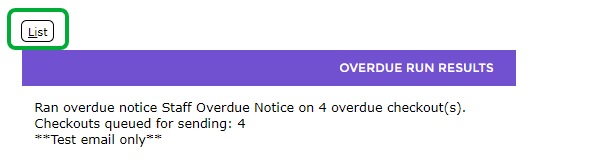
- Click on the List button.
- Click on the
 button for the option Staff Overdue Notice. A confirmation popup will appear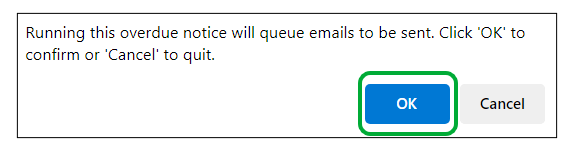
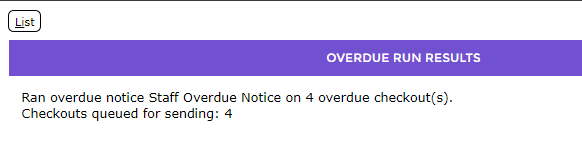
- A confirmation screen is displayed
Was this article helpful?
That’s Great!
Thank you for your feedback
Sorry! We couldn't be helpful
Thank you for your feedback
Feedback sent
We appreciate your effort and will try to fix the article