Summary
Overdue Notice Templates can be created for ad hoc overdue processing, or to fulfill your library policies on notifying patrons of any outstanding overdue items. An example library policy could be:
- Send out a single (First Notice) reminder to patron accounts that have any items that are between one and seven days overdue.
- Send out a single (Second Notice) reminder to patron accounts that have items that are between eight and twenty one days overdue.
- Send out repeating (Final Notice) reminders to patron accounts that have items that are more than twenty one days overdue.
These notices can be set to run automatically as part of the overnight housekeeping, or manually.
This guide will provide the steps to create an overdue notice template.
Create an Overdue Notice Template
- Navigate to Circulation > Overdues.
- In either the Search or List screen click the New icon, type the keyboard shortcut ‘ne’ or select New from the Overdues Function menu.
- Enter the name of the notice in the field provided in the Enter the Overdue Notice Name popup screen and then click the Add button or the Add icon.
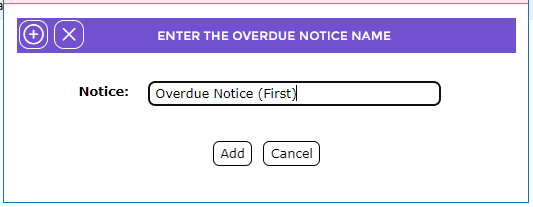
4. The Overdues Detail screen will display.
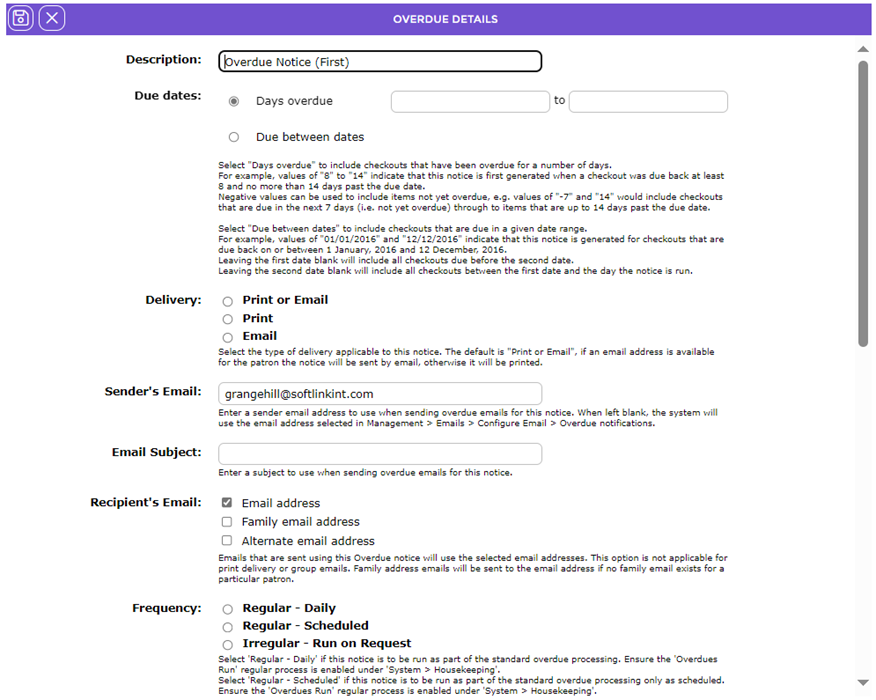
5. The following table provides an explanation of the Fields and Selection options in the Overdues screen:
Field | Description |
Description | This field will automatically populate with the title of the new Overdue notice entered in the previous popup screen. |
Due dates | Click the radio button next to the desired method of determining, by date, which overdue items will be included in the:
Days overdue – selecting this option will enable you to specify both the minimum and maximum number of days a copy on checkout is overdue, for it to be included in the notice when it is run. Note that you may enter a negative number(s) to capture checkouts that are not yet overdue. E.g. -10 means a copy that will become overdue anytime in the next ten days.
Due between dates – selecting this option will enable you to specify the date range in which a due date must fall for a copy on checkout to be included in the notice when it is run and sent. This option is ideal for temporary overdue notices set up to capture checkouts due back within a given time period (e.g. within a specific term or year). Leaving the first date blank will include all checkouts due before the second date, and leaving the second date blank will include all checkouts between the first date and the day the notice is run. Note that you may enter a future date(s) to capture checkouts that are not yet overdue.
|
Delivery | Click the radio button to select the applicable Delivery method:
Print – generates notices as a PDF file ready for printing.
Email – sends the notices to the Patron’s recorded email address. Patron accounts without an Email, Alt Email or Family Email set (depending on the “Recipient’s Email” setting within the Overdue template) will not generate an email notification so this option should only be used if the patron accounts have one or more of the email fields populated.
Print or Email – sends the notices via email to those Patrons which have an email address while those without will have their overdue checkouts included in the generated PDF file for printing. This option is recommended if you have patrons both with and without an email address on their record.
Note: When the overdue notice is run, the notice produced is determined by its text and settings. The notice is the same irrespective of the delivery method used to send it to the Patron. For example, if custom text is entered in the Header, Footer and Message fields of a template, that text is part of the notice generated when it is run; it is not altered according to whether the notice is printed or emailed. |
Recipient’s Email | Click the radio button to select the preferred email option:
Email – clicking in the radio button next to Email will result in the notice being emailed to the address entered in the Email Address field on the patron record.
Alt. Email – will send the notice to the address entered in the Alt. Email field on the patron’s record.
Family Email – will send the notice to the address entered in the Family Email field on the patron’s record.
All three Recipient’s Email options can be selected if required. |
Sender’s Email | This field specifies the email address from which the overdue notification is sent “from”. If this is left blank then the sender’s email address will default to the email address of the overdue template creator’s branch. If that is blank then the library’s email address specified in parameter 1004 “Email Address” will be used. |
Use SIS | If this option’s corresponding checkbox includes a check, Patrons, whose accounts are SMS enabled, will received overdues via a text message to their cell phone phone. |
Frequency | This option is used to specify when and how an overdue is run.
Regular - Daily – selecting this option will set the overdue notice to automatically run on a daily basis. The overdue notices set to Regular - Daily will then be run during the Housekeeping process, provided the Overdues Run option is checked in System > Housekeeping.
Regular - Scheduled – selecting this option will set the overdue notice to automatically run on the schedule specified in the following sub-options, which will appear when this option is selected.
Irregular - Run on Request – selecting this option will mean that staff must manually generate the overdue notice via the Run icon on the Overdues screen. |
Repeat | One Notice Only, means that an overdue item will only be reported one time for this overdue template no matter how many times the overdue is run. Multiple Notices, means that any item that qualifies for this overdue template will be reported every time the overdue is run. |
Report name and format | Click on the down arrow at the end of this field and select the report that will be printed for this overdue notice. There are more than 16 reports from which to choose. The report selection can be changed at any time to suit your purpose. |
Email from | Click on the down arrow at the end of this field and select the report to be used for this emailed overdue notice. There is no need to select an email form if the delivery option is Print. |
SIS form | Click on the down arrow and select the report format for SMS overdue notices. |
Report header | Enter custom text for the Header of the overdue notice template if you wish to override the default header for the selected report or email.
If default text is to be used, enter it in Parameter No 3401. That text will then be included on the notice. |
Report message | Enter custom text for the Message of the overdue notice template if you wish to override the default Message for the selected report or email.
If default text is to be used, enter it in Parameter No. 3402. That text will then be included on the notice. |
Report footer | Enter custom text for the footer of the overdue notice template if you wish to override the default footer for the selected report or email.
If default text is to be used it is entered in Parameter No. 3400. That text will then be included on the notice. |
6. Once all fields have been completed click the Save icon.
7. The Overdue Detail screen will display.
8. If there are any current overdue items that match the criteria established on the overdue template, the Run button will include the number in brackets, for example, Run (18).
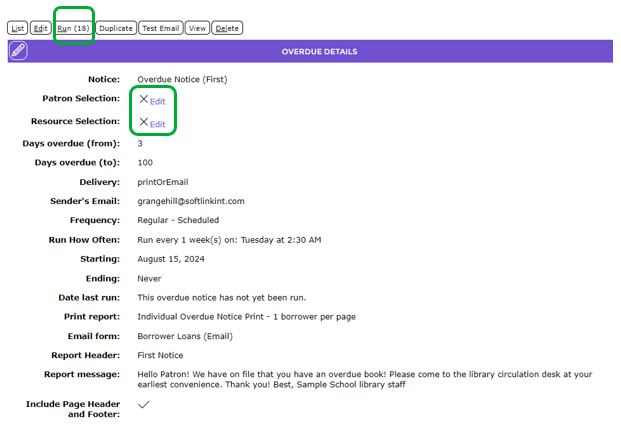
9. Patron Selection - You can further limit the records selected by clicking the Edit link in the Patron Selection field (see image for 7. above). This enables you to specify the patron accounts to be included in the overdue notice by selecting from one or more options.
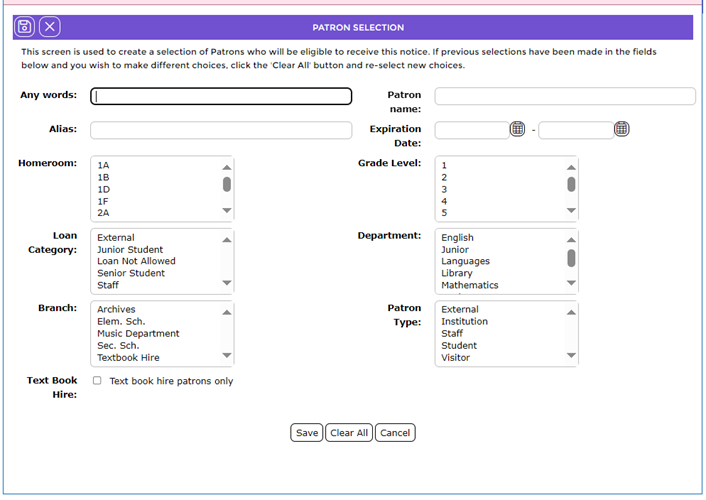
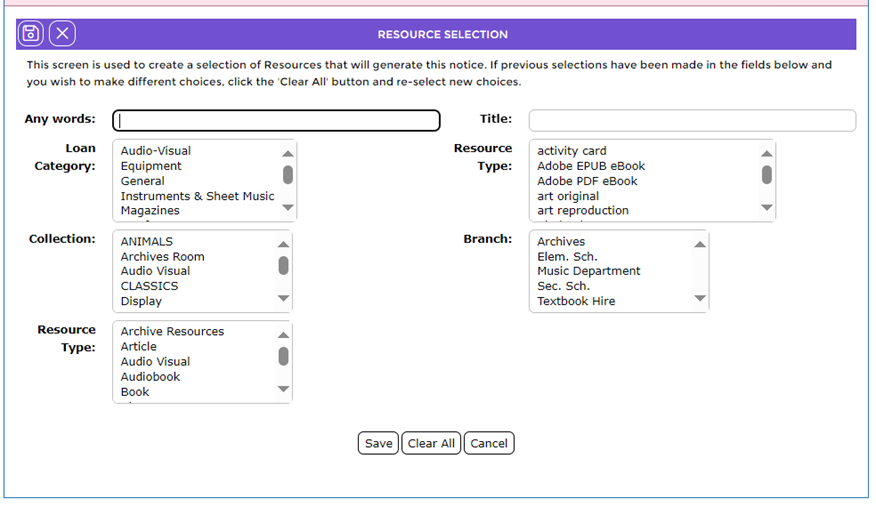
10. Resource Selection - You can further limit the records selected by clicking the Edit link in the Resource Selection field (see image for 7. above). This enables you to specify the copies to be included in the overdue notice by selecting from one or more options.
Was this article helpful?
That’s Great!
Thank you for your feedback
Sorry! We couldn't be helpful
Thank you for your feedback
Feedback sent
We appreciate your effort and will try to fix the article