Summary
Items are loaned to patrons via the Checkouts tab in the Circulation Desk. This guide will provide the steps required to checkout items to a patron. It will also include several screen examples of messages that may display during the checkouts process.
Opening a Patron’s Record in the Circulation Desk
You can bring up a patron’s record by one of three ways:
- Scanning a patron’s barcode
- Typing a patron’s name
- Browsing patrons by Department, Homeroom, Grade, or established Group
Scanning a patron’s barcode
- Click on the Checkout
 tab.
tab. - Scan the patron barcode.
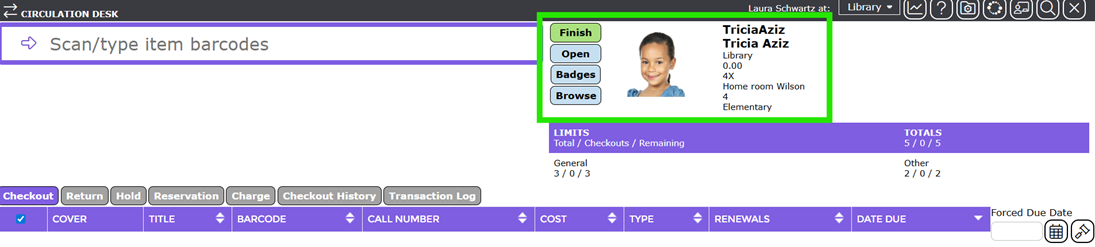
- The patron’s details will load into the screen. If the patron record includes a patron image, it will also display on the Checkouts screen.
Typing a Patron’s Name
- Type the first few letters of the patron’s first or last name into the data entry field.
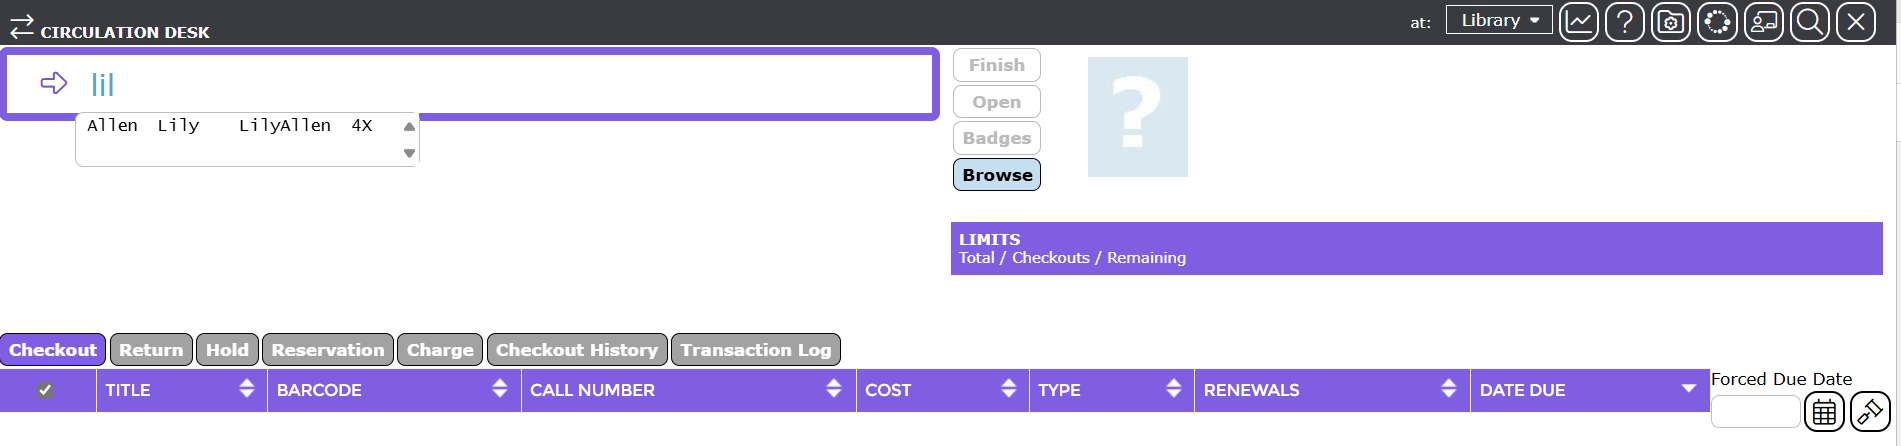 Click on the applicable patron in the resulting prediction list. The selected patron’s details will load.
Browsing Patrons by Department, Homeroom, Grade Level, or Group
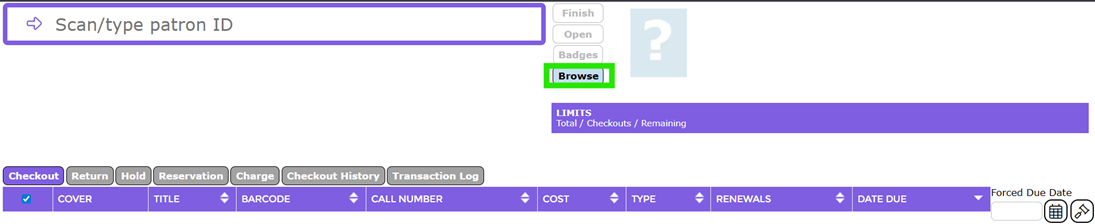
- Click the Browse button in the Circulation Desk to select a patron from a homeroom list.
- The Browse window will then appear. You may then select a department, homeroom, grade level, or group, and the patrons you would like to highlight. You may also opt to sort by either first or last name.
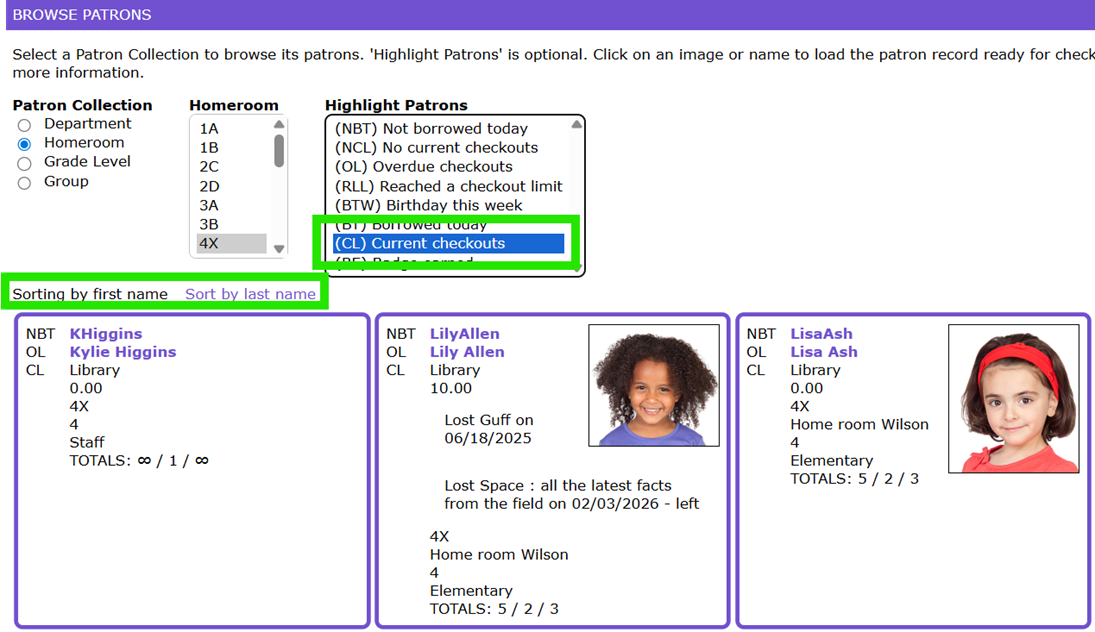
- Clicking on a patron’s name will close the Browse window and return you to the Circulation Desk with the selected patron showing and ready for the checkouts to be processed.
Checking Out Items to a Patron
Items may be checked out to patrons by either scanning or typing the item barcode, or typing the title of the item after the patron has been selected.
Checkout Items by Scanning or typing the Item Barcode
- Scan or type the item barcode into the Entry field in the top left-hand side of the screen.

- The Title, Barcode, Call Number, Cost, Type, Renewals, and Due date details will display in the grid in the bottom half of the screen. The details of each item scanned in the current process will display in italics.
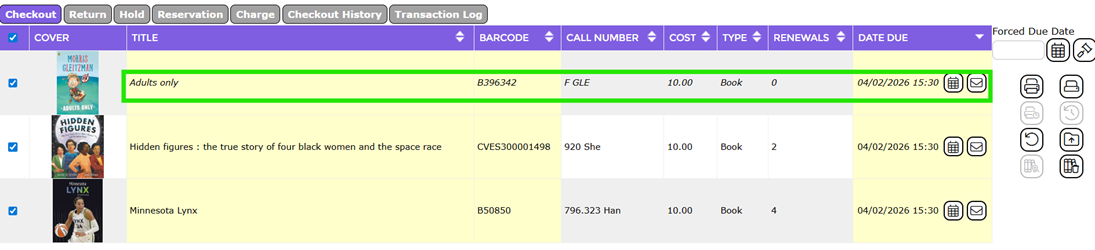
- Continue scanning all applicable items.
If the item barcode is not available:
- Type in the first few letters of the Resource’s title.
- The list of matching copies will appear under the search term entered. Note that there may only be one copy.

- Click on the copy required.
- The copy details will load into the Checkouts tab in the usual manner.
Circulation Desk Messages
Depending on the logged in staff member’s level of authorization, messages will display with a Cross and a Check icon, or just a Check icon. If the message:
- Includes a Check and a Cross, the staff member has override permission and can either click the Check to permit the checkout or click the Cross icon to disallow the checkout.

- Includes a Check icon the staff member is authorized to permit the action without needing to click on any icon.

- Begins with Checkout Not Permitted and just a green Check, the logged in staff member does not have override permission.
Related Parameters
There are two Support Parameters that should only be add/edited in consultation with a Support Consultant:
- Parameter No. 3071 – circDeskLoanSizeLess. The value entered in this parameter determines the number of checkouts to display in the Circulation Desk by default, or when the Show Less button is clicked.
- Parameter No.3072 – circDeskReturnsSizeLess. The value entered in this parameter determines the number of checkouts to display when the Show More button in the Circulation Desk is clicked.
- Parameter No. 3001 - Allow Checkouts by Title. The value entered in this parameter allows or disallows searching for a resource via the Circulation Desk by setting the value to Yes or No.
Was this article helpful?
That’s Great!
Thank you for your feedback
Sorry! We couldn't be helpful
Thank you for your feedback
Feedback sent
We appreciate your effort and will try to fix the article