How a Reservation is Automatically Generated via Circulation Desk
Summary
If a copy with a Resource Loan Category (RLC) identifying that it is reservable is loaned to a patron, the system creates a reservation, automatically removing the need for Circulation staff to manually create a reservation first. The system-created reservation is viewable in the library Management screen under Circulation > Reservations. The checkout period for the reservation complies with the lending rules set on the RLC.
This guide will provide an example of how the system creates an automatic reservation in Circulation Desk when a reservable copy is loaned to a patron. Separate guides provide the steps required to manually create a reservation and how to checkout items to patrons.
A Reservable RLC
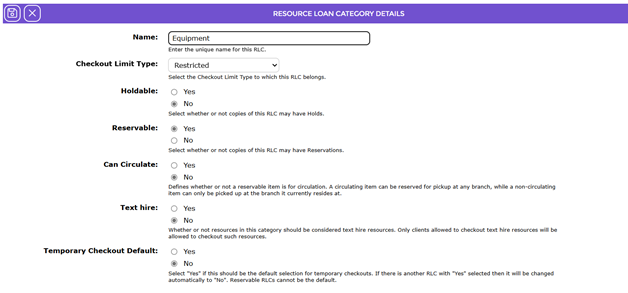
1. RLCs are created via Circulation > Lending Rules. To set the RLC as Reservable select Yes in the Reservable field in the RLC’s Detail screen (see the How to Set up Lending Rules guide for more information on RLCs).
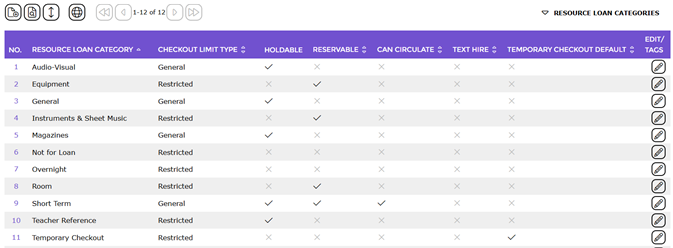
2. RLCs are selected on the Copy Add/Edit screen. If the copy is to be reservable, ensure the RLC selected on the copy is set as Reservable.
Issue a Reservable Copy
3. Scan or manually enter the patron barcode.
4. Scan or manually enter the barcode of the equipment copy in the Circulation Desk Checkouts screen.
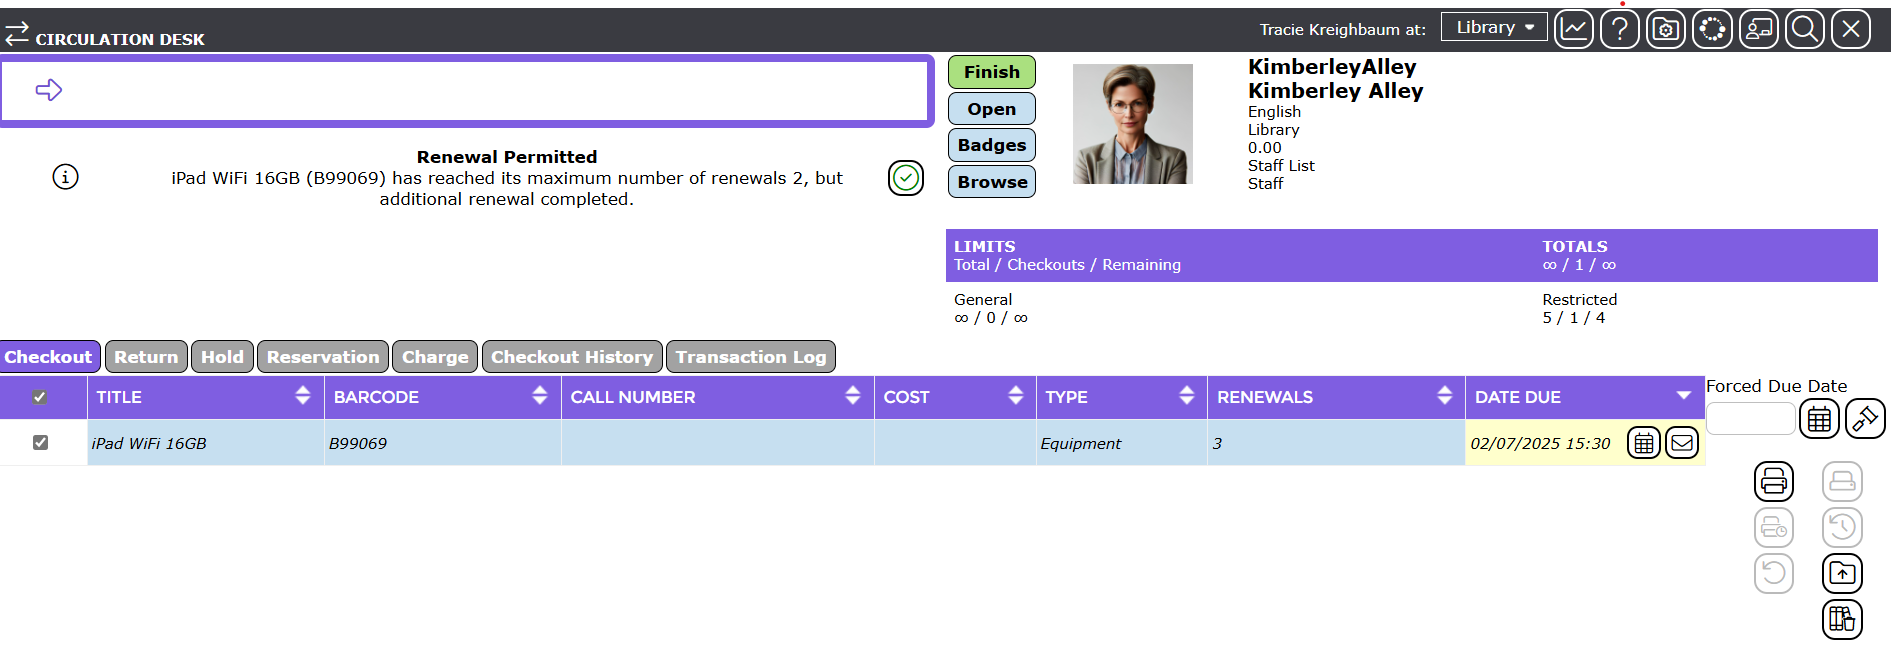
6. Click on the Reservations tab to confirm the reservation was automatically generated.
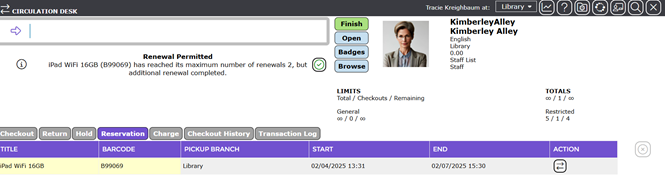
7. Any applicable messages relating to reservations will display including the copy loaned. If there is a list of reservations, the issued equipment details will list in the applicable Start date and time order.
Tip: An alert message can be added to reservable items that will display on the Circulation Desk, for example, “Must be booked one week in advance.” This alert can be added/adjusted in Management > Parameters > 3504. Depending on the logged in staff member’s User Privileges, they can either override and checkout the item or disallow the checkout. For staff without the allow/disallow User Privileges, an acknowledge message only displays identifying the alert message. |
Reservation Time Overlap
- If there is an existing reservation on a copy just issued which has a Start time that falls within the checkout time period of the now loaned copy, and the logged in staff member cannot automatically override the existing checkout of a bookable item, the Allow Checkout message with a Truncate, Override and a Cancel will display.
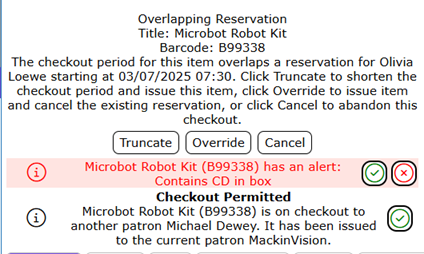
If the existing reservation is to be overridden, click the Override button. If the checkout is to be disallowed click the Cancel button.
View the Automatically Created Reservation in the Management Screen
- For staff with applicable User Privilege operations the automatically created reservation can be viewed in the Circulation > Reservations screen.
- Click on the Management icon in the Circulation Desk.
- In the Management screen click on Circulation then click on the Reservations sub-menu option.

4. The reservation for the copy just loaned will be included in the Reservations > List screen
Was this article helpful?
That’s Great!
Thank you for your feedback
Sorry! We couldn't be helpful
Thank you for your feedback
Feedback sent
We appreciate your effort and will try to fix the article