Summary
It is a mandatory requirement that a Patron Type is selected when creating a Patron record. Types determine which fields display by default on patron records. There are four system provided Patron Types which are set as the default for process. It is strongly recommended that the setting is not changed on the system provided types.
This guide will provide the steps required to create a Patron Type. An Overview guide provides a fuller explanation of Patron Types.
Create a Patron Type
- Navigate to Management > List Files and click on Patron Types.
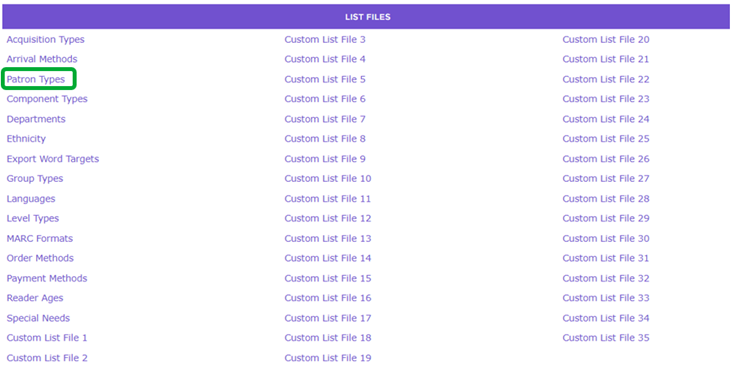
- The List screen of existing Patron Types will display.
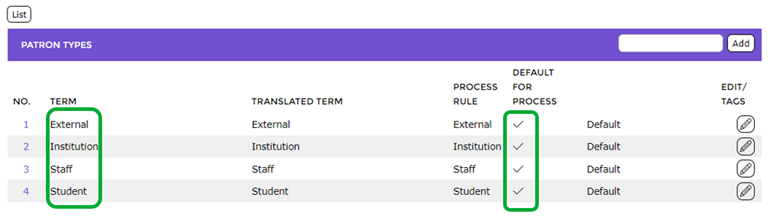
- There are four default Patron Types provided by the system. A Check icon displayed in the Default for Process column indicates the default types.
- To create additional types, enter the term required, for example Visitor, then click the Add button.

- The list will now include the newly created type.
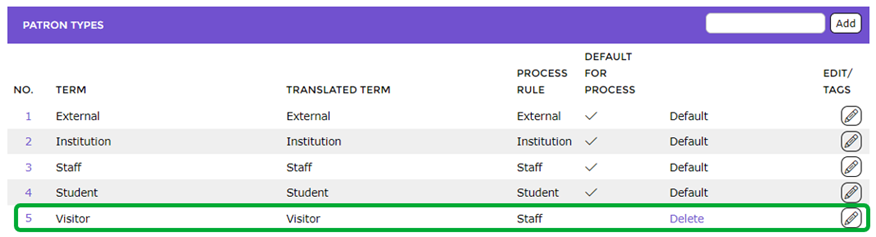
A Process is automatically selected on the new type, for example, Staff. This can be changed. Note that the option selected in the Process field for system provided types is left blank.
- Click on the Edit button.

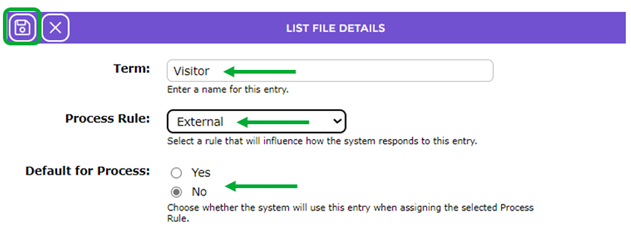
- The Term field will contain the new Patron Type you created.
- Click on the down arrow at the end of the Process Rule field and select the applicable option, for example, External.

- By default, the No radio button in the Default for Process field is active. It is recommended this setting is not changed unless one of the pre-set Patron Types is not required by your library but the newly created one is.

- Click the Save button if any edits have been done.

The newly added Patron Type is now available for selection on Patron records.
Was this article helpful?
That’s Great!
Thank you for your feedback
Sorry! We couldn't be helpful
Thank you for your feedback
Feedback sent
We appreciate your effort and will try to fix the article