Summary
This guide provides detailed instructions on the process of merging two patron records in MackinVision. This process involves three main steps:
- Merging the checkout histories.
- Transferring any current checkouts to the patron record that will be kept.
- Deleting the duplicate patron record.
Note: The process described in this guide is intended for situation in which there is only one duplicate patron record. If a patron has more than one duplicate record, then please contact the Softlink Education support team for assistance.
Determining Which Patron Record to Keep
Before merging patron records, you will first need to decide which patron record to keep. In most cases, this will be the patron record with the correct alias. If the patron details in both records vary greatly, then you may want to keep the patron record that will require the least amount of editing.
1. Merging the Checkout Histories
Once you have determined which patron record will be kept, the checkout history for the other patron record will need to be transferred to it, merging them together.
Note: The following steps utilize the Global Change functionality to transfer and merge checkout histories from the duplicate patron record to the patron record that will be kept. Global changes cannot be reversed by the user. Hosted clients are advised to perform global changes at the start of the day so that minimal data is lost in the event that the previous night’s backup needs to be restored. If your school’s MackinVision system is not hosted by Softlink, then it is recommended that a backup of the data be created before the global change is performed.
- Navigate to Circulation > Patrons, then perform a search for the patron record that will eventually be deleted.
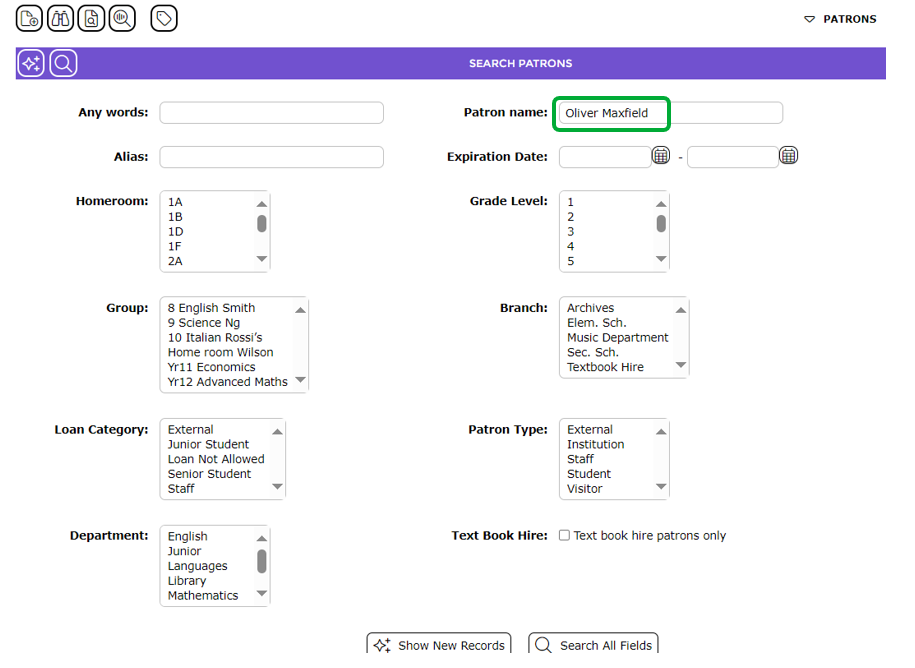
- When the search result displays, click the corresponding number for that patron record to access the Details screen.

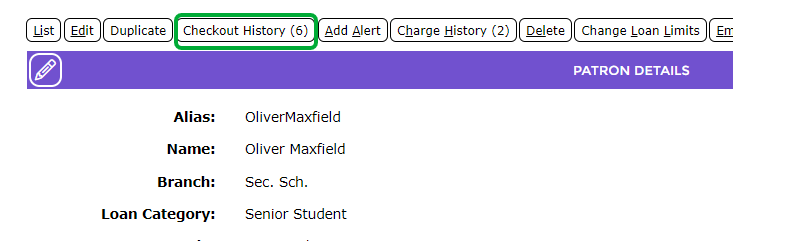
- In the Patron Details screen, click the Checkout History button.
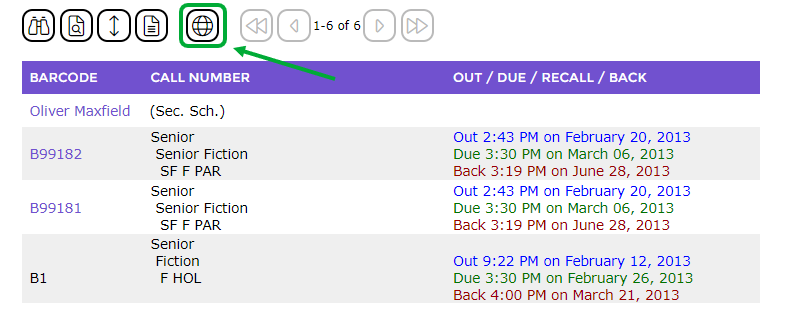
- In the Checkout History screen, click the Global Change button.
- In the Global Change screen, switch the Select Field option to alias, switch the From Value option to Any current value, switch the To Value option to Specified value, then enter the alias for the patron record that will be kept.
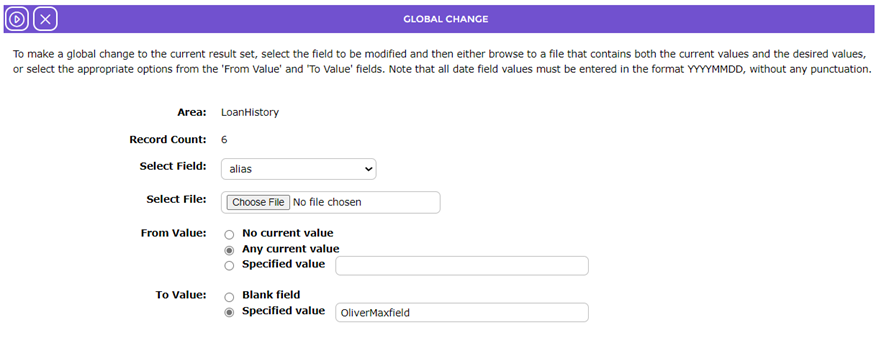
6. Click the Go  button and the checkout history will be transferred to the patron record for the alias specified, merging their checkout histories.
2. Transferring Current Checkouts
If the duplicate patron record to be deleted has current checkouts, then these will need to be transferred to the patron record that will be kept. The transferring of checkouts is done via the Terminate Checkouts functionality in the Circulation Desk.
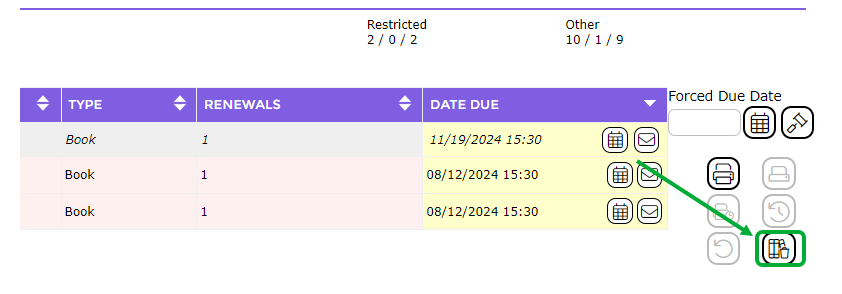
When the Terminate Checkouts window appears, click the Transfer button, then start typing the name or alias of the patron record that the checkouts will be transferred to and a drop-down list will appear displaying the possible matches. Select the relevant patron and then click OK. Please see the How to Use Terminate Checkouts guide for more detailed instructions on how to do this.
3. Deleting the Duplicate Patron Record
- Navigate to Circulation > Patrons, then search for the duplicate patron.
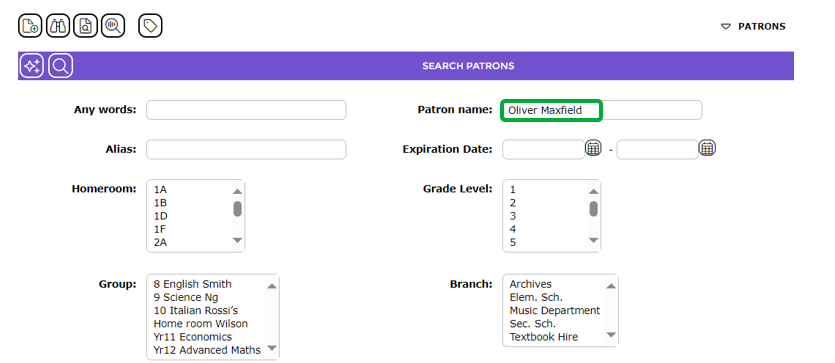
- In the search result screen, click the corresponding number link to access the Details screen.

- In the Patron details screen, click the Delete button.
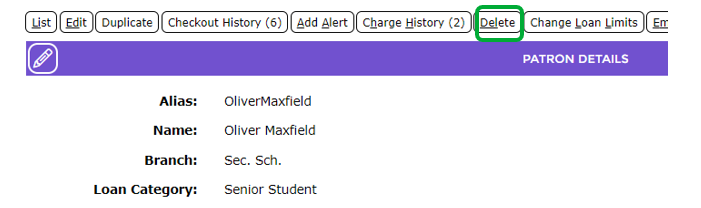
- Finally, click the Confirm button.
Was this article helpful?
That’s Great!
Thank you for your feedback
Sorry! We couldn't be helpful
Thank you for your feedback
Feedback sent
We appreciate your effort and will try to fix the article