Summary
The Duplicate Copies function enables library staff to create additional copies using most of the information on the copy selected to duplicate. The fields in duplicated copies will have the same values as those on the selected copy with the exception of the Barcode, Accession Number, ID, Received Date and Alert Message fields. The Status field is “copied” to duplicate records so Users must ensure a copy selected for duplication has the required Status or it will have to be manually changed on the duplicates. The duplicate process can be done immediately after the first copy has been added to a resource or can be used at a later date.
This guide will provide the steps required to duplicate copy records. A separate guide provides the steps required to complete a search and receive an ordered copy.
Related Parameter
Parameter No. 2106 Item Duplication Barcode Batch Limit – the value set in this field determines the maximum number of copy records to create at a time using the Duplicate Copies function. The default value is 10. A User with applicable permission would change the value to suit the library’s requirements if applicable.

Duplicate an Existing Copy Record
- Navigate to Cataloging > Copies and complete a search for the copy to be duplicated in the usual manner.
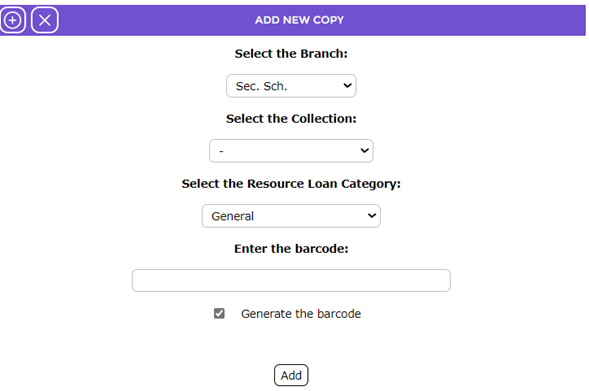
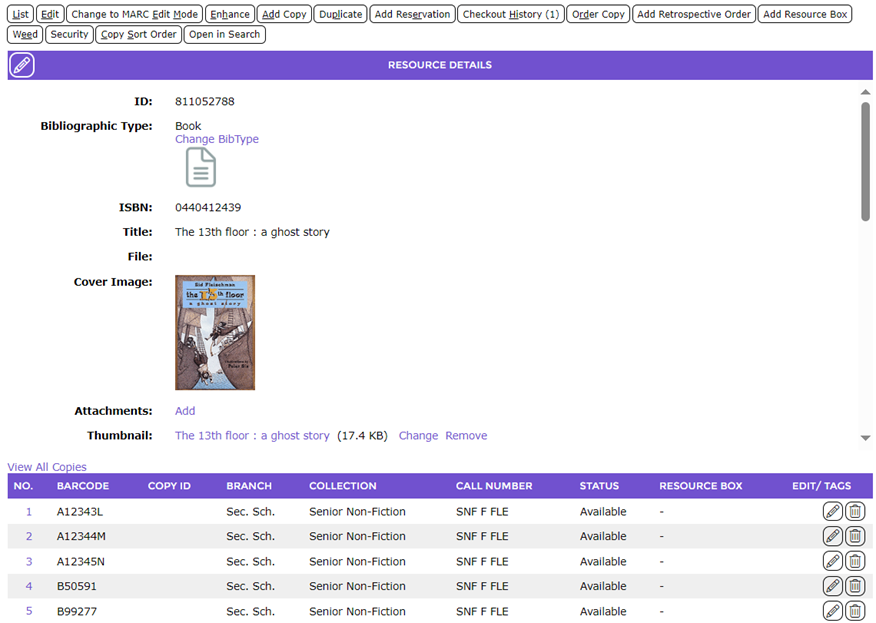
- Access the copy’s Detail screen and click on the Add Copy link button.
- The screen in which enables staff to duplicate the selected copy record displays.
Library staff can either scan or manually add library specific prepared barcodes, or use the automatically generated barcodes function by entering settings, for duplicate copies.
Using Library Barcodes:
- Scan or manually add each barcode into the text field below in the Scan Barcodes section.

- The barcodes will display in the list-box below the Scan Barcodes field.
- When all applicable barcodes have been added, enter the copy number to increment from in the Copy Number field. This determines how to calculate the copy number to apply to the duplicates being created. By default, 0 is the value entered in the field. It is not mandatory to change the value.
- Click the Add button. Then click the Save icon.
- The screen will refresh to identify the successfully created copies and list the barcodes. A link to the resource on which the copies are now tied is also available.
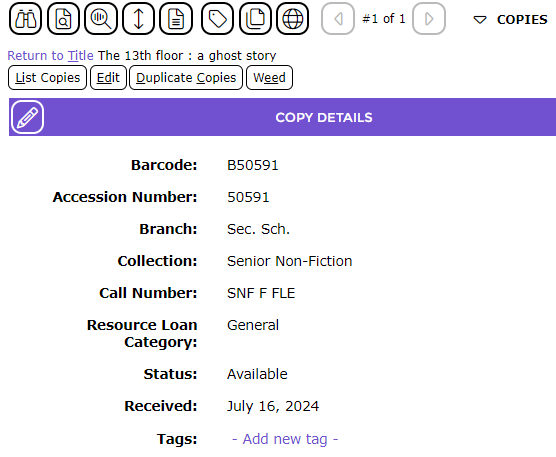

- Click on the List Copies link to access the resource to which the copies are now linked.
- The copies will display in the grid at the bottom of the resource’s Detail screen.

Using System Generated Barcodes:
Settings can be established from which the system can generate barcodes.
- In the Duplicating Copies screen click in checkbox next to System Generated Barcodes.
- Select a format from the Barcode Format field.
- In the First Barcode field, enter the leading character and digits of the copy barcodes to be generated, for example A12345X. Do not enter a check digit.
- If a school code is to be included in the barcode, enter it in the School Code field. This is not a mandatory requirement.
- In the Number to Generate field enter the number of barcodes to be created, for example, 3.
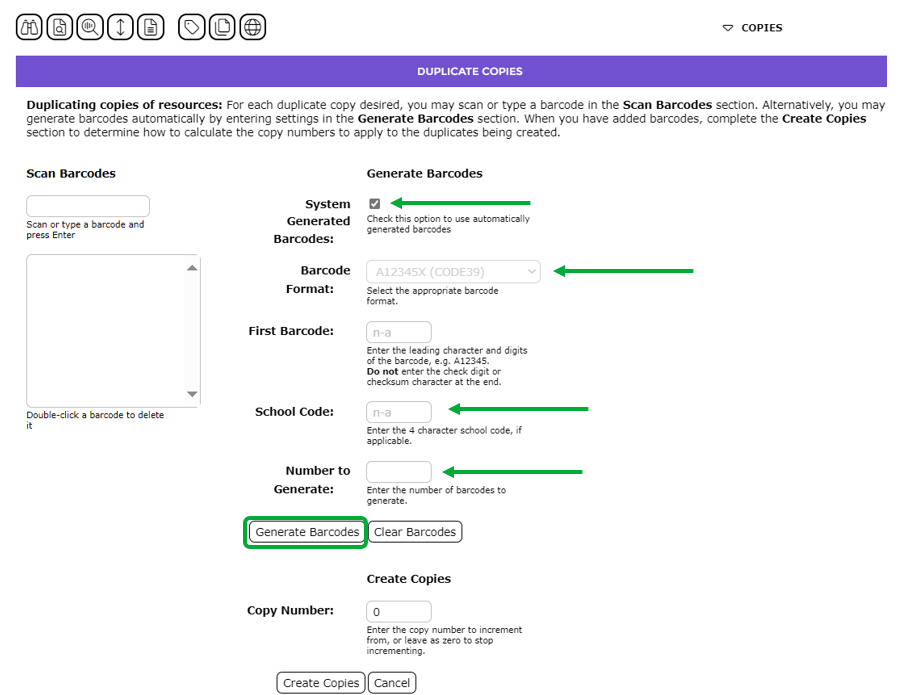
- Click on the Generate Barcodes button.
- The barcodes will display in the list-box in the left hand side of the screen.
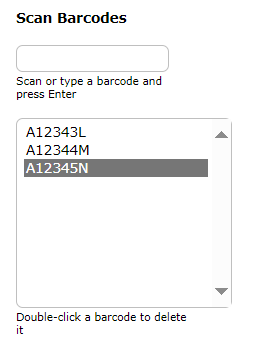
- In the Copy Number field, enter the number to increment from.
- Click on the Create Copies button.
- The screen will refresh and identify that copies corresponding barcodes the barcodes have been created. A link to the resource, to which the copies are tied, is also available.

- Click on the View Catalog Resource link to access the resource Detail screen.
- The duplicated copies will display in the grid at the bottom of the screen.
Was this article helpful?
That’s Great!
Thank you for your feedback
Sorry! We couldn't be helpful
Thank you for your feedback
Feedback sent
We appreciate your effort and will try to fix the article