Summary
Once the Translations option is turned on most screens will include a Translations xxx and a Find translation for a selected text. Staff, with the required permission, can complete a translation for the applicable field label or term.
This guide provides the steps required to complete the translation of a term highlighted in a screen using the Find translation for selected text link. A separate guide will identify how to access the list of translation keys related to a screen the User is in via the Translations xxx link and then translate a specific term
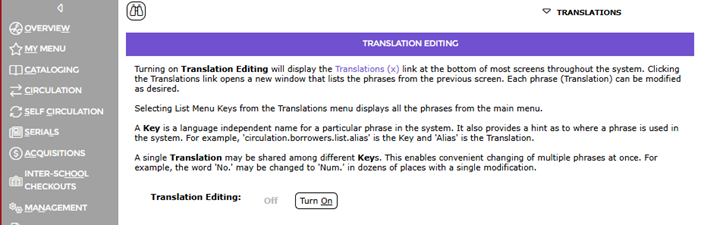
You must first make sure translation editing is on.
- Go to System > Translations
- Click “Turn On”
Use the Find Translation for Selected Text Link to Change a Field Label
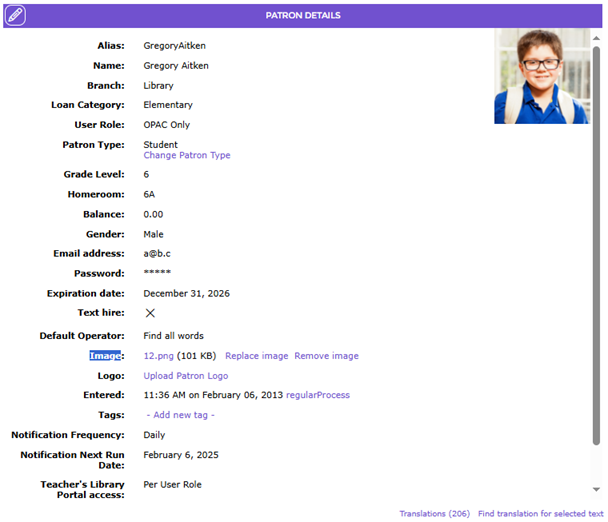
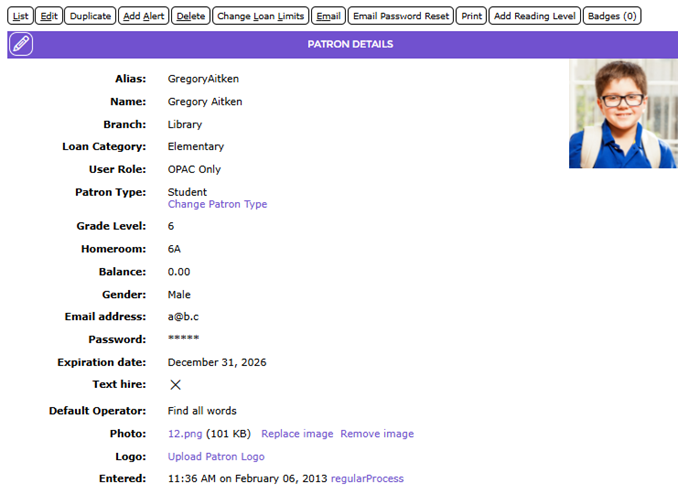
The following example shows how to change a field on a Patron Detail screen.
- Highlight the field label to be changed, for example, Image and click the Find translation for selected text link.
- The Translation List screen will display. Depending on how many related screens the term occurs in, or how many times the term occurs in the current screen, there may be more than one line in the List screen.
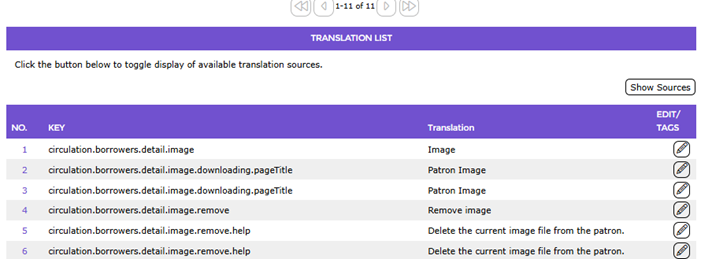
- The term to be translated is Image (not Upload Patron Image), which displays in the cell in the Translation column. The corresponding key that is to be changed, circulation.patrons.detail.image, is located in the cell in the Key column.
- Click on the corresponding edit icon link to access the Edit screen.
- The term Image displays in the Translation text-box.
- Highlight Image, and replace it with, for this example, Photo then click the Save button.
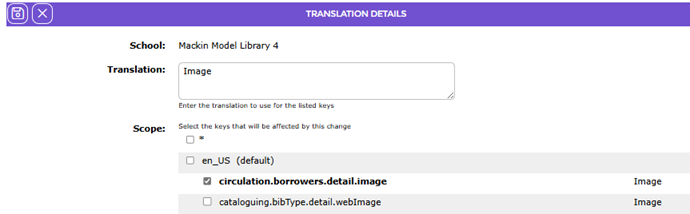
- The Translation List screen will display. Click on the Cross icon at the top right hand corner of the screen to return to the Patron Detail screen.
- Exit the current record screen and then access any Patron Detail screen. The previous field label of Image will have changed to Photo.
Was this article helpful?
That’s Great!
Thank you for your feedback
Sorry! We couldn't be helpful
Thank you for your feedback
Feedback sent
We appreciate your effort and will try to fix the article