Summary
The Translations functionality enables changes to Help text and Field labels/names to suit your requirements. For example, you may feel Category rather than Branch is more suitable. This can be done by using the Translations functionality this can be done. Translation sis accessed via the System main menu option on the library Overview (Management) screen.
It is recommended that the number of staff who can access and edit default translations is limited. Access to translation editing can be restricted by ensuring the applicable activated User Privilege operations are included in User Roles only tied to staff of a particular level.
This guide will provide the steps required to change a field label using the Find translation for selected text link on the screen in which the term or field label, to be changed, appears.
Complete a Translation via the Applicable Screen
The following example provide the steps required to change the Alias field name, in the Patron Detail screen, to Barcode.
- Navigate to System > Translations and click on the Turn On button.
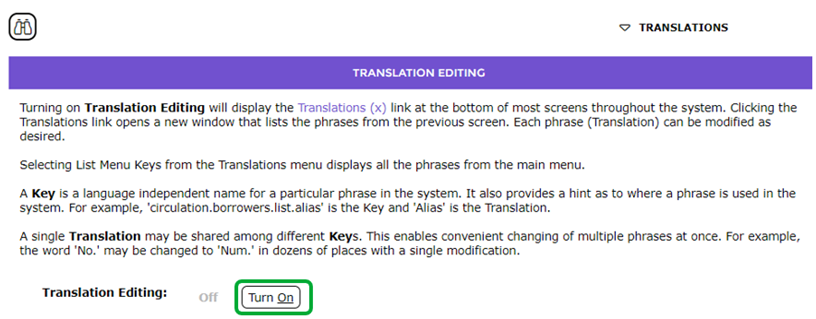
- Once Translations is turned on, two links will display at the bottom of most screens throughout the system.
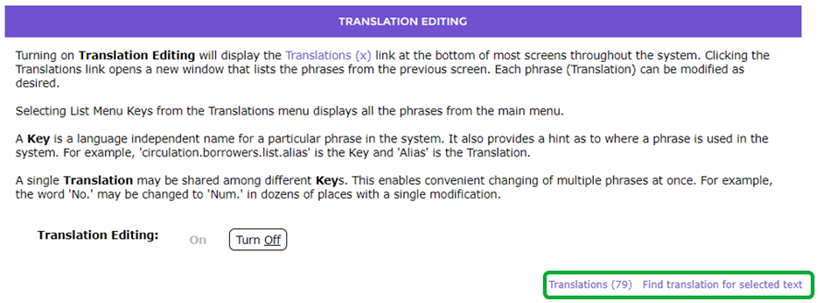
- Translations (xxx) identifies the number of fields available for translation, in this case 79. Clicking on this link will display a popup screen listing all of those terms, and their key.
- Find translation for selected text is clicked once the term to be changed is highlighted. Clicking this link will take the User to either the Translation List or Edit screen.
- Navigate to the screen on which a field label is to be changed which, for this example, is the Patron Detail screen.
- Highlight Branch.
- Scroll to the bottom of the screen and click on the Find translation for selected text link.
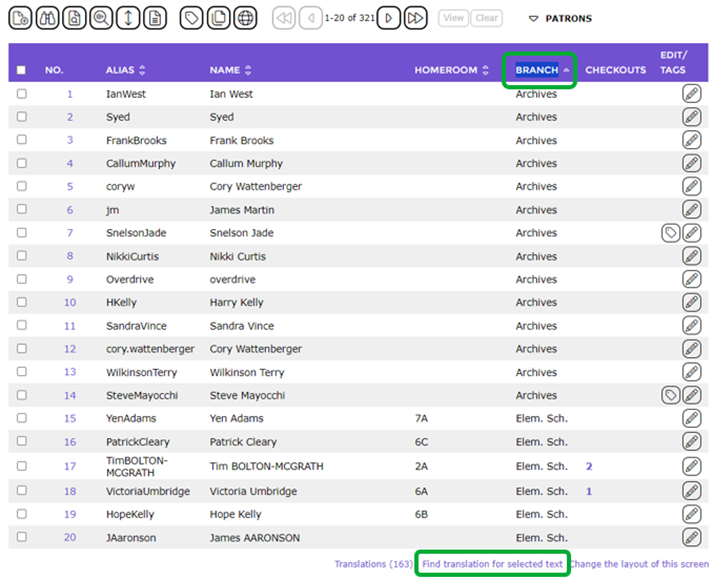
- The Translations Edit screen will display.
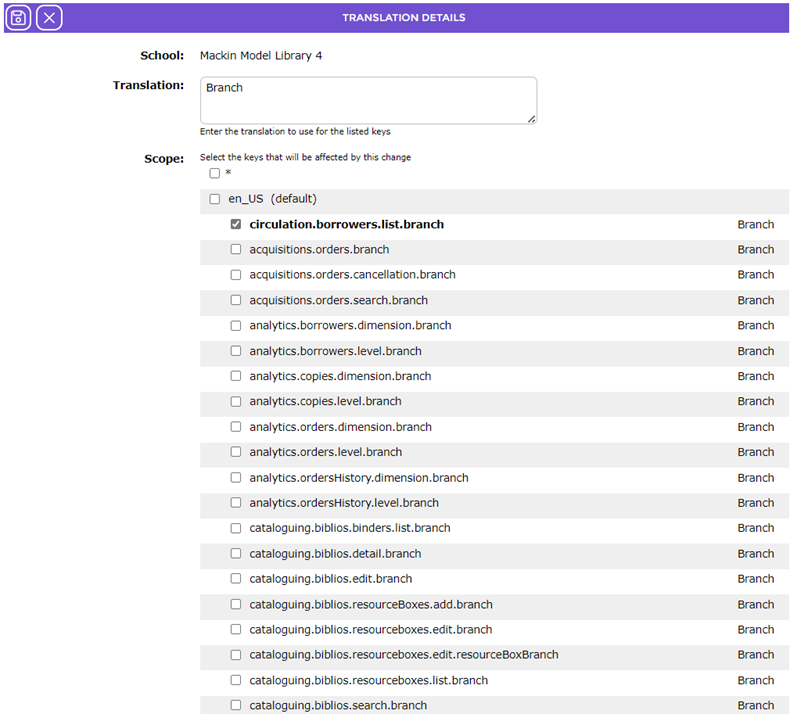
- Change the term Branch to, for example, Category.
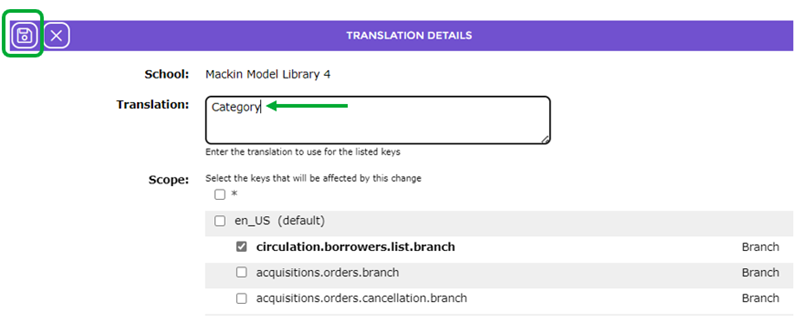
- Click the Save button and the Translation List screen will display.

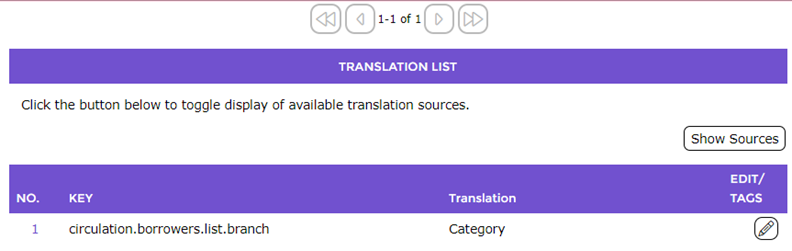
- Click on the red X in the top right-hand corner of the screen to return to the Patron Detail screen.
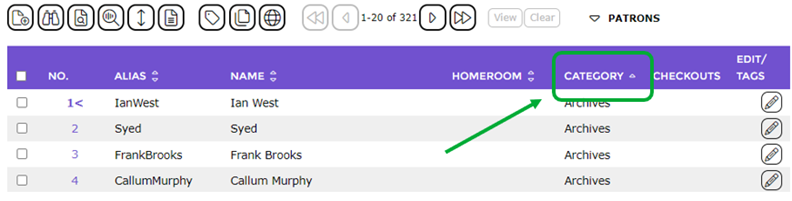
- Refresh the screen (for example, access to the Edit screen then return to the Detail screen). The term of Branch is replaced with Category.
Was this article helpful?
That’s Great!
Thank you for your feedback
Sorry! We couldn't be helpful
Thank you for your feedback
Feedback sent
We appreciate your effort and will try to fix the article