Summary
Reports can be scheduled to run every day or on a particular day of the week, monthly or annually. The scheduled report can have a start and end date if applicable or run for a specified number of times only. Each scheduled report can be flagged for automatic emailing to one or more staff once the nightly Housekeeping is run. The scheduled reports Housekeeping process is activated by default.
This guide will provide the steps required to schedule a report to be run daily, and flagged for email notification to a specified staff patron. It also identifies where to access the list of reports you have scheduled. Separate guides provide the steps required to search for records, run different system provided reports, and use the Circulation Reports feature.
Schedule a Report
The example provided shows you how to schedule the automatic daily running and emailing of a report on copies with a Status of Missing. Different types of reports that you run on a regular basis can be scheduled in the same way.
- Complete a search for Missing copies in the usual manner.
- In the resulting List screen, click on the Reports
 icon or select Report from the Function menu, or type rt.
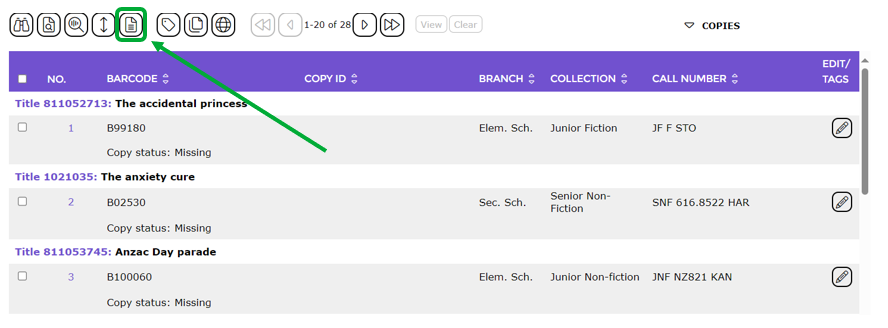
- The Reports screen will display.
- Click on the required report in the Select Report list-box.
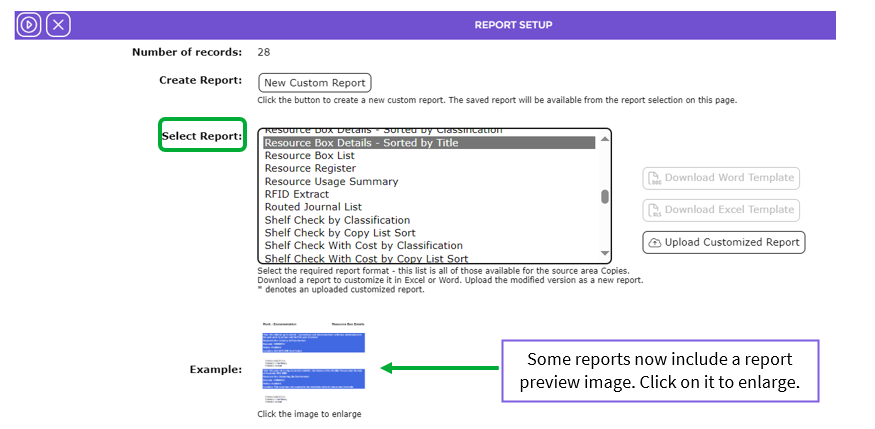
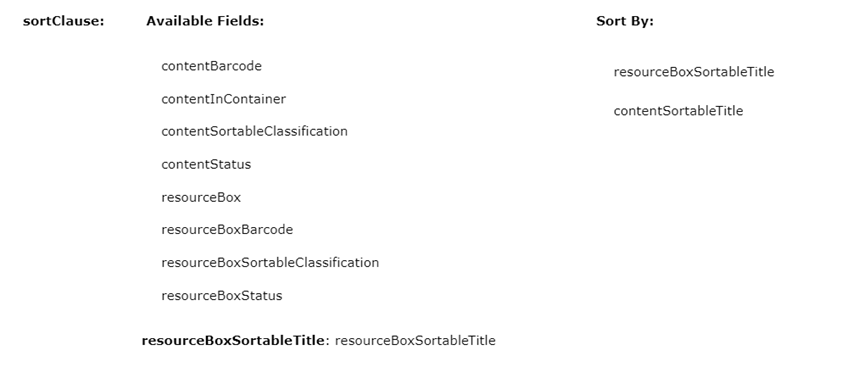
- Use the Sort Fields or sortClause list-boxes if you require additional fields to sort the report data by, select them from the Available Fields list-box in the usual manner by dragging from the Available Fields and dropping into Sort By.
- Click the Go icon.

- The Reports screen will refresh to display the report link and the Schedule this report button.

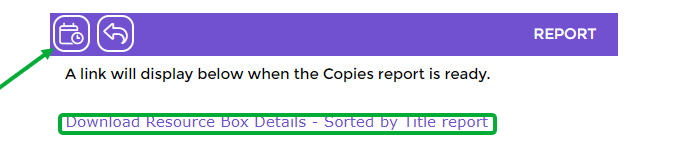
- Click the Schedule this report icon and the Schedule Reports > Add screen will display.
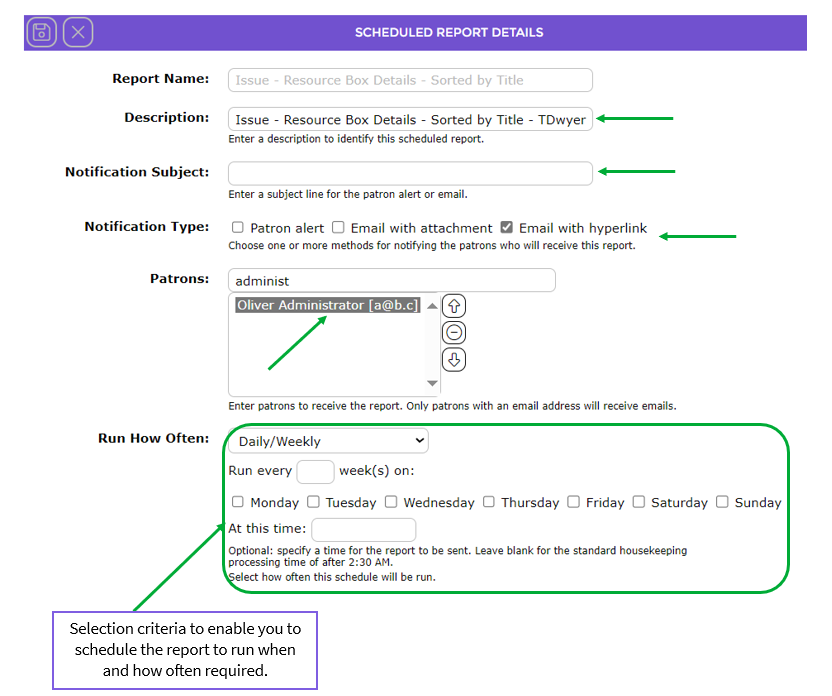
- The report name selected in the previous screen will display in the Report Name field.
- The Description field may include default data. If not, enter an applicable description.
- Enter the subject of the email in the Notification Subject field, for example, Missing Copies Report.
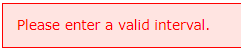
If nothing is selected in this field, a message directing you to do so will display below the field.
In the Notification Type field, there are three options each with a corresponding checkbox:
- Patron Alert
- Email with attachment
- Email with hyperlink
- Click in the applicable checkbox in the Notification Type field, for example, Email with Attachment.

- In the Patrons field, enter the first few letters of the patron who will receive the Notification email and click on the applicable staff patron from the prediction list. More than one patron can be selected to receive the email notification.
- The Run How Often section provides a number of flexible options. Staff can chose from the options to ensure the report is scheduled as required:
- Click on the down arrow at the end of the Run How Often field. If one of the options is applicable click on it. The options are Daily/Weekly, Monthly and Yearly.
- If the report is to be run every pre-determined number of weeks, for example 12, enter 12 in the Run every week(s) field.
- If the report is to be run on a particular day of the week or on specific days of the week click in the checkbox next to each applicable day.
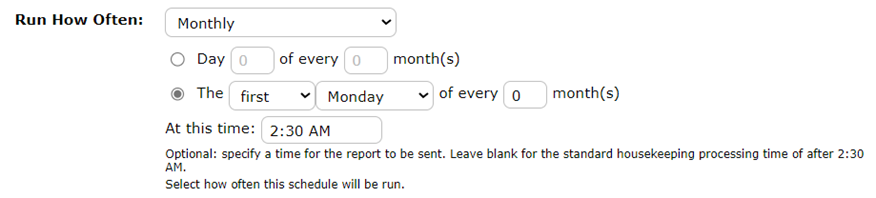
- As this report is to be run once a month select Monthly from the Run How Often field’s drop down list and click in the radio button in the how often fields and select the applicable options, for example First, Monday and a value in the month(s) field.
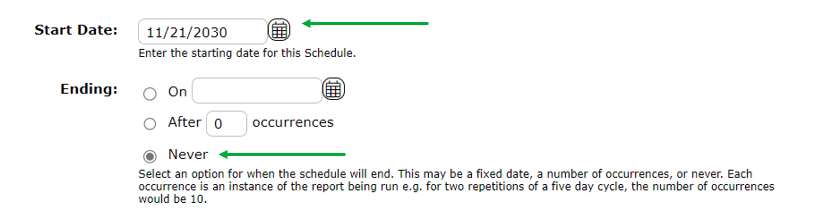
- Enter the applicable date (or click the Calendar icon
 and select the date) in the Start Date field.
- If the running of the report is to end after a particular date or number of occurrences click in the applicable radio button in the Ending section and complete the field with the number or date applicable. For the purposes of this example, the radio button next to Never is clicked.
- When all details have been completed click the Save icon.

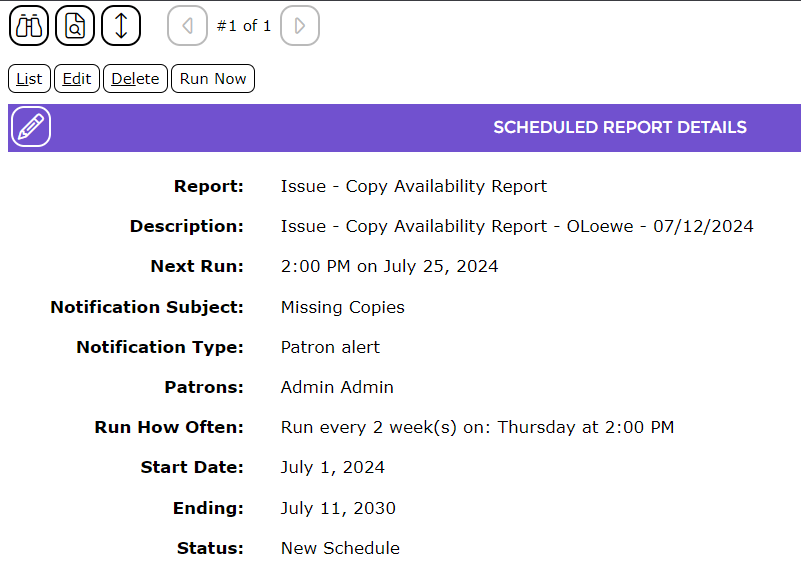
- The Scheduled Report Detail screen for the Catalog – Full Resources will display.
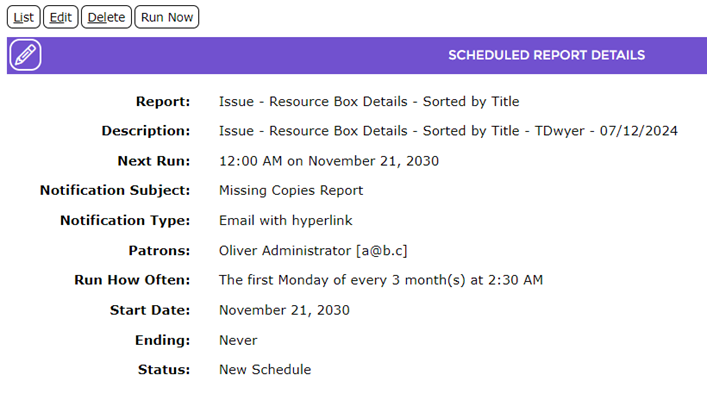
- The patron/s flagged to receive the email notification with the attached report will receive the notification email once the Housekeeping process has completed.
Subsequent Parameter Setting Changes on Applicable Scheduled Reports
When reports are scheduled, the parameters that determine data of the report are saved to that scheduled job. If a scheduled report uses a system parameter for example, Parameter No. 4514 – Resource clicks that count as checkouts, and the setting was subsequently changed, the scheduled report will not reflect that change. You will need to delete the report’s schedule and re-schedule it. To access the scheduled report
- Navigate to System > Reports and select Scheduled Reports from the Function menu.
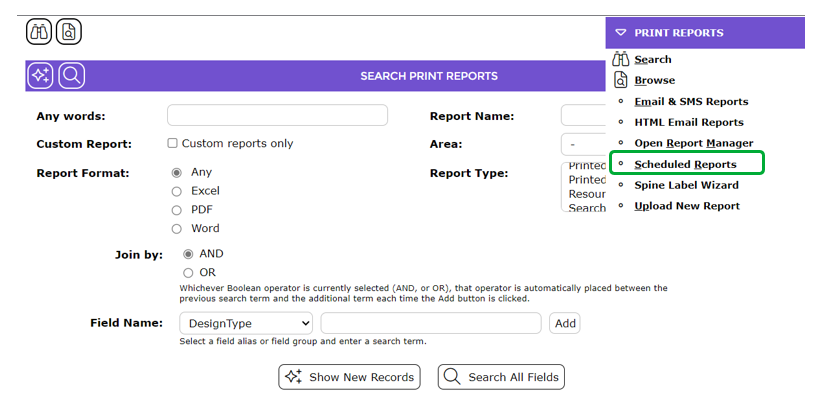 2. From the List screen click on the number link of the report to be deleted from the scheduled job.

3. In the Detail screen click on the Delete button to delete the report from the schedule.
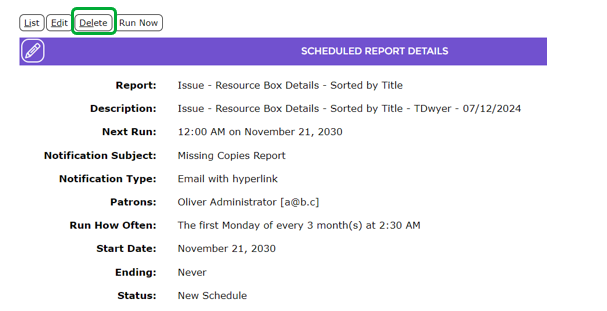 4. Reschedule the report as per the steps provided in the Schedule a Report section.
Associated Housekeeping Process
A Scheduled Reports Housekeeping option is included in System > Housekeeping screen. It is turned On by default.
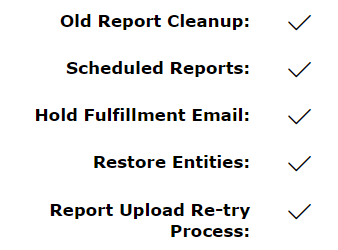
Example of a Scheduled Report Email Notification
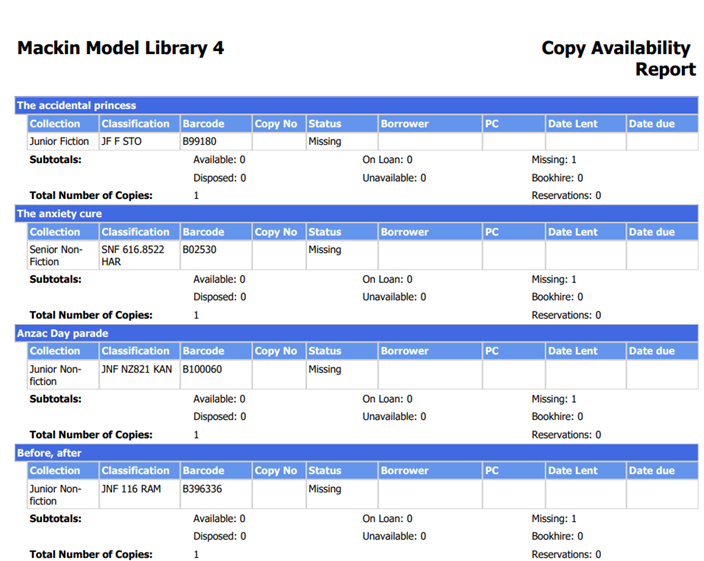
The following example is of the scheduled Missing Copies report. The email sent to the required staff patron includes the Subject Heading as specified when the schedule was created. The report is attached identifying the Email with attachment checkbox in the Report > Schedule screen was ticked.
The notified staff patron can click on the attached report to view it.
View Your Scheduled Reports
- Navigate to System > Reports Search and from the Function menu, select Scheduled Reports.
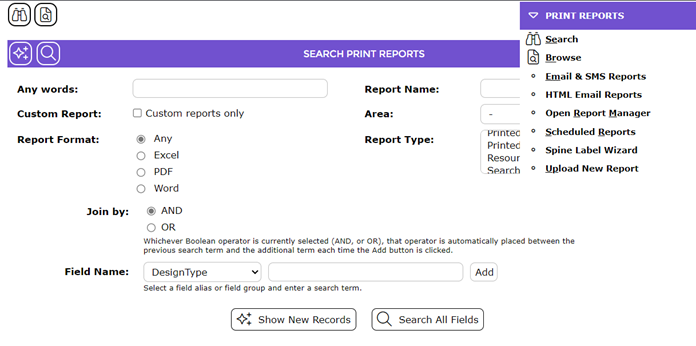
- The Scheduled Reports > List screen will display. It will include the report name, last run date, and status of each report listed.

Scheduled reports can be edited or deleted in the usual manner.
Was this article helpful?
That’s Great!
Thank you for your feedback
Sorry! We couldn't be helpful
Thank you for your feedback
Feedback sent
We appreciate your effort and will try to fix the article