Summary
There are several Patron Checkout List reports in the system that can be run against a specified date range. This guide will provide an overview of the feature and provide an example of a Usage report using the Usage with Date Range option.
Overview
There are several Patron Checkout List reports which are accessed via Circulation > Reports > Usage with Date Range.
There are 9 Patron Checkout List report variations. How you want the checkout list to display will determine the report you choose.
Note: There are also 6 Resource Checkout List report variations available in this drop-down list as well. A separate guide will provide the steps required to run a Resource Checkout List report.
How to Run a Patron Checkout List by PLC
The steps to run any of the Patron Checkout Lists follow the same process.
1. Navigate to Circulation > Reports
2. In the resulting Circulation Reports screen click on Usage with Date Range from the Usage section.

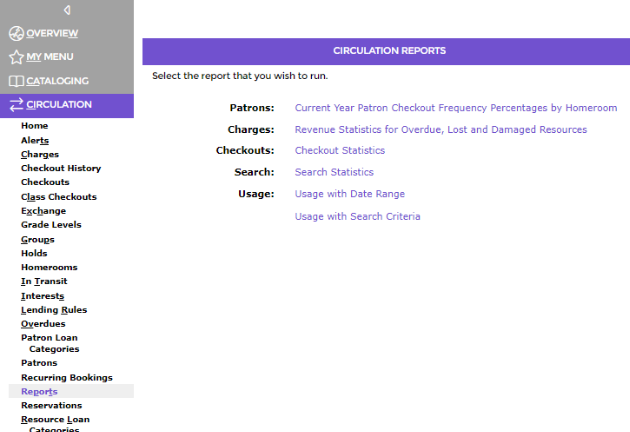
3. The Usage with Date Range popup screen will display.
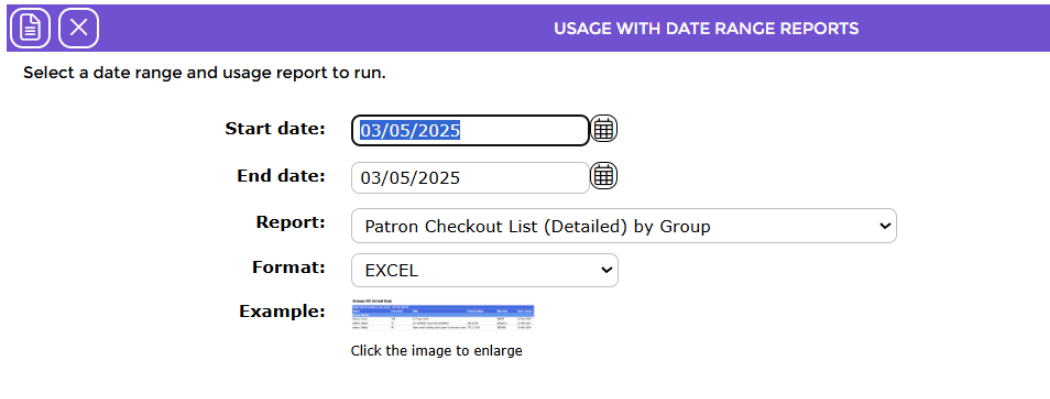
By default, “today’s” date displays in the Start and End date fields.
4. In the Start date field, click on the Calendar icon to select the required date, or manually enter it.
5. In the End date field, click on the Calendar icon to select the required date, or manually enter it if the date is to be other than “today”.
6. Click on the down arrow at the end of the Report field and click on Patron Checkout List (Detailed) by PLC.
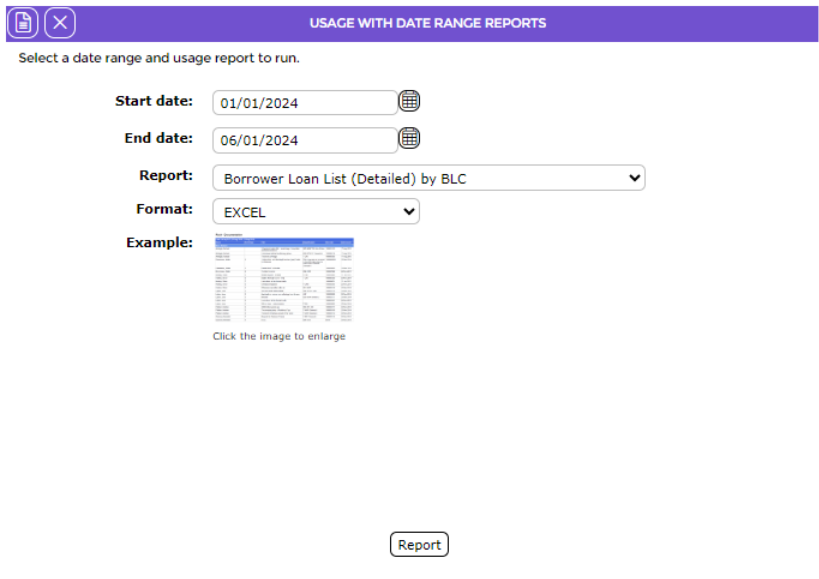
7. PDF is selected by default in the Format field. If preferred, click on the down arrow at the end of the field and select WORD.
8. This report includes a report preview image. It is located in the Example field. You can click on the image to enlarge it.
9. Click the Report icon or Report button.



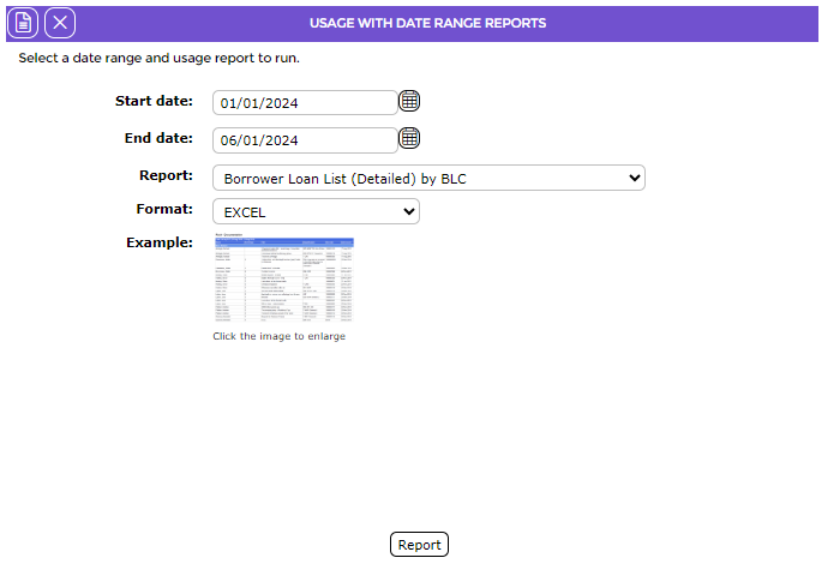
10. The Report screen will display and when ready the Download Patron Checkout List (Detailed) by PLC report link will display.
11. Click on the link.

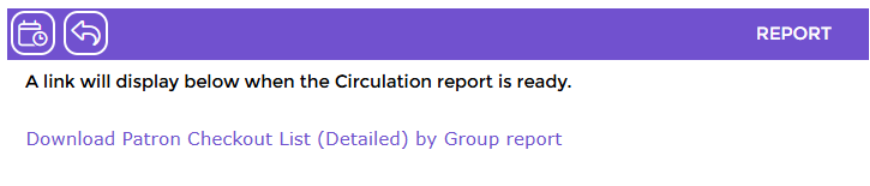
12. The File Download popup screen or Do you want to open…panel will display. Both options include the Open, Save, and Cancel buttons.
13. To open the report to the screen, click the Open button. To save the report as a file to your computer to run later, click on Save.
14. To return to the list click the Return to list icon.

15. To schedule the report, click the Schedule this report icon. A separate guide provides the steps required to schedule a report.

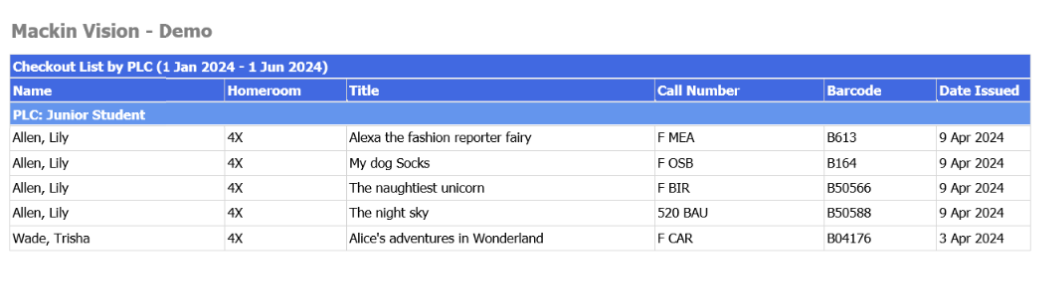
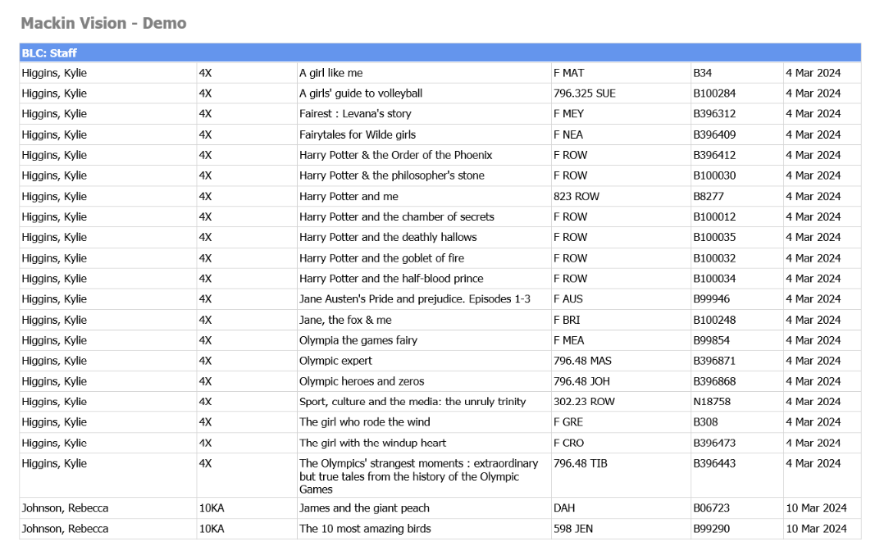
16. The information, listed in PLC order, on the report includes:
- Patron Names
- Homeroom
- Title
- Call Number
- Barcode and
- Date Issued.
Report Example Screens:
PLC: Student
PLC: Staff
Was this article helpful?
That’s Great!
Thank you for your feedback
Sorry! We couldn't be helpful
Thank you for your feedback
Feedback sent
We appreciate your effort and will try to fix the article