Summary
Patron data can be imported into the system in CSV format. Once a Patron Type has been created (via Management > List Files) a CSV template must be created which matches the order in which the data is displayed in a CSV file. Once a template is created, the process of loading the Patron data can be completed. More than one Patron CSV template can be created if required.
This guide will provide the steps required to create a Patron CSV template.
Create a CSV Template
A Patron CSV template must be created to ensure it exactly matches the format and the order in which the Patron data displays on the CSV data file. This means that not only must the template include the fields that are in the CSV file but the order of the template’s fields must match the order in which they appear in that CSV file.
- Navigate to Management > Import.
- In the Import screen click on the CSV Data Sync link.
- The CSV Import screen will display. Click on the CSV Function menu and select CSV Templates.
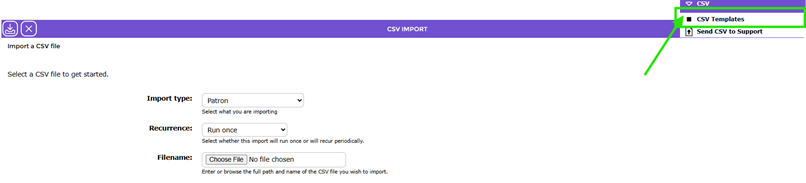
- The CSV Templates > List screen will display. If no applicable Patron CSV template is listed, click the New
 icon or select New from the Function menu or type ne.
- The Add a new CSV template popup screen will display. Click on the down arrow at the end of the Filename field and select Client.xml.
- Enter a name for the template that clearly identifies the template’s use, for example Patrons.
- Click the Add button.
The Add CSV Template screen will display. Note that the Name and Filename fields automatically display the data entered in the previous screen. The fields are grayed out and cannot be edited.
In this screen, Users will select the fields to be included in the Patron CSV template they are creating.
The left-hand side list-box includes all possible patron record fields that can be included on a CSV template. The fields list in alphabetical order.
- Following the order of patron data on the CSV file to be imported, identify the first field required for the template from the Unused column, then click and drag it into the Used column.
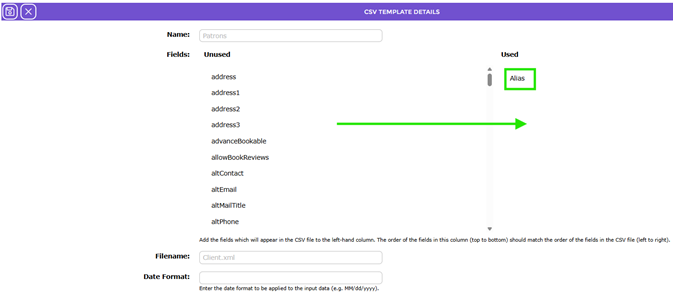
Note: Although Alias is used for this example, ensure you select the field corresponding to the first piece of data in the CSV file.
- The field will now display in the right-hand side list-box.
- Repeat Step 8 until all the fields required display in the right-hand side Fields list-box.
- If any fields are not in the correct order, click and drag the field to move it to the correct position the list.
- In the Date Format field, enter the format for the date for example MM/dd/yyyy.
- When all details have been completed click the Save button.

- The CSV Templates > Detail screen will display for the newly created CSV template.
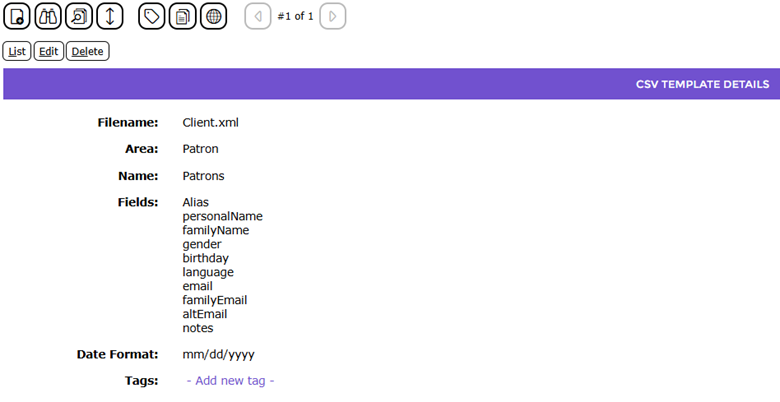
- Crosscheck the order displayed in the Fields section of the Detail screen against those in the CSV file. You can always edit the template to correct any fields that are not either included or located in the wrong position.
- The Patron CSV template is now available for selection when importing a CSV file of Patron records. (Management > Import > CSV Data Sync > Function Menu: CSV Templates)
Was this article helpful?
That’s Great!
Thank you for your feedback
Sorry! We couldn't be helpful
Thank you for your feedback
Feedback sent
We appreciate your effort and will try to fix the article