Summary
The Overview screen displays when library staff log in. The screen contains several access points to modules, sub-modules and includes a Notices and a Things to do panel. The modules and processes that can be accessed from the Overview screen depends on the User Role (and the activated applicable User Privileges) of the logged in staff member. This screen will not display on log in to library users whose User Role is, for example, OPAC Only or OPAC Advanced User Roles for example.
This guide provides a brief overview of the Overview (Management) screen.
Overview (Management) Screen
The Overview (Management) screen displays when most library staff log into the system. The access to areas within the system depends on the logged in staff member’s User Role. It is also accessed by clicking on the Overview menu bar option if staff are working in a specific area within Management, for example, Cataloging.
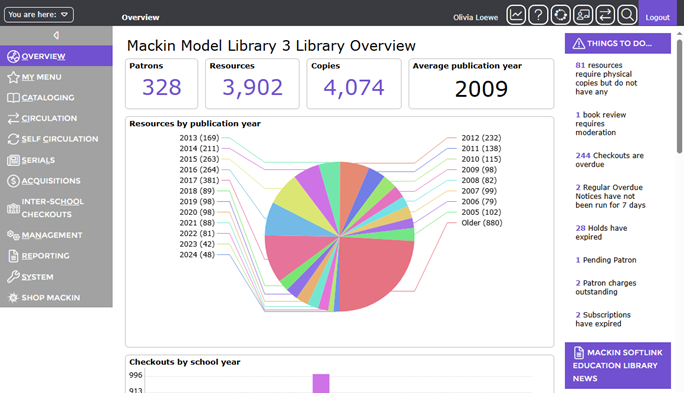
The Overview (Management) screen includes:
- The top bar which includes a Log in/Log out link and a ‘You are here’ section. The option enables staff to return to List and Detail screens accessed prior to navigating to the Overview screen if applicable. It also includes navigation icons that are located on the right-hand side of the screen.
- A side Menu bar which provides access to modules and applicable sub-menu options according to the logged in staff member’s User Privileges. The modules listed in the menu panel are dependent on your registration. The main menu can be auto or manually hidden.
- (For Grid and List views – see below) A brief overview of the sub-modules and some of the processes that can be accessed. within each module. Options highlighted in blue text indicate they are a link to the sub-module and function.
- A Notices panel that contains any global notices established by staff with the requisite activated user privilege operation.
- A Things to do panel alerting library staff to information on the number of overdue items, outstanding charges and the number of holds that have expired if applicable. Each of the “things to do” includes a corresponding number which, when clicked, performs an automatic “search” process to display the related records.
Note: The Home screen of other modules will also include both an Information and an Alert panel containing links to information specific to that module.
Configuring the Overview Layout
The Overview screen of the Management Console can be configured to display in three different ways:
- Grid
- Icon
- List
You can configure how the Overview page displays by navigating to Management > Parameters and altering parameter 1145.
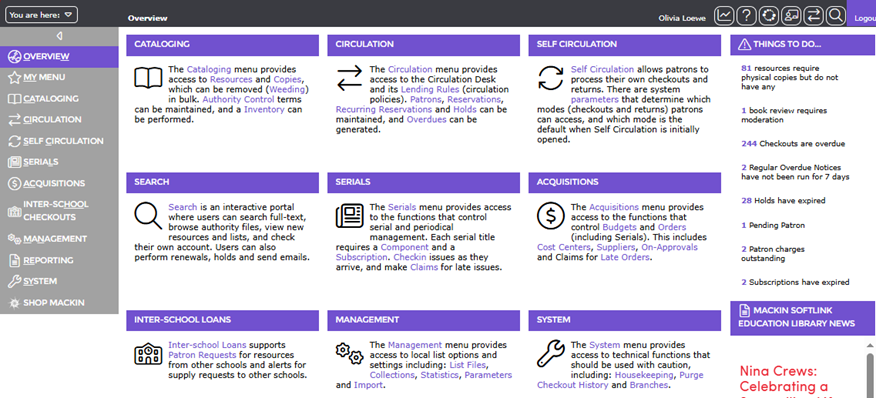
The Grid View
This view displays the Overview options in a grid layout, with each section of the grid providing a description of that section of MackinVision v5 and links to click as shortcuts to the screens referred to.
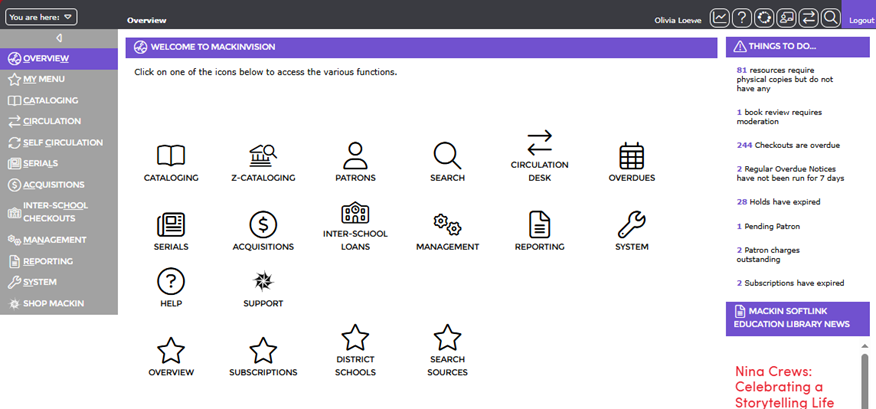
The Icon View
This view displays the Overview options with a simpler and cleaner list of labeled icons linking to the relevant function.
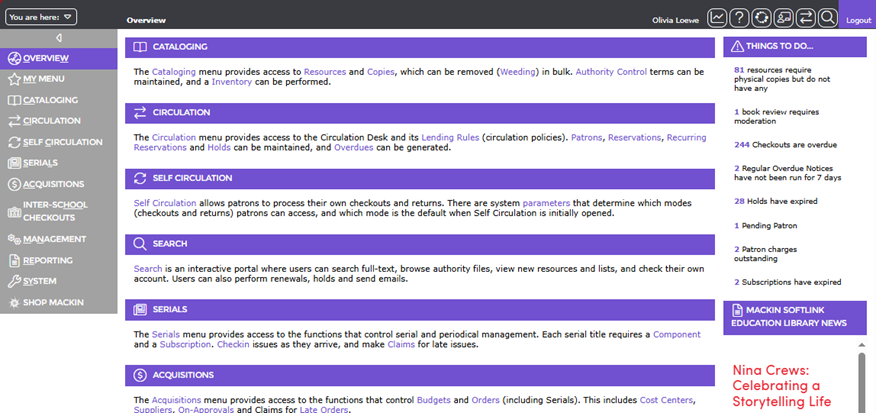
The List View
This view displays the Overview options in a list layout, with each section of the list providing a description of that section of MackinVision v5 and links to click as shortcuts to the screens referred to.
Hiding the Main Menu
The main menu on the Overview screen can automatically hidden via Parameter No. 1101 Auto Hide Menu. If it is not set to auto hide, it will display with left facing arrow, located above the Overview option on the main menu. Staff can click the arrow to hide the menu manually.
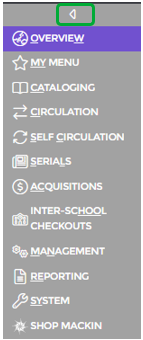
If the arrow is clicked, a right facing arrow will then display at the top left-hand corner of the screen.
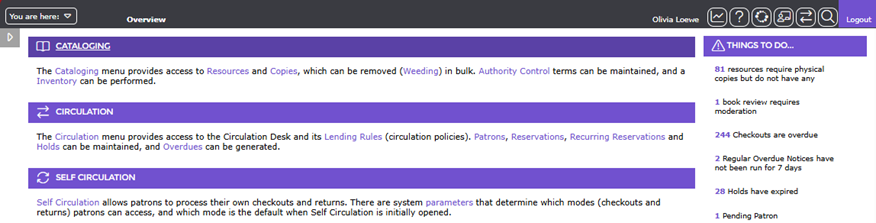
Clicking on the right facing arrow will display the main menu with the right facing arrow again displaying above the Overview option.
Navigating Options on the Overview Screen
Staff can access other areas of the system using icons and links.
Icons
 Help – click this icon to access the Help interface. Staff can search for and view system-provided and custom help documents.
 Circulation Desk – click this icon to access the Circulation Desk.
 Search – click this icon to access the Search interface (the library’s Home screen).
 Analytical Reporting – Click this icon to open the Analytical Reporting functionality. If the icon doesn’t show, then switch parameter 5840 to Yes.
 LearnPath – Click this icon to go directly to the LearnPath . Note that this is an additional module which may need to be added to your MackinVision v5 subscription.
Links
A brief explanatory section for each module, for example the Cataloging module is included in the center panel of the Management Overview screen. Within each section there are terms displayed in blue indicating they are a link. Clicking the link will take the staff user to the applicable area within that module if they are permitted access.
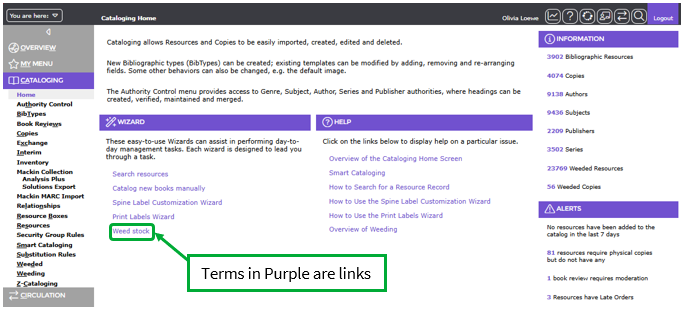
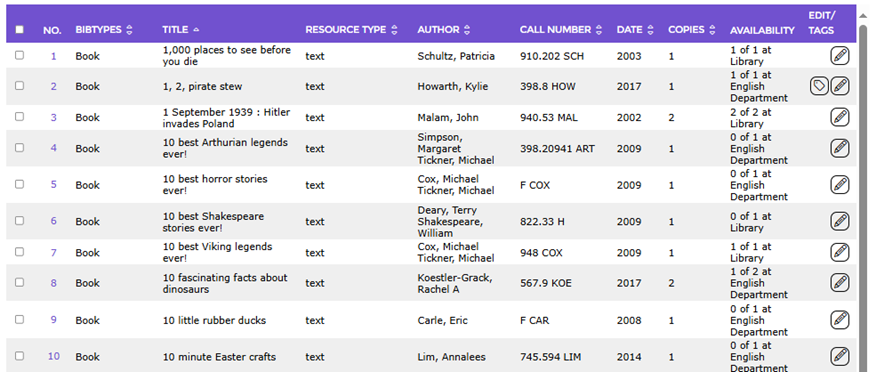
If, for example, the Resources link in the Cataloging section of the Overview screen is clicked, either the List or Search screen will display. The screen that displays is dependent on the value entered in Parameter No.1215 - List Size Before the Search Screen is Shown.
Things To Do Panel Information
The Things to do panel includes information relating to, among other things, the number of resources added in the last 7 days, resources awaiting delivery (if using Acquisitions), overdue checkouts, expired holds and monies owed by patrons (if charges apply).
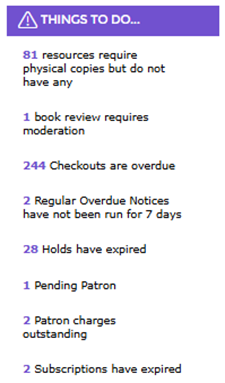
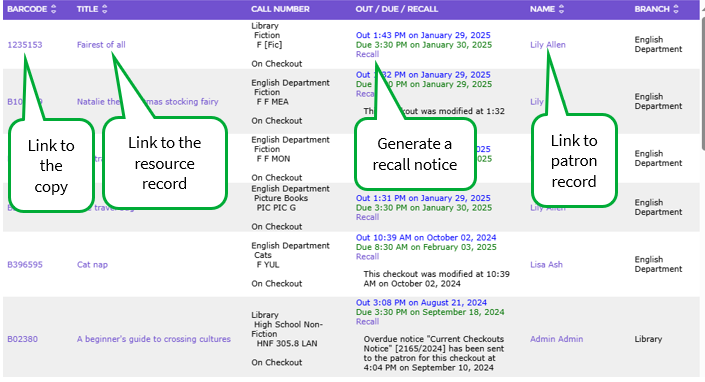
The numbers corresponding to each option display in a different color to the text, indicating that they are links which will display the list of relevant records when clicked. For example, when the number 244 link, next to Checkouts are overdue is clicked, a List screen that includes only those overdue copies will display. The Barcode, Title, Recall, and Patron Names are links to the applicable screen or, in the case of the Recall link, will complete a recall process.
Was this article helpful?
That’s Great!
Thank you for your feedback
Sorry! We couldn't be helpful
Thank you for your feedback
Feedback sent
We appreciate your effort and will try to fix the article