Summary
Automatic charges are set up via Lending Rules. For libraries that require the automatic application of specified charges for overdue items, holds or rentals they can establish the charge type and amount as required. The charges are then automatically added to patrons according to the criteria established. A maximum amount for any particular charge can be set if applicable and any grace days, if applicable, established
For other discretionary charges that are not automatically applied, for example replacement or administrative charges should be set up in the Charge Types option not the Lending Rules Charges option.
This guide will provide the steps required to establish charges via the Lending Rules option.
Establish an Overdue Charge
In the following example steps provided, an overdue charge, of 10 cents per day after a grace period of 3 days to a maximum amount per item of $2.00, will be set up for an RLC of Nonfiction corresponding to the PLC of Library Patron.
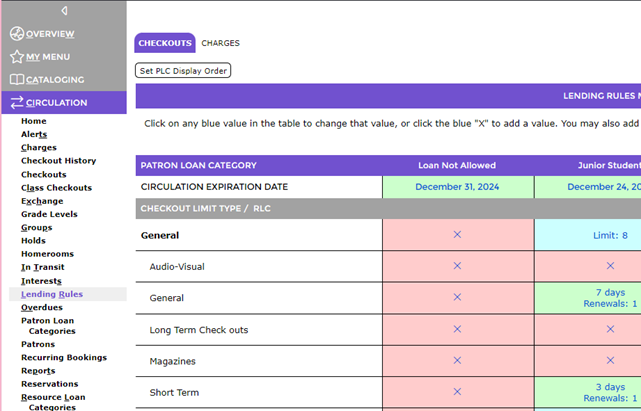
- Navigate to Circulation > Lending Rules and click on the Charges tab.
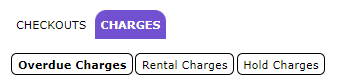
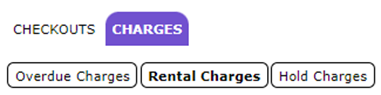
- There are three buttons, Overdue Charges, Rental Charges, and Hold Charges. These are the automatic charge types that can be established.
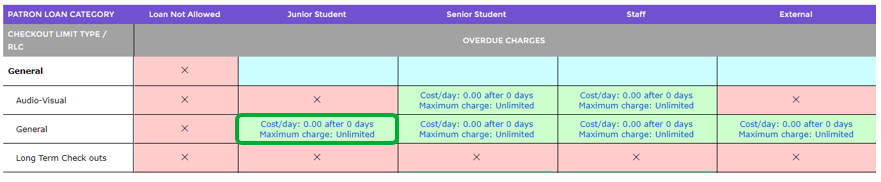
- The Overdue Charges matrix displays by default.
Any pink cells displaying a red Cross indicate no resources can be loaned to the corresponding RLC and PLC combination therefore no charge can be established.
Cells displaying in green indicate charges can be established as the resources with the corresponding RLC can be loaned to patrons with the applicable PLC.
- Click on a green cell corresponding to the RLC of General and the PLC of Junior Student, to add a charge that will apply to that combination.
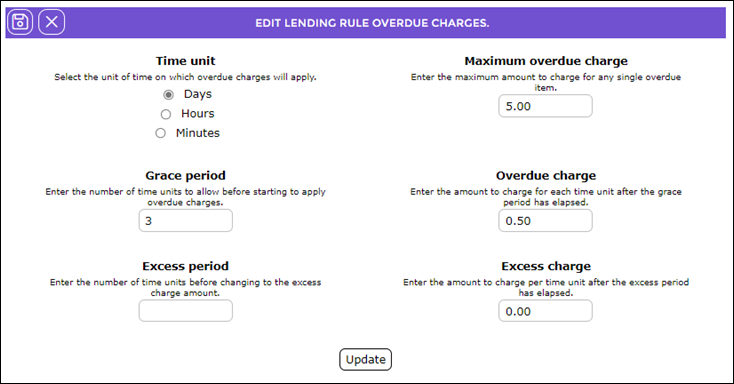
- The Edit Lending Rules Overdue Charges popup screen will display.
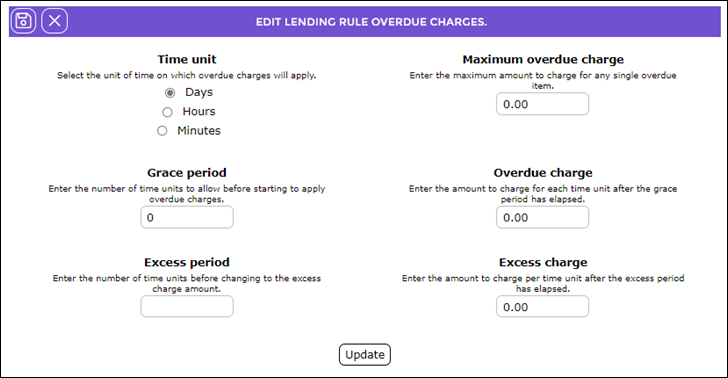
There are several settings can be completed in accordance with the library’s charges policy. To establish the charges for this example:
- Click in the radio button next to Day if it is not active by default.
- Enter 3 in the Grace period field.
- Enter 0.50 in the Overdue charge field.
- Enter 5.00 in the Maximum overdue charge field.
- Click the Update button.
- The green cell will now display with the charge details completed in the Edit popup screen.
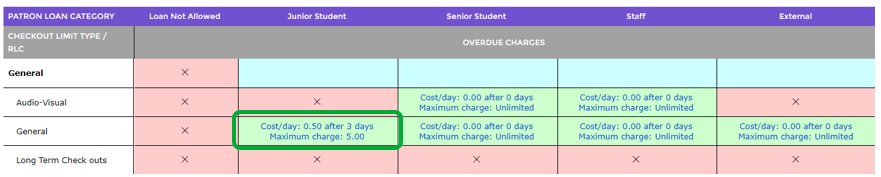
The process to add overdue charges for other RLC/PLC combinations is the same as long as the corresponding cell is green indicating lending rules have been established.
Note: If there are RLC/PLC combinations that do not have lending rules set (identified by a pink Colored cell), click on the Checkouts tab and set up the applicable rules, for example, how many items can be loaned, for how long, maximum renewals and Renewal period. This is explained in the guide on how to set up Lending Rules.
Establish Rental Charges
If the library includes resources for which a rental charge/fee applies such charges are set up via the Charges tab in Lending Rules. The feature provides flexibility enabling staff to only apply rental charges to certain Patron Types. For example, some public libraries may be located in areas which attract holiday makers who are allowed temporary membership but charged a rental fee on any item loaned, or school libraries where students who checkout specific types of resources, for example computer games or equipment, are required to pay a rental fee.
The example provided is the setting up of a rental charge for Student if they are loaned a computer game.
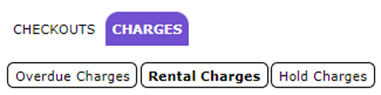
- Click on the Rental Charges button on the Charges tab.
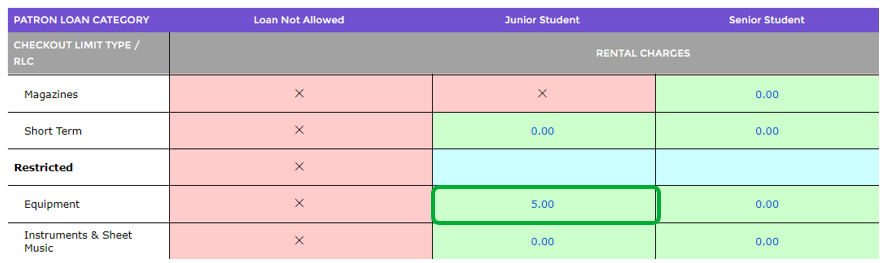
- Click on the green cell corresponding to Junior Student and Equipment.
Note: If there are RLC/PLC combinations that do not have lending rules set (identified by a pink Colored cell), click on the Checkouts tab and set up the applicable rules, for example, how many items can be loaned, for how long, maximum renewals and Renewal period. This is explained in the guide on how to set up Lending Rules.
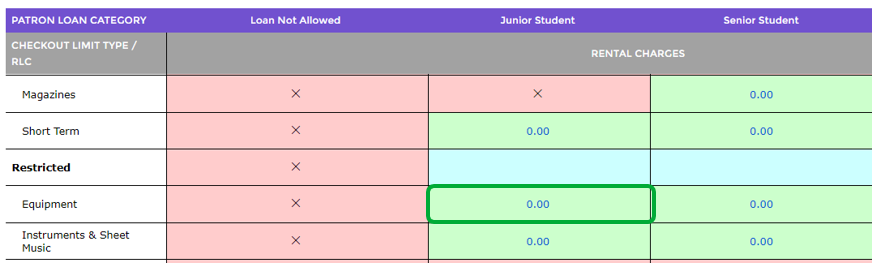
- The Rental Charge popup screen will display.
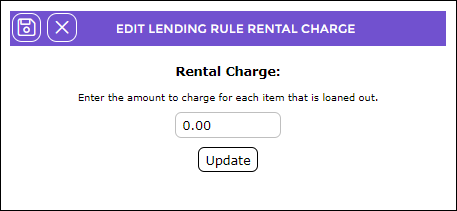
- Enter the new rental charge then click the Update button or Update icon.
- The new charge will display in the cell corresponding to Computer Game and Student.
Establish Hold Charges
If an automatic charge is to be added to a patron record when they place a hold on a specific type of resource, the charge can be set up in the same manner as other automatic charges.
- Click on the Hold Charges button on the Charges tab.
Note: As noted earlier, if there are RLC/PLC combinations that do not have lending rules set (identified by a pink Colored cell), click on the Checkouts tab and set up the applicable rules, for example, how many items can be loaned, for how long, maximum renewals and Renewal period. This is explained in the guide on how to set up Lending Rules.
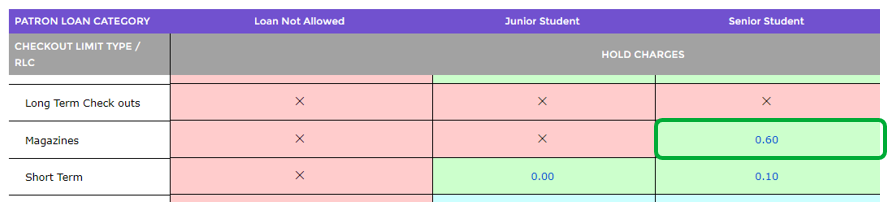
- Click on the green cell corresponding to Senior Student and magazines.
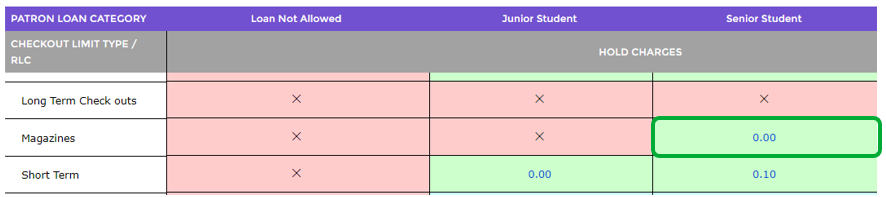
- In the Hold Charge popup screen, enter the applicable charge, for example 0.60, in the text field provided and click the Update button or the Update icon.
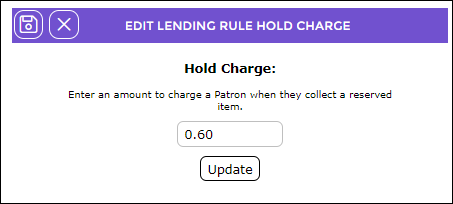
- The charge entered in the popup screen will display in the green cell.
- If a hold charge applies to any other Patron Resource type click in the corresponding green cell and add the value as explained in Step 4.
Was this article helpful?
That’s Great!
Thank you for your feedback
Sorry! We couldn't be helpful
Thank you for your feedback
Feedback sent
We appreciate your effort and will try to fix the article