Summary
Incrementing the Grade Level on student records can be done in bulk. This process should be completed before the new school year begins. This guide will provide the steps required to complete a Grade Level rollover.
Note: If you will be importing a CSV file of the students’ records as a part of your end-of-year rollover for the new school year, then the process described in this guide will not need to be performed.
Check Existing Grade Level Setup
Before beginning the rollover process, check that the Grade Levels have been set up correctly.
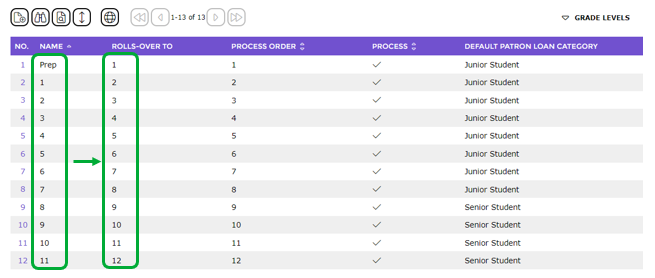
- Navigate to Circulation > Grade Levels.
- Check that the year to roll over to is set up correctly. For example, Prep rolls over to Year 1, Year 1 rolls over to Year 2, and so on.

3. Check the process order. The highest year level is processed first, and the lowest year level is processed last. Therefore, the lowest grade level should have the lowest Process Order of 1, the second lowest year should have the second lowest process number of 2, and so on.
4. A Check should correspond to each year that will be incremented.
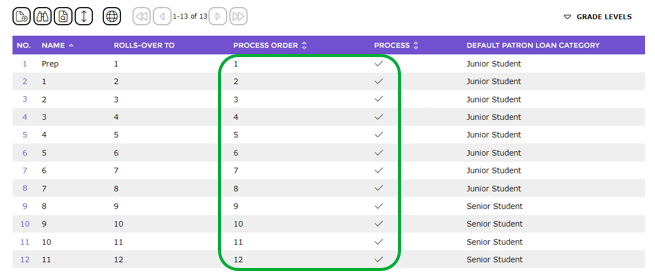
Note: Ensure that the Default Patron Loan Category (PLC) is correct.
Rollover Grade Levels
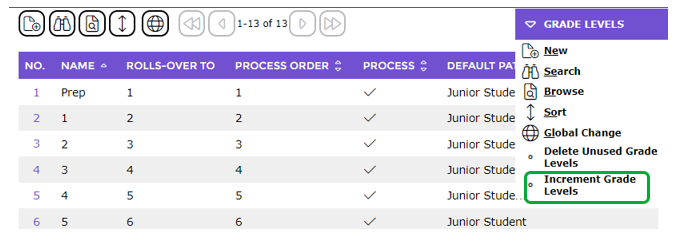
1. From the Grade Level Maintenance List screen Function menu, select Increment Grade Levels.
2. A message will display informing the staff member that the operation will update all applicable records.
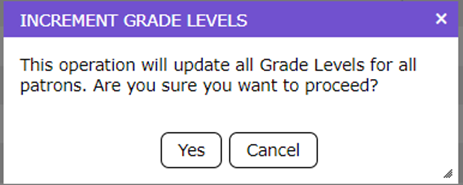
3. To proceed click Yes.
4. The Processing screen will display indicating that the process is complete.
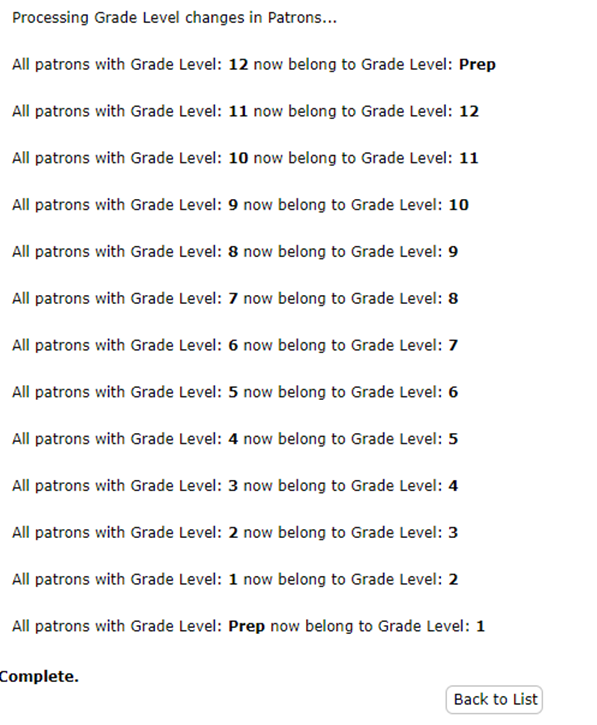
Staff can confirm the process was successful by checking the Grade Level field for a selection of patron records.
Was this article helpful?
That’s Great!
Thank you for your feedback
Sorry! We couldn't be helpful
Thank you for your feedback
Feedback sent
We appreciate your effort and will try to fix the article