Summary
Reading Lists are a valuable tool, which enables library staff to assist Patrons to easily locate information on:
- Curriculum subjects or assignment topics
- Material on specific subjects or titles of resources on specific genres
- Resources required for business such as development project implementations or legal cases.
New lists can be created via the Authority Control sub-menu option under Cataloging or via the Resource Add or Edit screen. Once lists have been created, Patrons can search for them in the Search interface. Temporary or permanent reading lists can be created.
This guide will provide the steps required to create a temporary reading list.
What are Reading Lists Used For
Lists can be created for many different categories of resources. For example, patrons may ask for resources on a curriculum subject. Using an appropriate name for reading lists and adding related resource titles will assist the library’s patrons to find the applicable list of resources. Staff can establish temporary Reading Lists by setting an expiration date, which is a useful feature, for lists established to identify resources for school or work projects that have a defined timeframe. Other Lists may be permanent with new resources added to it over time.
A parent/child hierarchical structure of Reading Lists can be established where related reading lists are tied to another list. For example, a Reading List called Pedagogy is created to which lists on subjects that fall within that topic such as Teaching Guides, Teaching Children with Disabilities, or Learning Activities could be linked. Patrons can access Reading Lists, and associated resources via the Search interface. Library staff with applicable permissions can locate lists and their contents via the Cataloging main menu option of Authority Control.
Create a Temporary Reading List
Lists can be permanent or temporary depending on whether an end date is added when creating a Reading List. The following example shows how to create a temporary list.
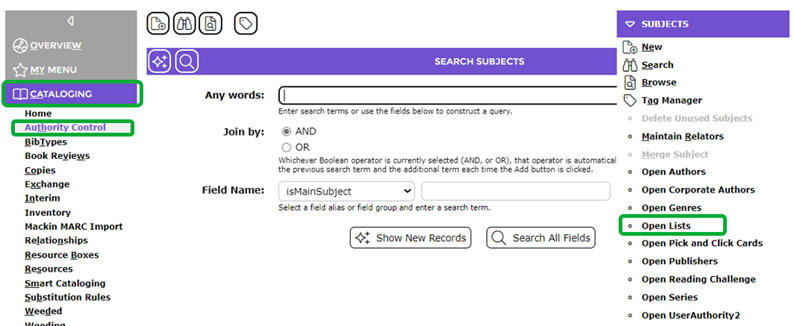
- Navigate to Cataloging > Authority Control and select Open Lists from the Function menu.
- Click on the New icon (or select New from the Function menu or type ‘ne’).
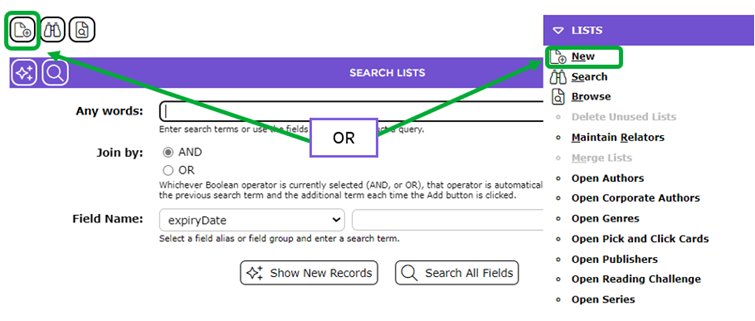
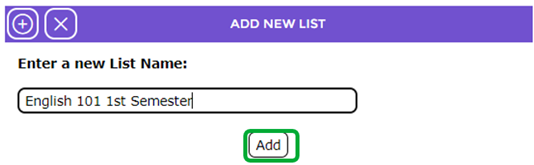
- The Add List popup screen will display.
- Enter the name of the new reading list, in the field provided, and click the Add button.
- The Lists Add screen will display.
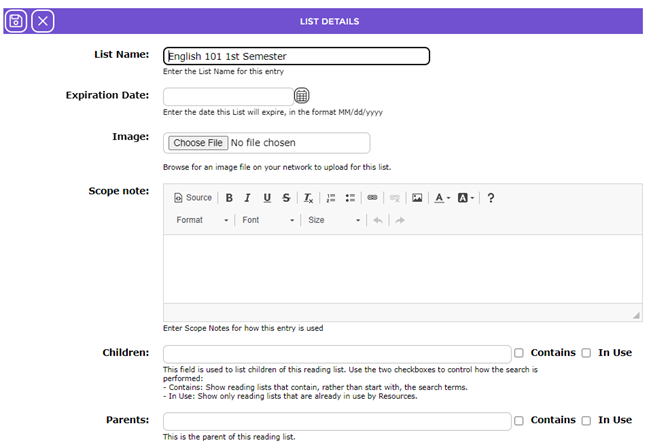
- The name of the list entered in the Add popup screen displays in the List Name field.
- If the list is to be temporary either manually enter the applicable date in the Expiration Date field or click on the Calendar icon and select the day, month, and year in the usual manner. If the List is to be permanent, do not complete this field.
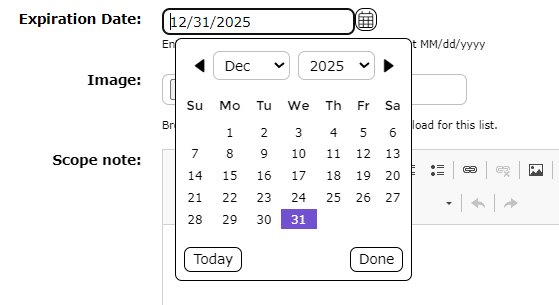
- If applicable, enter notes in the Scope Notes text box. This box includes Rich Text Format (RTF) options to change the font, size, and color of the text.
The steps to link a child to a parent list is the subject of a separate guide. As the example list being created is neither a Parent or a Child the Parent and Children fields are left blank.
- Click in the Contains, Verified or In Use checkboxes if applicable (these function in the same way as those on Authority Term screens).
- Click the Save button.

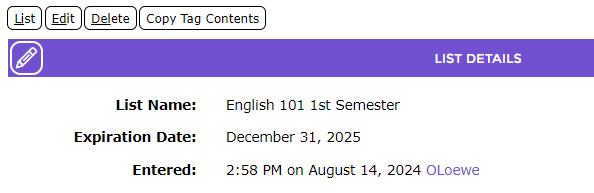
- The Detail screen of the newly created List will display.
Was this article helpful?
That’s Great!
Thank you for your feedback
Sorry! We couldn't be helpful
Thank you for your feedback
Feedback sent
We appreciate your effort and will try to fix the article