Summary
Patrons may add, view and delete their own reservations via the OPAC search screen. To do this, the patron must be logged in to MackinVision. This functionality is controlled by the user privileges assigned to the patrons’ user role and is enabled by default. The item must also belong to a resource loan category that is bookable.
Adding a reservation
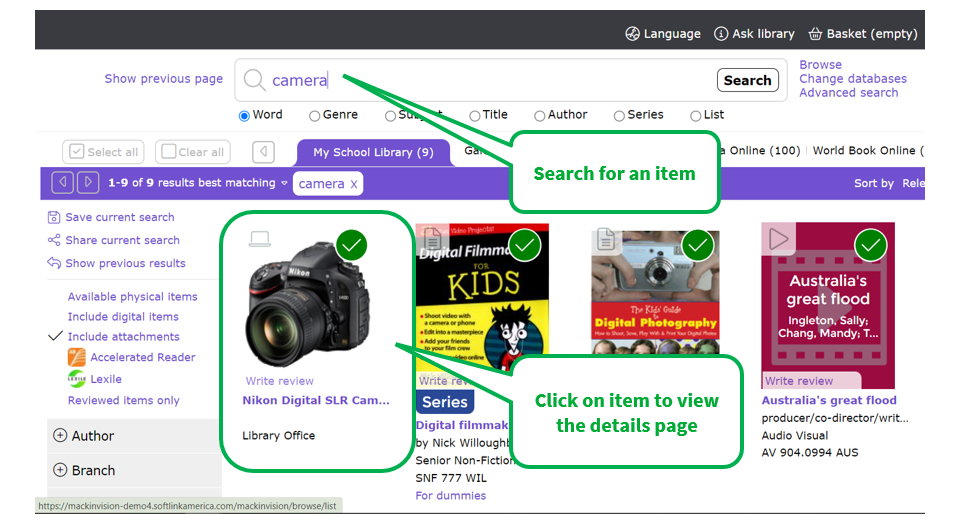
- Perform a search in the OPAC search screen for the item to be booked, then click it in the list of results to open its Details screen.
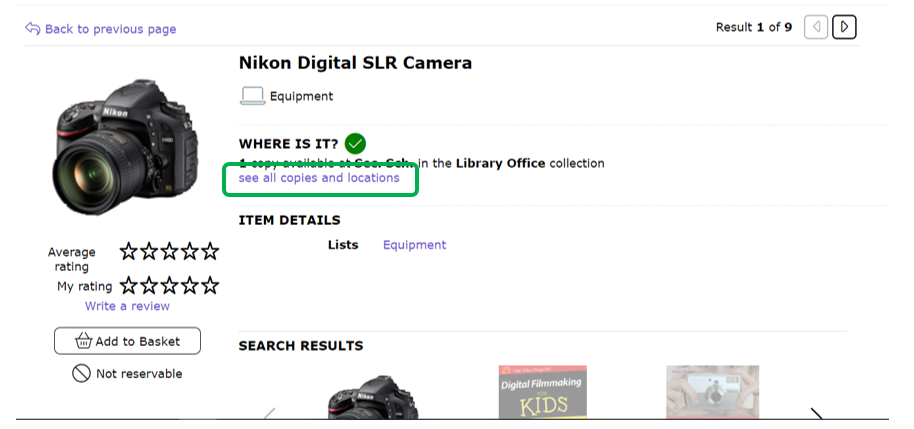
- In the item’s Details screen, click the see all copies and locations link.
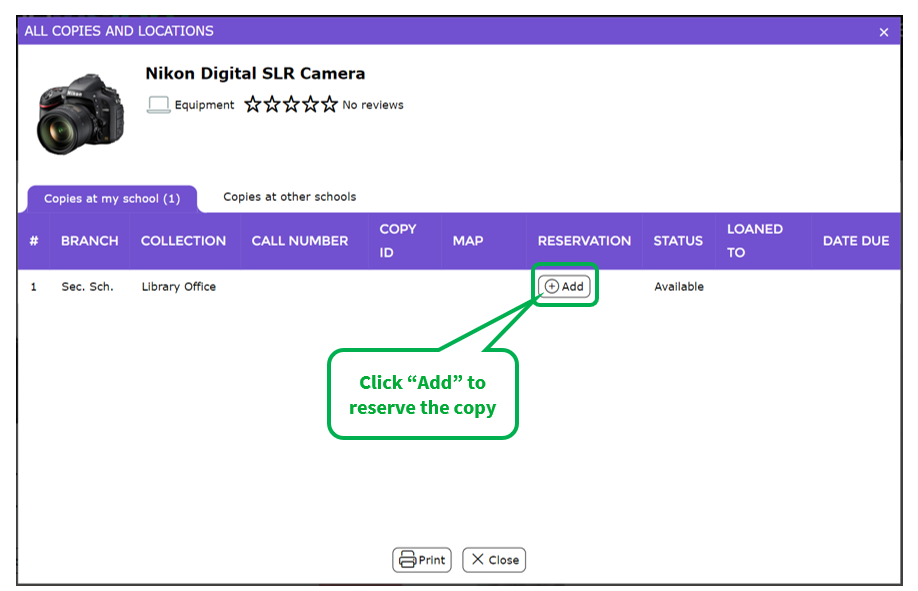
- When the All Copies and Locations popup appears, click the Add button for the copy you would like to make a reservation for.
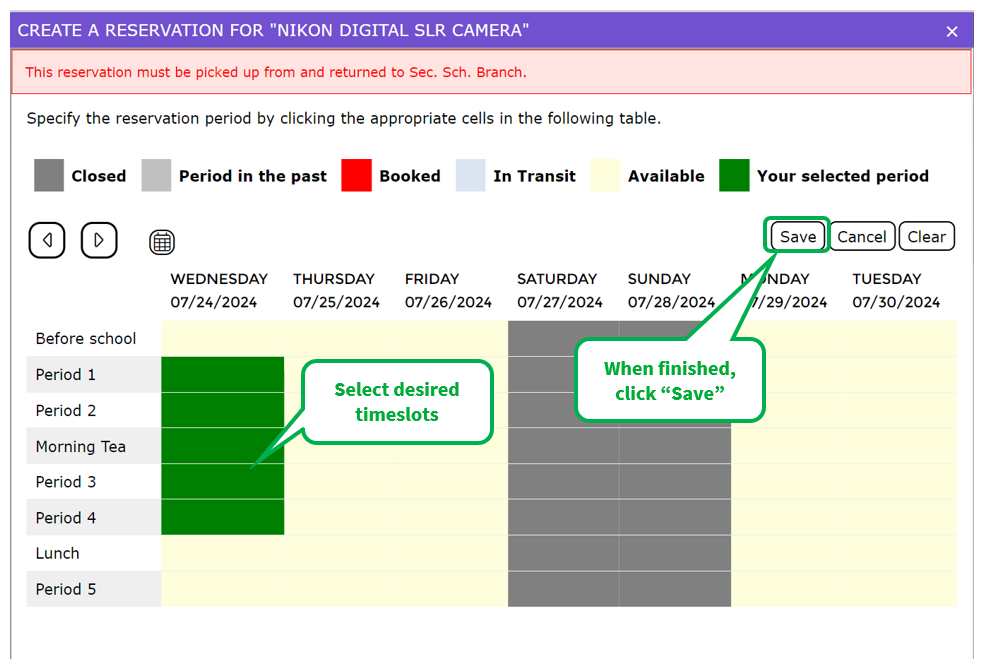
- Select the desired time slots and then click the Save button when done. A confirmation message will appear in the lower-left corner of the screen.
Viewing Your Reservations
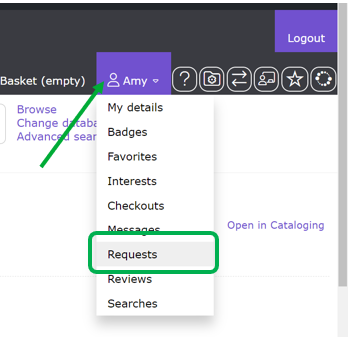
- Click the patron account drop-down menu and then select Requests, when logged in to MackinVision.
- In the Requests screen, select Reservations. Each reservation will show its allocated dates and times. To cancel a reservation, click the Delete reservations link.
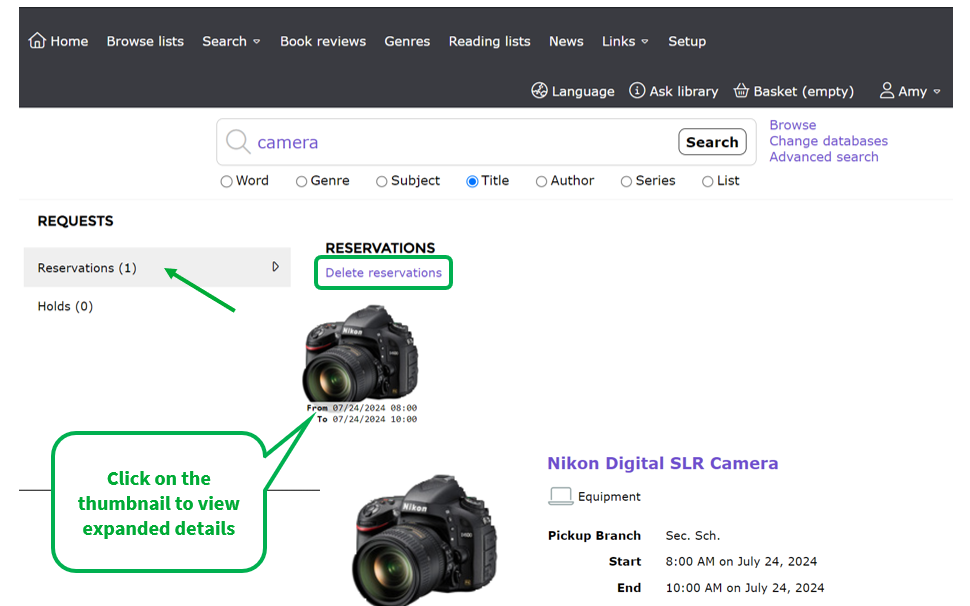
Deleting Reservations
When the Delete reservations link is clicked, the patron will be presented with a screen listing the reservations and the option to select or de-select one or more reservations. When the relevant reservation has been selected, click the Delete button. 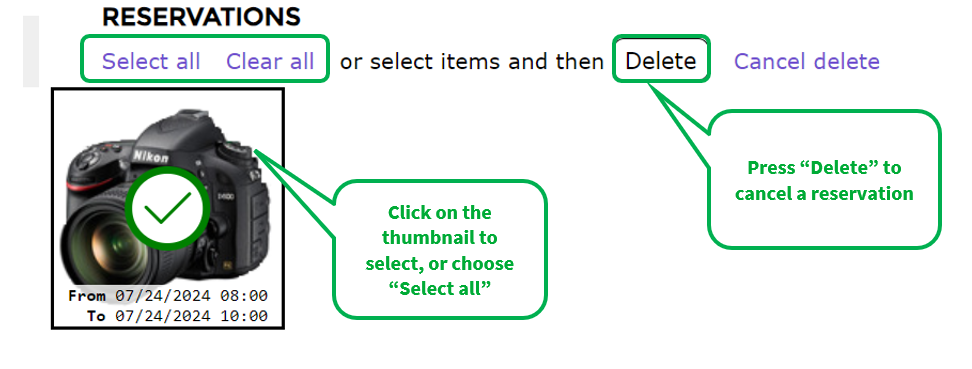
Was this article helpful?
That’s Great!
Thank you for your feedback
Sorry! We couldn't be helpful
Thank you for your feedback
Feedback sent
We appreciate your effort and will try to fix the article