Summary
Weeded copy records are indexed and can be searched for and located so a restore process can be completed on it. Weeded copy records can also be restored individually or permanently deleted via a Purge function.
This guide will provide the steps required to search for and restore a copy record, which has been subject to a weed process.
Restore a Weeded Copy Record
A Restore button will only display on copy records if the resource record to which they were tied, has not also been weeded. The following example shows how to restore a weeded copy.
- Navigate to Cataloging > Weeded > List (or Search) screen and select Open Weeded Copies from the Weeded Resources Function menu.
- If the Weeded Copies List screen displays access the Weeded Copies > Search screen in the usual manner. The Weeded Copies Search screen includes the same search criteria as the Copy > Search screen.
- Complete a search in the usual manner and click on the number link of the applicable copy.

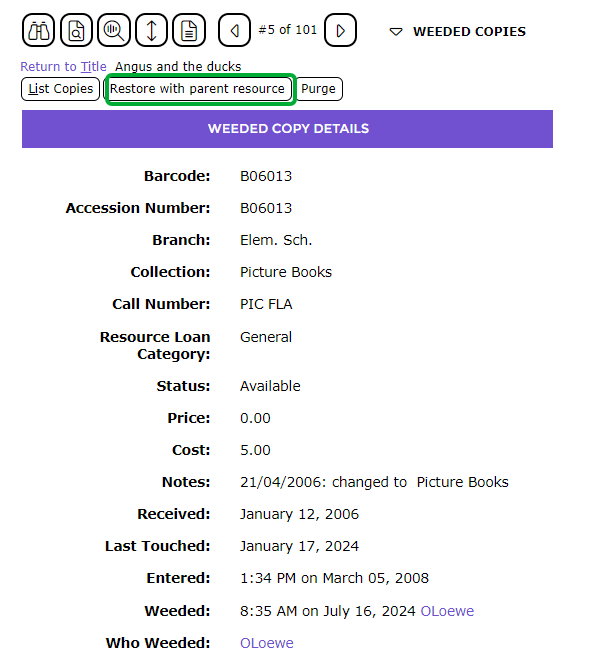
- The Weeded Copy Detail screen for the selected copy will display.
- Click on the Restore button.
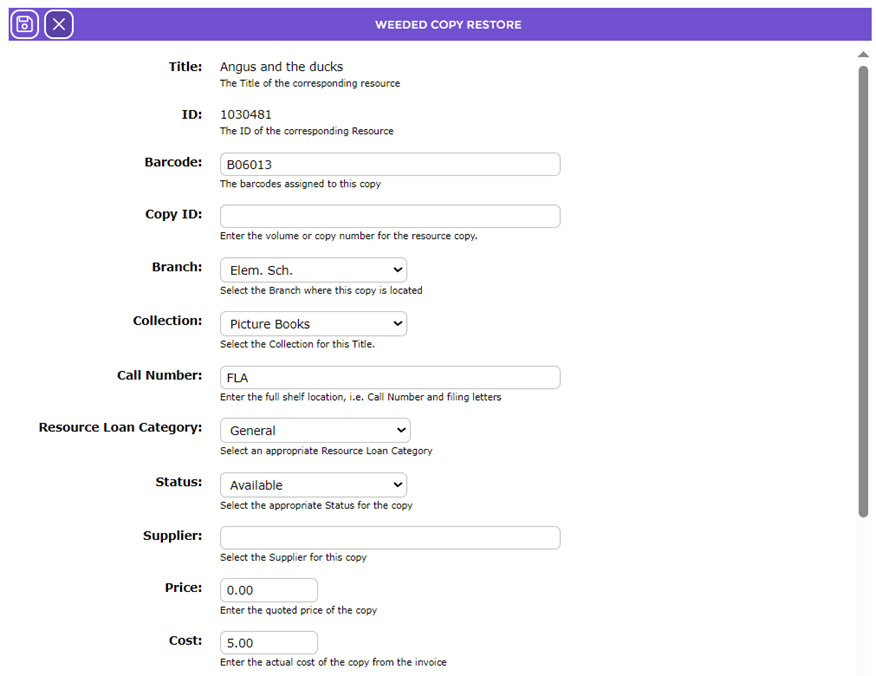
- The Copy Edit screen will display. Complete any field as required, then click Save.
- The Copy record is now restored and searchable via the Copies > Search screen.
If a Copy is Tied to a Weeded Resource
If the weeded copy record being restored is tied to a resource record, which is itself weeded, a warning message will display at the top of the screen indicating the “parent” resource must be restored before the copy record can be restored. In the example screen below, there is no Restore button available on the copy Detail screen
- Search for the resource record in the usual manner.
- Access the Detail screen and click on the Restore button.
- The Resource Edit screen will display.
- Complete any edits required then click on the Save icon.
- The resource’s Detail screen will display.
- Search for the weeded copy that was attached to the resource record and restore the copy as explained in the previous section.
Was this article helpful?
That’s Great!
Thank you for your feedback
Sorry! We couldn't be helpful
Thank you for your feedback
Feedback sent
We appreciate your effort and will try to fix the article