Summary
When MARC Resource records are imported, all of the Control fields, tags and sub-tags from the MARC file are stored. The process creates a corresponding bibliographic record. If further information is to be added requiring the inclusion of tag and subfields, information is to be deleted, or existing information edited, the changes must be made be made via the MARC Editor screen.
This guide will provide the steps required to, add a tag and subfield, delete a subfield and correct a typing error via the MARC Editor screen. Separate guides provide the steps to searching resources, viewing a MARC record before importing it, importing a MARC record and importing a file of MARC records.
Add a Tag and Subfield to an Existing MARC Record
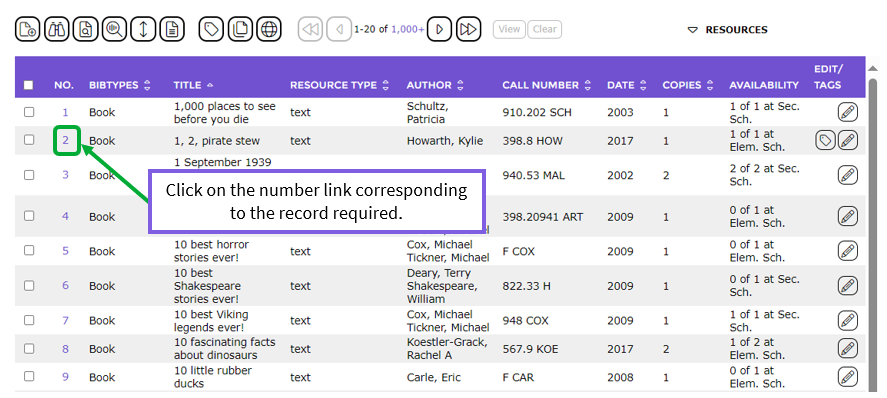
- Navigate to Cataloging > Resources > Search and locate the record to be edited.
2. Click on the number link of the required resource in the List screen.
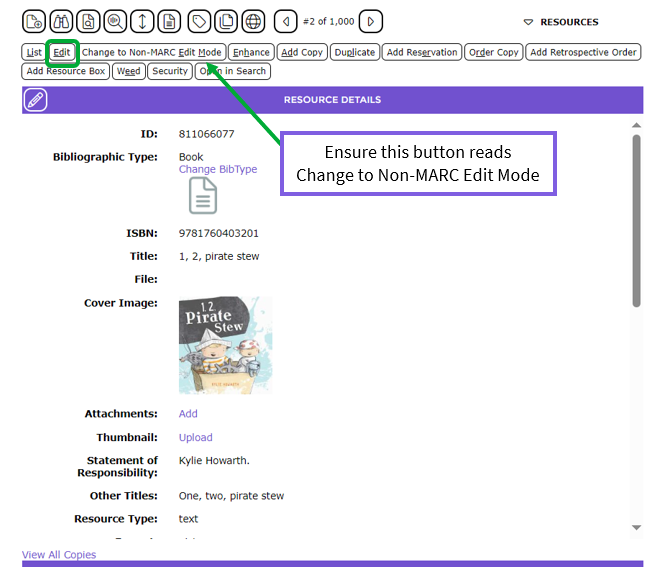
3. In the displayed Detail screen, click on the Edit button. Ensure the button to the right reads Change to Non-MARC Edit Mode. If the button reads Change to MARC Edit Mode click on it to change it to Change to Non-MARC Edit Mode.

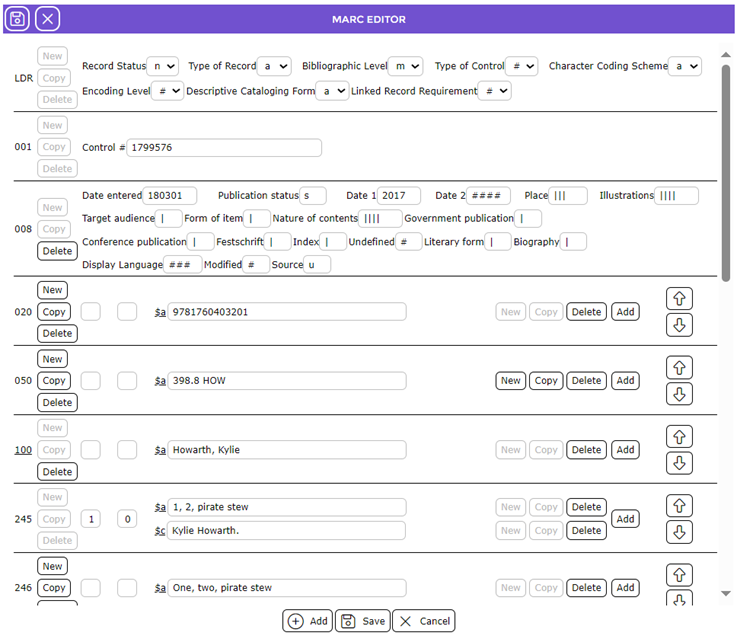
In the following example, the steps will show staff how to edit the MARC record by adding, a 586 $a tag and subfield to identify the resource has received an award. The process is the same for whatever tag and subfields the cataloging staff member is adding.
4. In the Edit screen, click the Add button located at the bottom of the screen.
5. The Add Tag popup screen will display.
6. Click on the down arrow at the end of the field.
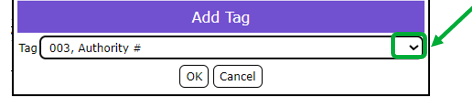
7. Scroll down the list until you locate 586 and click on it.
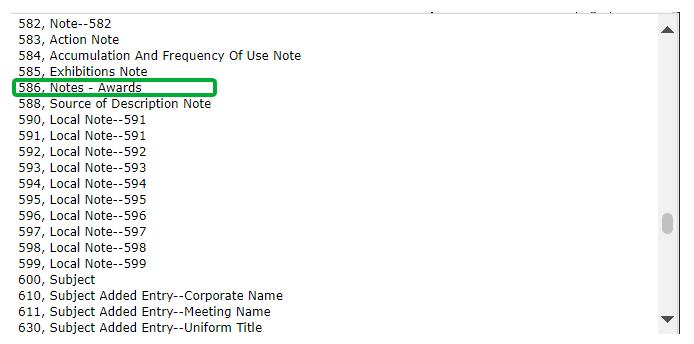
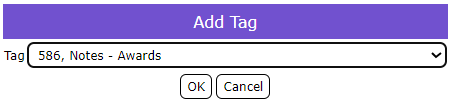
8. The tag will display in the field. Click the OK button.
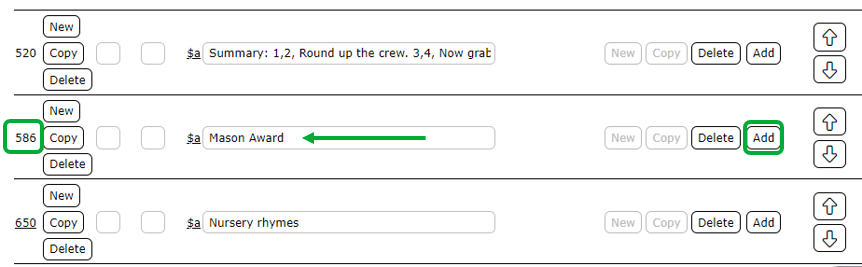
9. The 586 $a field will then be positioned in the correct MARC tag number order.
10. Enter the information required in the field provided, for example, Lawson ScienceAward.
11. If you are adding subfields to the MARC tag you added, you would:
12. Click on the Add button at the end of the newly added MARC tag.
13. The Add Sub Tag popup screen will display.
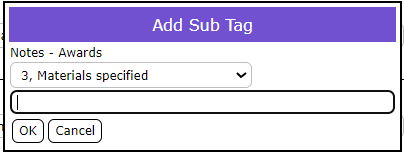
14. Click on the down arrow at the end of the field provided and click on the subfield provided then click the OK button.
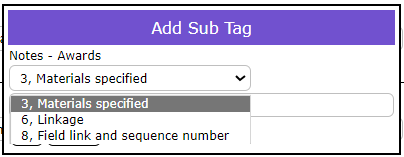
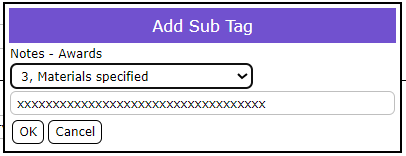
15. The subfield selected will list below the $a subfield. In the field provided, enter the additional information then click the OK button.
16. When all edits are completed, click the Save icon located at the top of the screen or the Save at the bottom of the screen.

17. The resource Detail screen will then display.
Delete a Tag and Subfield
In the following example, the 586 $3 subfield will be deleted from the record.
- Navigate to Cataloging > Resources > Search and locate the record to be edited.
- Click on the number link of the required resource in the List screen.
- In the displayed Detail screen, click on the Edit button. Ensure the button to the right reads Change to Non-MARC Edit Mode. If the button reads Change to MARC Edit Mode click on it to change it to Change to Non-MARC Edit Mode.

- In the MARC Editor screen locate the tag and subfield to be deleted, for example 586 $3 and click the Delete button corresponding to the subfield.

- The subfield is removed.

6. Click the Save button at the bottom or top left-hand side of the screen to return to the resource Detail screen.

Was this article helpful?
That’s Great!
Thank you for your feedback
Sorry! We couldn't be helpful
Thank you for your feedback
Feedback sent
We appreciate your effort and will try to fix the article