Summary
To provide additional search options, for example, the URLs of approved external websites such as Google Scholar or the British Museum, they must be set up in the Search URL option.
This guide will provide the steps required to set up Search URLs. A separate guide provides the steps to complete a search using the Other Provider option.
Related User Privileges
Staff, who can set up alternate providers, must have the relevant User Privilege operations activated. The User Privileges option is located under the System menu option in the library Management screen.
Click on the top-level User Privilege, ‘Access to other provider searches’, to access the sub-level operation Enables ‘Search an alternate provider’ in Search and ‘System > Search URL’ from the Management window. Click on the sub-level operation to display the two related operations. Ensure a check displays in the checkboxes corresponding to those two operations:
- /opac/external/result
- /opac/external/sort

Note: A check displayed in the checkbox corresponding to the Access to other provider searches sub-level operation, activates all applicable sub-level and related operations.
TIP:
To permit a patron from one library to search the catalog of another library, when the catalog of the library to be searched uses a different version the following User Privilege operations must be enabled:
/webservices/entity/browse/Catalog
/webservices/entity/query/Catalog
Set Up a Search URL
The example steps provided show you how to set up an alternate provider that is the approved website of an organization.
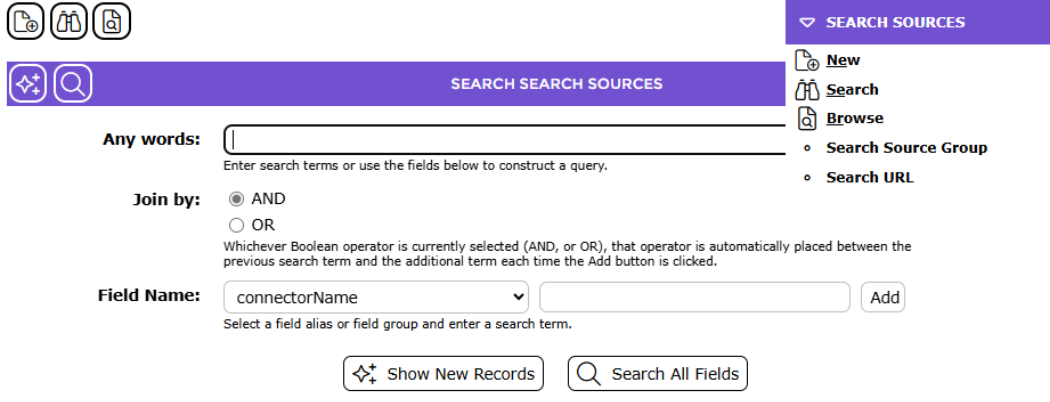
1. Navigate to System > Search Sources and from the Function menu click on Search URL.

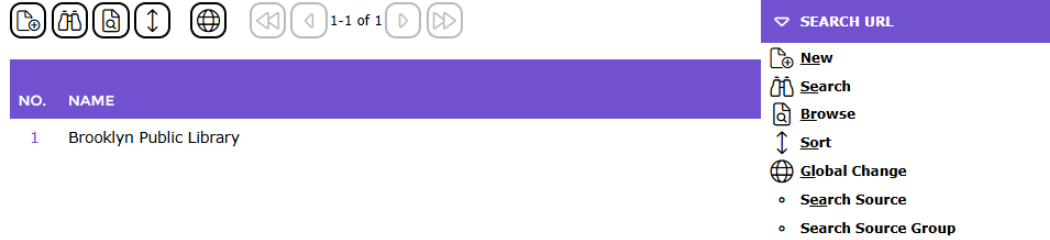
2. The Search URL > List screen (or Search screen depending on the setting on Parameter No. 1215) will display.
3. Click on the New icon, or select New from the Function menu, or type ne. The New options are available from either the Search or List screen.



4. The New Search URL popup screen will display.
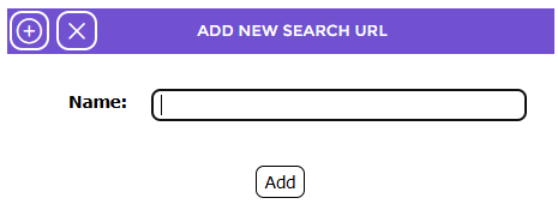
5. Enter the name of the website to be established as an alternate search provider in the Name field, for example, British Museum, and then click the Add button.
6. The Search URL Details screen will display.
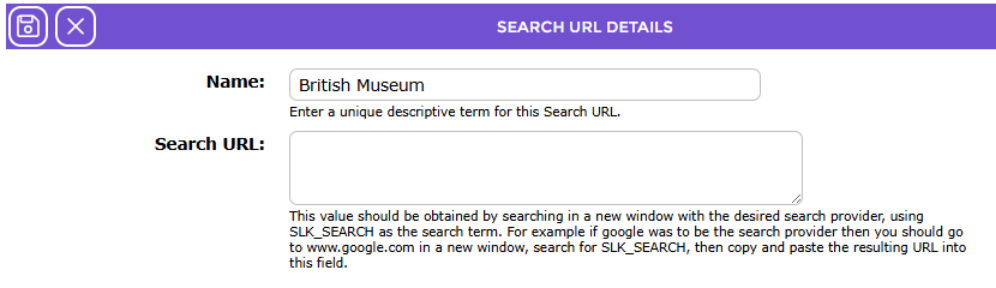
7. The name entered in the previous popup screen will display in the Name field.
8. To obtain the URL of the alternate provider being created, go to the applicable website. For this example, the British Museum website will be used.
9. Complete a search in the alternate provider’s website using the string SLK_SEARCH in the Search field provided.
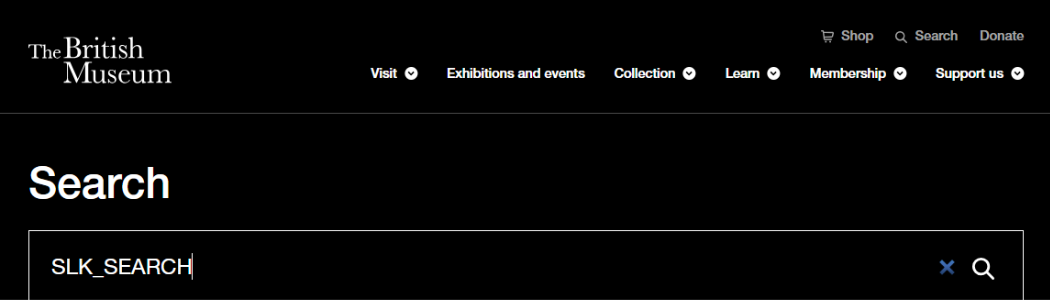
10. When the results screen displays, copy the URL located in the field at the top of the screen. Note that SLK_SEARCH is included in the URL.

11. Paste the URL (including the =SLK_SEARCH element) into the Search URL field.

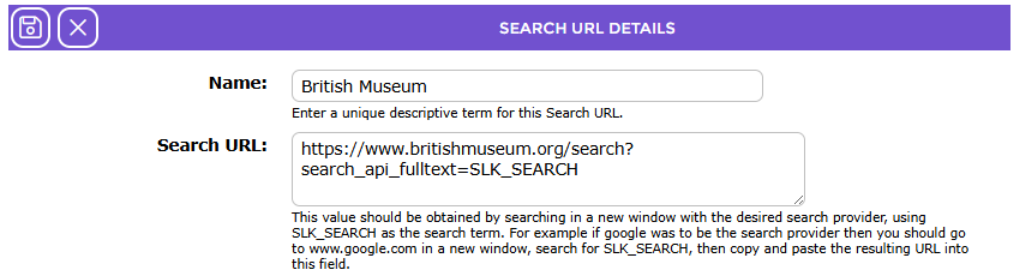
12. Click the Save button.
13. The Detail screen for the alternate provider will display.
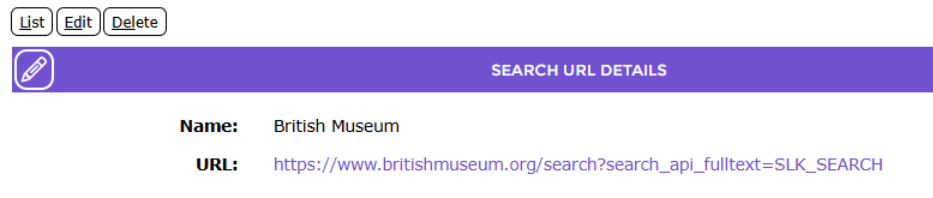
14. Click on the List button to return to the Search URL > List screen. The newly added alternate provider will display.
Users will now be able to access the British Museum website when searching in the Search interface. To do so, they would enter a search term in the usual manner then click on the Change Search Sources icon.

The Change Search Sources screen will be displayed. The alternate provider, for example, British Museum will be available. It is a link which, when clicked, will take the User to that alternate provider’s website.

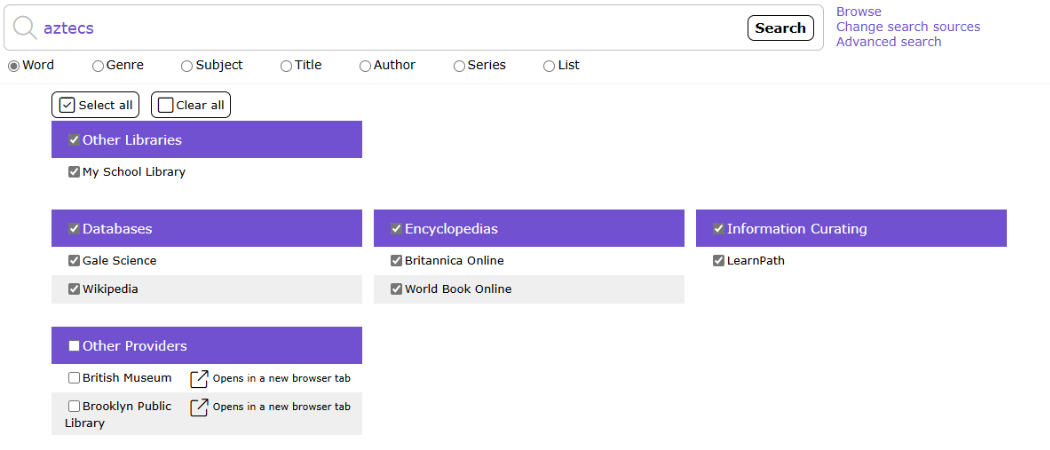
Note: The Change Search Sources link is available whether the initial search returned resources held by the library or the search returned no results at all.
Was this article helpful?
That’s Great!
Thank you for your feedback
Sorry! We couldn't be helpful
Thank you for your feedback
Feedback sent
We appreciate your effort and will try to fix the article