Summary
The Exchange functionality ensures staff can make a temporary or permanent change to the Branch, Collection, Status, and/or RLC settings on a list of copy records if required.
This guide will provide the steps required to complete an exchange process.
Complete a Temporary Exchange
There are four Exchange options available for use; more than one option can be exchanged on a list of copies if applicable. For copies subject to a temporary exchange, there are date fields corresponding to each option in the Exchange screen. The date entered will determine when the system will automatically restore the setting that existed prior to the exchange on the date entered. The grayed out Start button will activate when a field for exchange is selected.
The example provided will exchange the Branch on a list of copies from Archives to Sec. Sch. (Secondary School). As the change is to be temporary, the check in the Remember current Branch will remain.
1. Complete a search for the required copies in the usual manner. For this example, in Cataloging > Copies the Branch labeled Archives was searched.
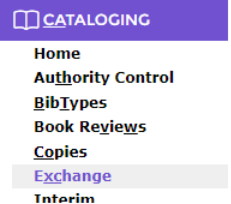
2. With the copy list displayed, click on the Exchange option under the Catalog main menu option.

The Exchange screen will display. Note that the Start icon is grayed out until an exchange option is selected.
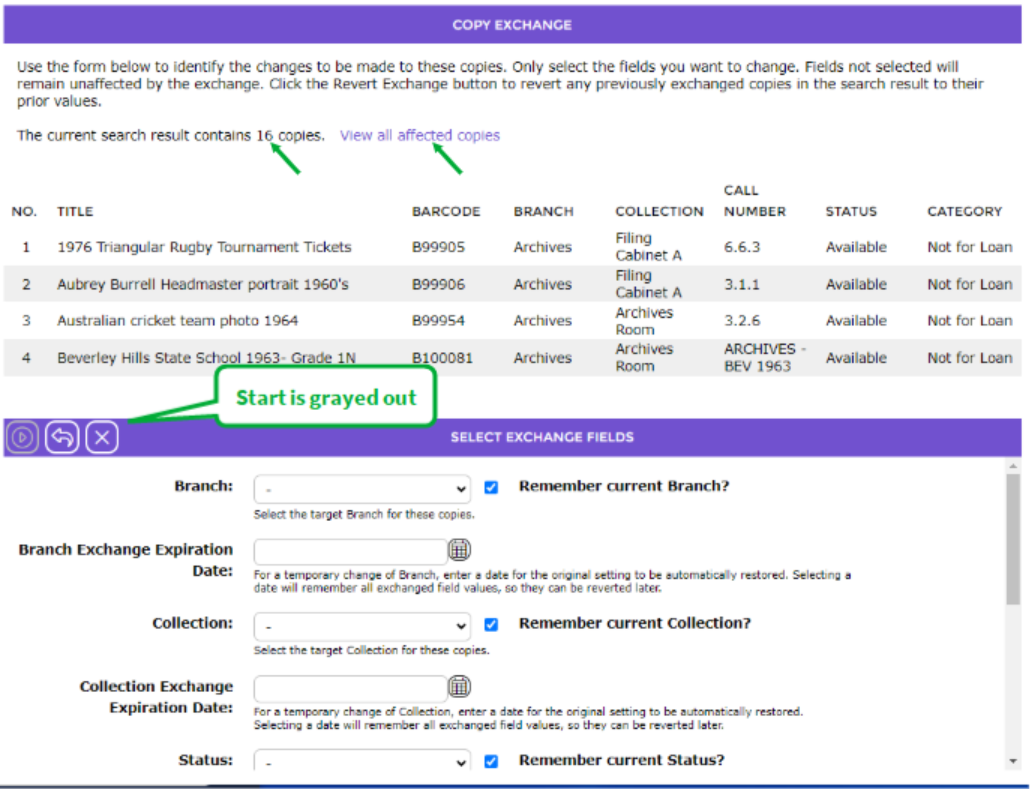
3. By default, only the first few copies from the list returned from the search will display with the total number of copies noted at the top of the screen. Click on the View all affected copies link to display the complete list of the applicable copies.
There are four exchange option fields:
- Branch
- Collection
- Status
- RLC
Each option has a corresponding “Remember” checkbox. By default, a check displays in each checkbox. The default setting must stay if the exchange is to be temporary. This ensures that that option setting reverts to its previous value, via the applicable Housekeeping process, once the exchange expiration date has passed.
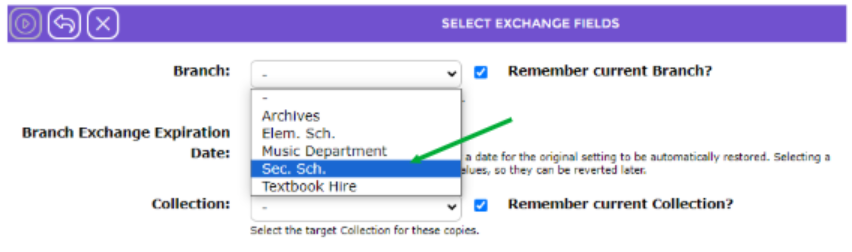
4. Click on the down arrow at the end of the Branch field and from the list click, for example, on Sec. Sch.
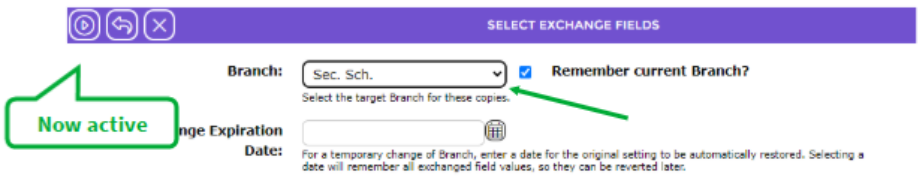
The selection now displays in the Branch field. Note that the Start icon is now active.
As this example is for a temporary exchange:
5. In the Branch Exchange Expiration Date field, either manually enter the date the temporary exchange expires or click on the Calendar icon and select the date elements.
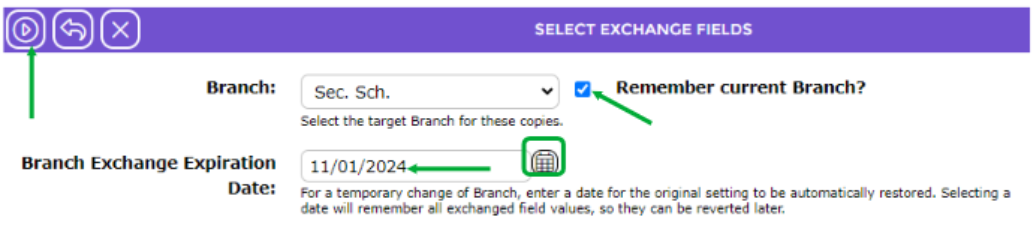
6. Ensure a check remains in the corresponding Remember current Status checkbox.
7. Click on the Start icon.

The Exchange screen will refresh and the Branch field on all copies will reflect the selection made in the previous screen.
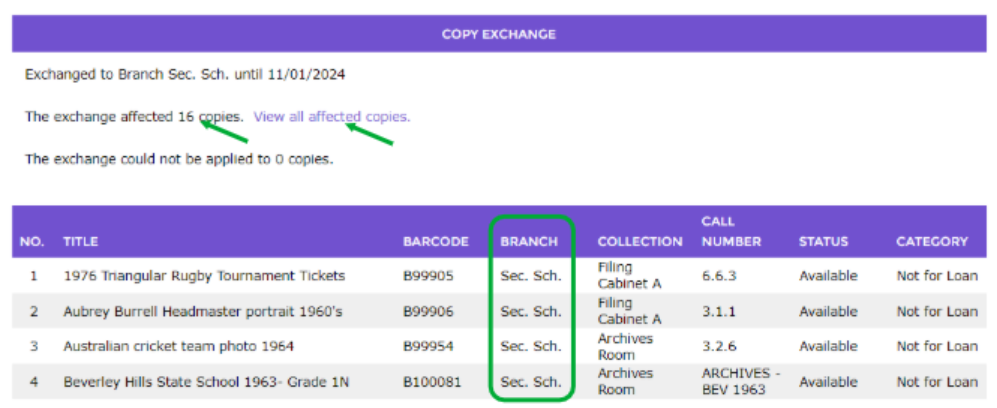
8. Again, only the first few copies will list in the screen. Click on the View all affected copies link to see the complete list.
The number of copies, if any, not included in the exchange process, is identified at the top of the screen. In this example, the Branch for all copies was successfully “exchanged”.
Related Housekeeping Process
Housekeeping is accessed from the System main menu in the library Management screen. Only staff with applicable user privilege operations can access the screen.
1. Navigate to System > Housekeeping.
2. Confirm that a check displays next to Exchange. This ensures that when the date any temporary exchange is to revert back to the original setting, the process is included in the nightly Housekeeping run.
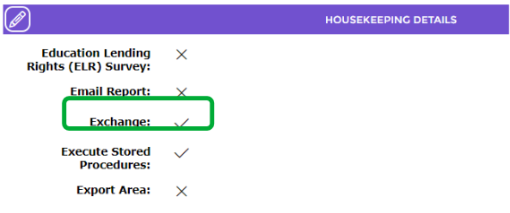
3. If an ‘X’ displays, click the Edit button in the Housekeeping screen.
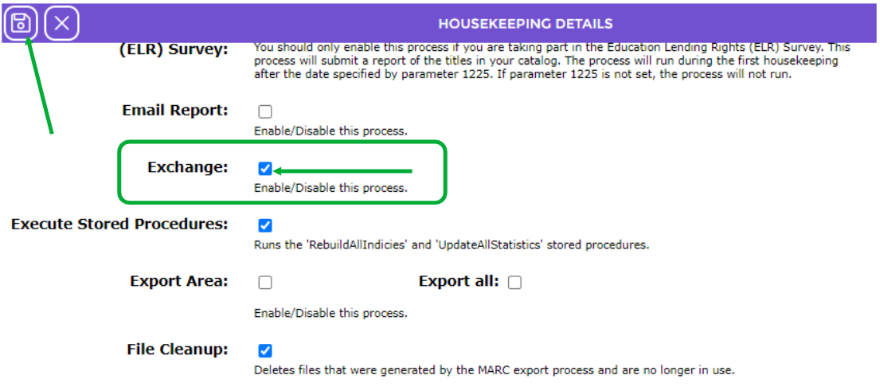
4. Locate Exchange and click in the checkbox to display a check then click the Save button at the top of the screen.
Was this article helpful?
That’s Great!
Thank you for your feedback
Sorry! We couldn't be helpful
Thank you for your feedback
Feedback sent
We appreciate your effort and will try to fix the article