Summary
A file of MARC records can be imported into the catalog. MARC record files can be imported manually or can be set to recur automatically.
This guide will provide the steps required to import a MARC record file manually. It will also provide examples of a successful and an unsuccessful import.
NOTE: You do not need to import MackinVIA MARC records into your MackinVision system. These records will populate in the overnight house keeping process.
Manually Import a MARC File
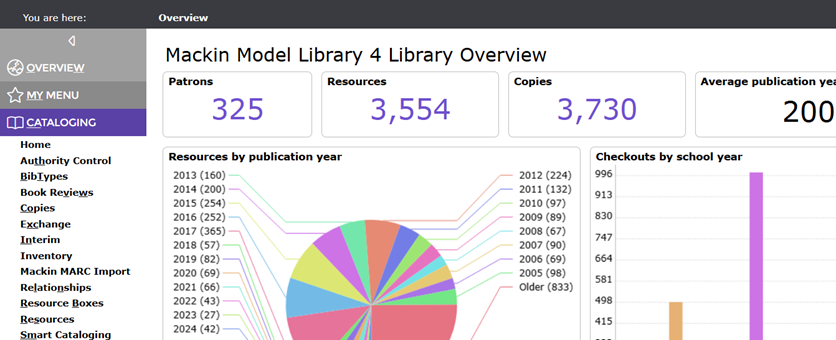
- Navigate to Cataloging > Mackin MARC Import. You can import MARC files from any vendor here.
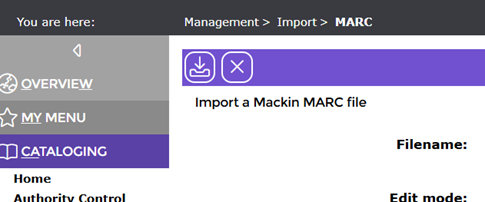
- The Import a Mackin MARCfile screen will display.
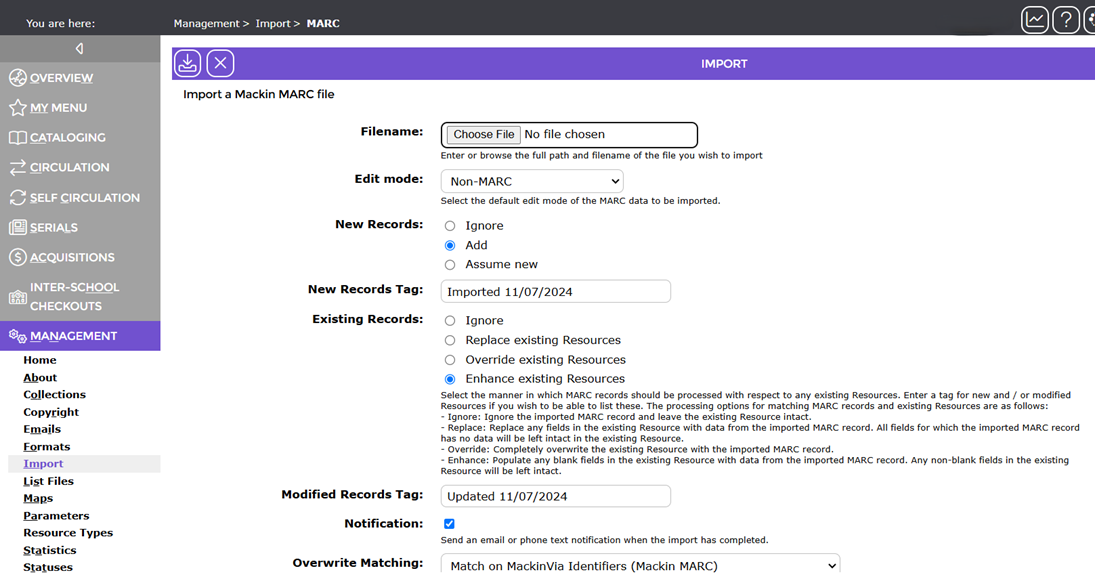
3. Click the Choose File button at the end of the Filename field.

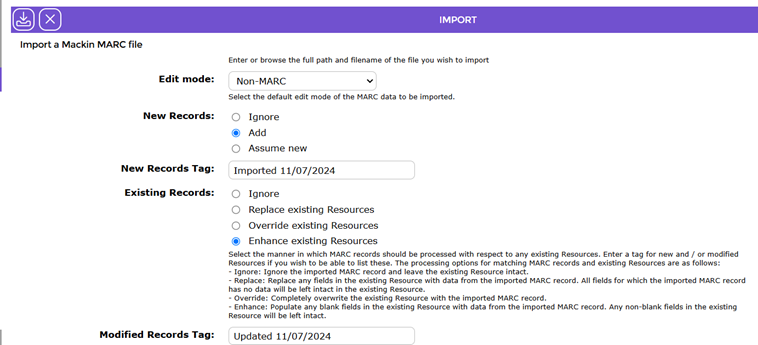
4. When the file is being imported the selection of Ignore, Add or Assume new will determine what the system does with the MARC records in the file:
New records:
- Click in the radio button next to Ignoreif the system should ignore all new records included in the MARC file
- Click in the radio button next to Addif all new records in the MARC file are to be added to the catalog
- Click in the Assume Newif all records in the file are to be assumed as new. Be aware that if there are MARC records in the file, that are already in the catalog, duplicates will result if you chose this option.
Existing records:
- Click in the radio button next to Ignore to ignore the imported CSV record and leave the existing record intact
- Click in the radio button next to Replace existing Resources to replace any fields in the existing record with data from the imported CSV record. All fields for which the imported CSV record has no data are left intact in the existing record.
- Click in the radio button next to Override existing Resources to overwrite the existing Resource with the imported MARC record.
- Click the radio button next to Enhance existing Resources to populate any blank fields in the existing record with data from the imported CSV record. Any non-blank fields in the existing record are left intact.
5. When all details are completed, click the Import button.
Once the Import Has Been Started
- The first Import screen will be displayed. In the grid in the bottom half of the screen, the time and date the Import was submitted is added while the Queued for Processing icon will display in the Result column.
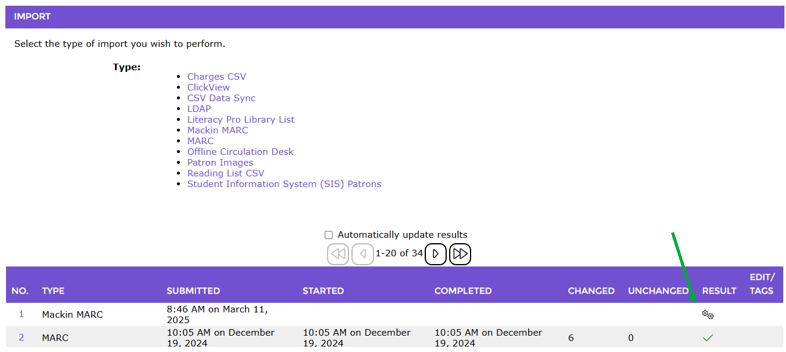
2. The time and date the imported started will display in the Started column.

3. Once the import process has completed the time and date will display in the Completed column.

4. Any messages relating to the import will display in the applicable cell in the Changed, Unchanged or Errors columns.
5. A green Check will display in the Result column if the import was successful. In the following screen example the time the import was completed displays in the Completed column, that one record was changed displays in the Changed column and a green Check displays in the Result column displays indicating that the import was successful.

If a red Cross displays, the import was unsuccessful. In the following screen example, the import did not complete successfully.

6. To view the errors click on the number link, for example 1, corresponding to the failed Import and the Import Detail screen will display.
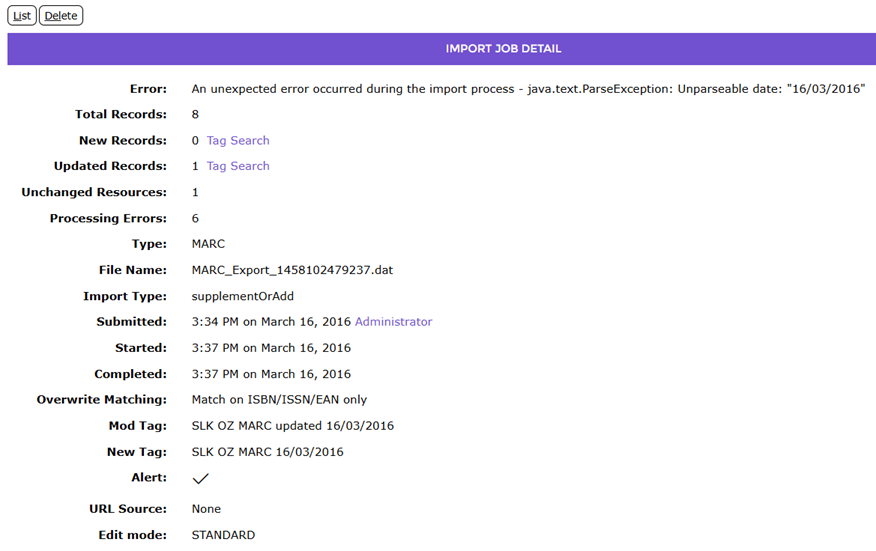
The information provided will assist with identifying why the import failed.
- The Error line identifies the import was aborted after 10 failed attempts to import the file
- The Processing Errors line confirms that all 10 attempts the system did to import the file failed because it could not be read. This indicates there may be a problem with the MARC file itself.

TIP: Clicking the Tag Search link in the Import Detail screen will display a List of all records imported from the file, each with their own corresponding T link in the far right hand side column. The tooltip for a T link identifies the tag name. |
7. Click the List button to return to the List screen.
8. To remove the details of the import click the Delete button.
Note: Clicking the Delete button does not delete the imported records from the system; it deletes the import details only. DO NOT click the Delete button until the file import has completed.
Was this article helpful?
That’s Great!
Thank you for your feedback
Sorry! We couldn't be helpful
Thank you for your feedback
Feedback sent
We appreciate your effort and will try to fix the article