Summary
When adding a new resource to the catalog, a MARC record can be created manually if one is not available for the resource via Z-Cataloging or a supplier. If it is relatively uncommon and you only require a basic MARC record for the item you are adding to the catalog, you can create a MARC record manually.
This guide will provide the steps required to create a MARC record manually.
TIP: If your library material consists of a significant number of items like departmental reports, research papers and the like, for which there is no available MARC record, you can create a MARC template via BibTypes. The template can contain all possible MARC tags and subfields you would be likely to require, and a note on the information type to be entered on the tag subfields. This will reduce the workload of having to add every tag and subfield you require every time you create a MARC record.
Create a MARC Record Manually
You can create as basic or as complete a MARC record as required. Only the LDR and Title tag and subfield are mandatory, however, adding additional tags such as call number, author, publication details, series, notes and subject tags and subfields will make the discovery of your material easier for patrons
- In the Cataloging > Resources Search or List screen click on the New icon or New from the Function menu (or type ne).
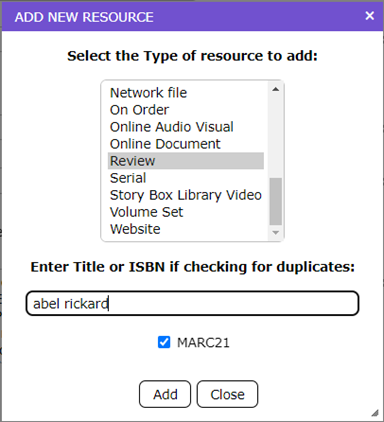
- In the Add a new resource popup screen click on the Resource Type required and enter the title in the field provided then click the Add button. Ensure the checkbox next to MARC21 is ticked.
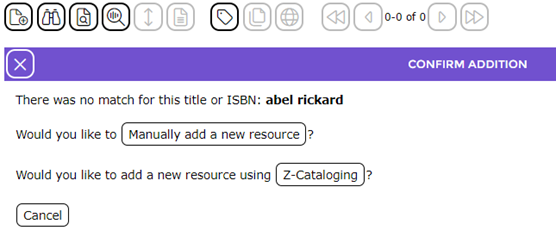
- In the resulting screen click on the manually add a new resource link.
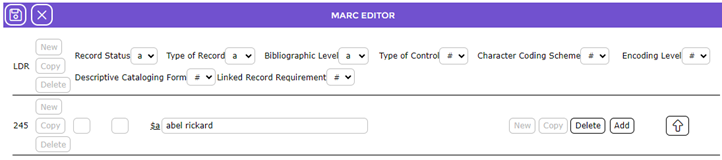
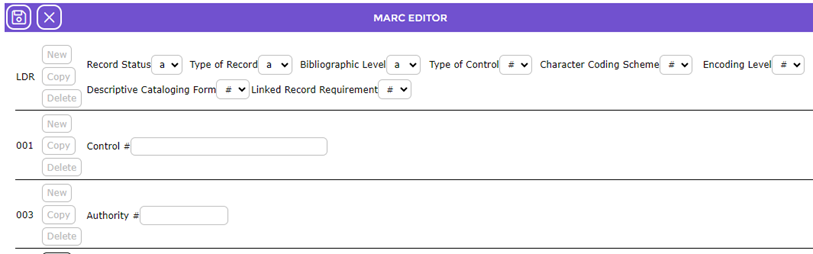
- The LDR and 245 fields will be included in an otherwise blank editor screen as both these fields are mandatory fields for a MARC record.
- If a title was entered in the Add a new resource popup screen it will automatically appear in the 245 a tag and subfield line.
Tags and subfields, into which applicable information is entered, can now be added.
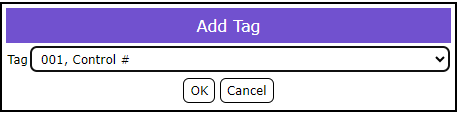
- Click on the Add button at the bottom of the Editor screen and the Add Tag popup screen will display.
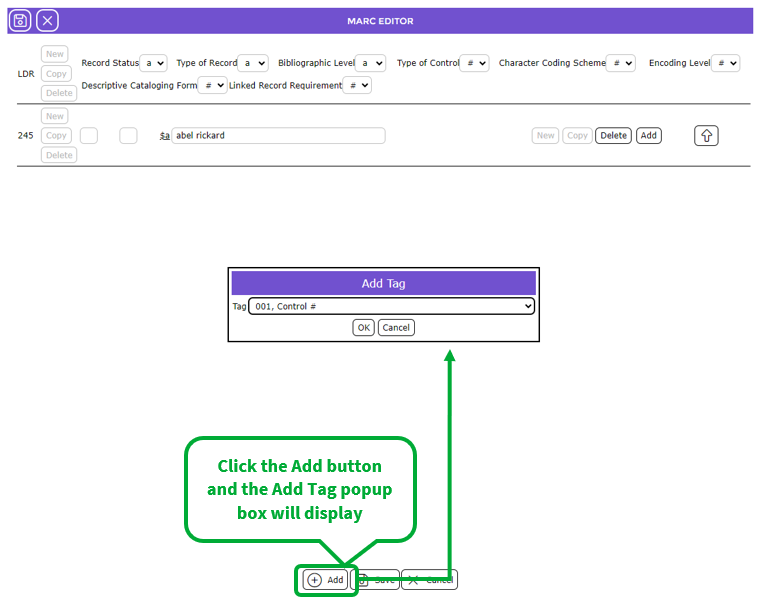
- The first tag available, for example 001, Control # will display by default in the popup screen.
- If you want to add the tag, click on the OK button under the field in the popup screen.
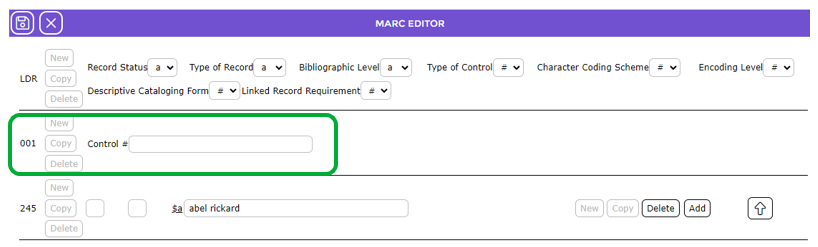
- The 001 tag will automatically be inserted into the correct numerical position in the Editor screen, that is, between the LDR and the 245 field.
- Click on the Add button again to display the Add Tag popup screen.
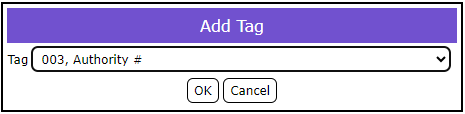
- The next tag in numerical order will automatically display in the tag field in the popup screen, in this instance 003.
- If you want to add the 003 tag, click the OK button.
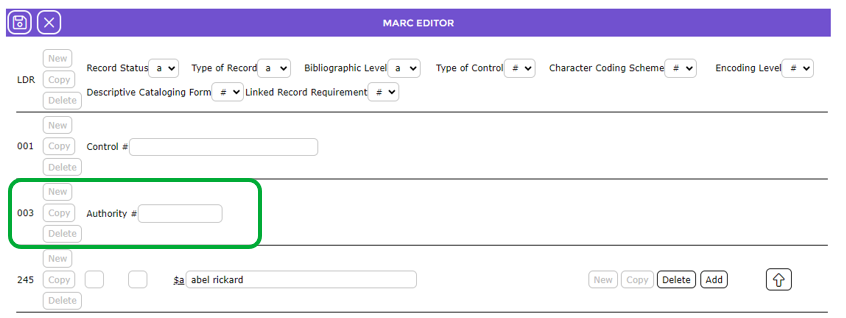
- The tag will be automatically inserted in the correct numerical order.
How to Add a Tag and Related Sub-Fields
There may be a number of tags you add that will require one or more subfields. To add a tag and related sub-fields that you want to include, complete the following steps:
- Click on the Add button to display the Add Tag popup screen.
The tag that automatically displays is the next tag in numerical order after the last tag added to the Editor screen.
- If the next tag in numerical order is not the one you want, click on the down arrow at the end of the Tag field. Part of the available list of tags, and their description, will be displayed.
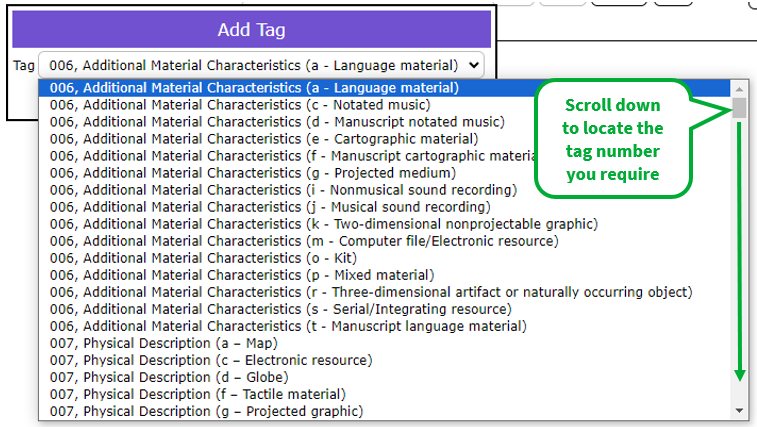
- When you locate the tag required, click on it then click the OK button.

- It will automatically display in the correct numerical position in the Editor screen.
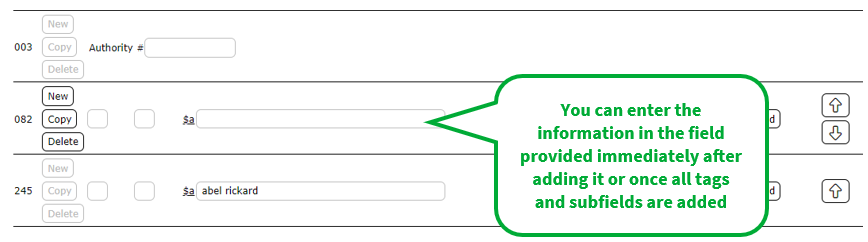
Note: In applicable instances, an ‘a’ subfield is automatically included by default when the MARC tag is added to the Editor screen.
- Enter the applicable data into the field. Note that the user can go back and add data into the field once all tags have been added if preferred.
- Repeat steps 1-4 to add all the MARC tags required for inclusion in the template.
How to Add the Subfield tags to the MARC tags in the Template
- To add a subfield to the added MARC tag, click on the Add button corresponding to the tag – it is located to the right of the tag.

- The Add Sub Tag popup screen will display.
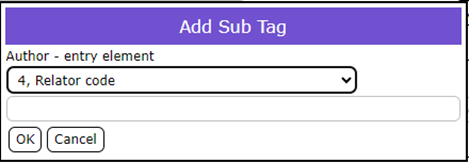
- If the first sub-field displayed by default is not the one required, click on the down arrow at the end of the subfield to display the list of subfields applicable to the MARC tag number.
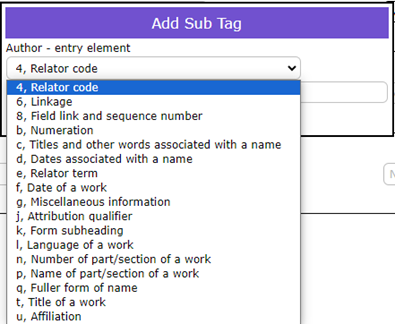
- Click on the subfield required and, if preferred, then enter the relevant information in the blank field provided.
- Repeat steps 1–4 for each subfield tag to be added to the MARC tag.
- To add another MARC tag, click again on the Add button at the bottom of the MARC editor screen then add all the relevant subfields.
- When all fields, subfields, and data required for those fields have been entered, click the Save button.
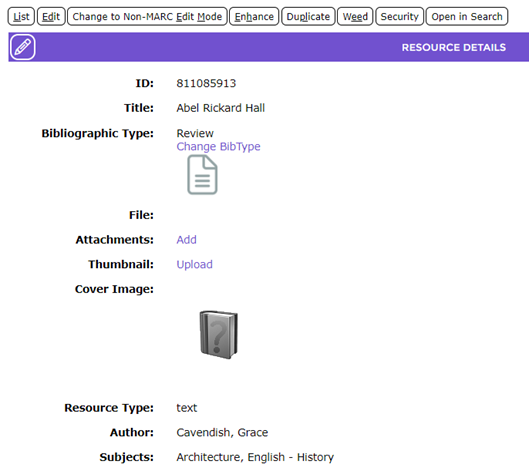
- The Detail screen of the corresponding resource record will display.
Was this article helpful?
That’s Great!
Thank you for your feedback
Sorry! We couldn't be helpful
Thank you for your feedback
Feedback sent
We appreciate your effort and will try to fix the article