Summary
Circulation Expiration Dates (CEDs) are often used, particularly by libraries in educational institutions to limit the due date of any checkouts, to different types of patrons that may otherwise be extended beyond the end of the year. If the library has set any CEDs that expire at the end of a year, they will need to be updated.
This guide will provide the steps required to edit a CED. Separate guides provide an overview of the Lending Rules Matrix screen and how to create a Patron Loan Category (PLC).
Update Circulation Expiration Dates
1. Navigate to Circulation > Lending Rules. The Lending Rules Matrix screen will display.
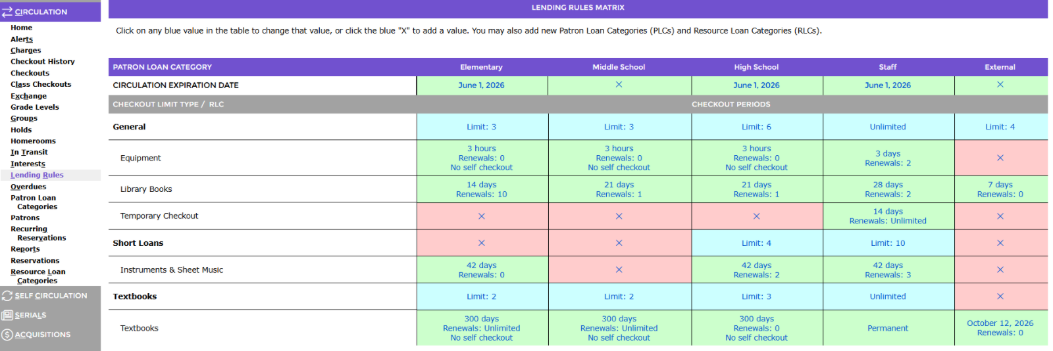
2. Locate the CED to be updated, for example the one established for the PLC of Middle School.
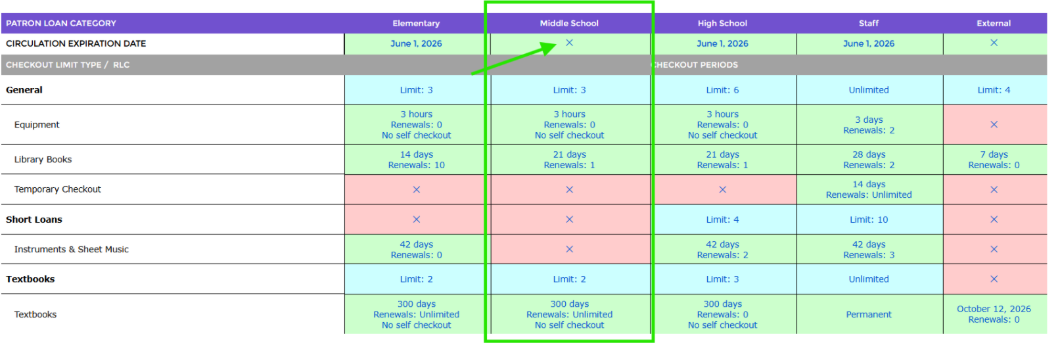
3. The date is in blue text indicating it is a link. If there is no date chosen for this PLC, an X will display. Click on the date or X link.
Note: The cell of any CED, whose date has expired, is identified by its pink background.
4. The Edit Circulation Expiration Date popup screen will display. Click on the Calendar icon to select the new date or manually type it in the Date field using the applicable format, for example 06/01/2026.
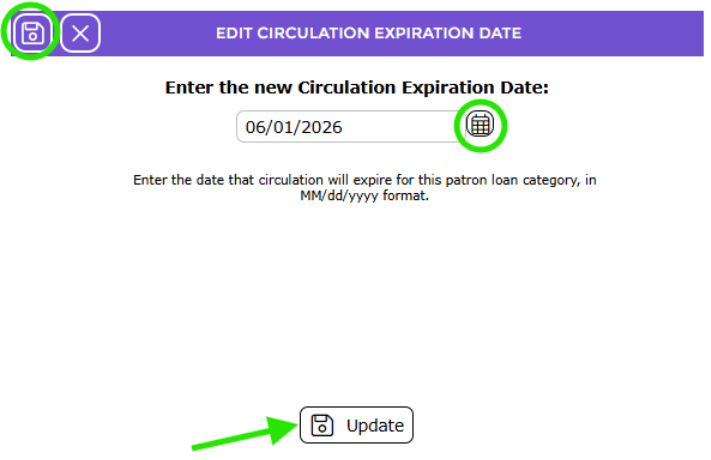
5. When the date is entered or selected, click the Update icon or button.
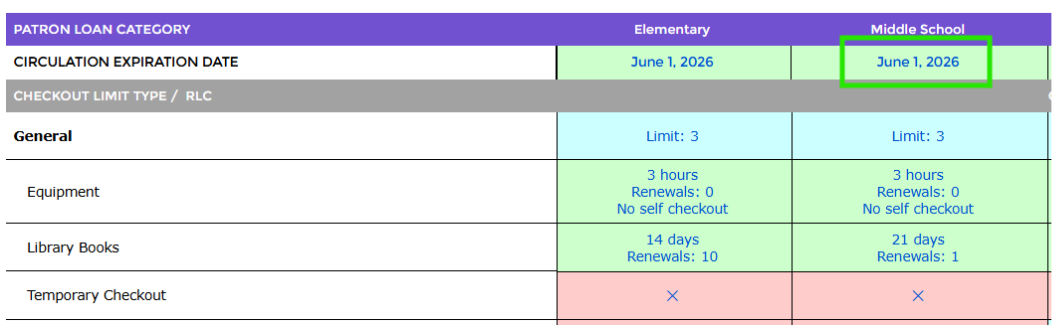
6. The new date will display under the Student PLC in the matrix and the background color of the cell is now green.
Was this article helpful?
That’s Great!
Thank you for your feedback
Sorry! We couldn't be helpful
Thank you for your feedback
Feedback sent
We appreciate your effort and will try to fix the article