Summary
The Page editing function provides the option for Users, with applicable access, to change the layout of a page by either, adding, repositioning, or removing (hiding) fields in many screens throughout the system. There are some screens, for example Weeding, a Change the layout of this screen link will not be available even if Page Edit functionality is turned On.
By default, this functionality is turned off as a security precaution and it is advisable that access be restricted as the accidental removal of fields from screens could cause unnecessary confusion. It is important to note that while fields can be removed from display on a screen, the fields themselves are not removed from the system and they remain available to be re-added later if required.
Turning Pages Edit On
- Navigate to System > Pages to access the Page Editing screen.
- By default, the setting is Off. Click the Turn On button to activate the edit functionality.
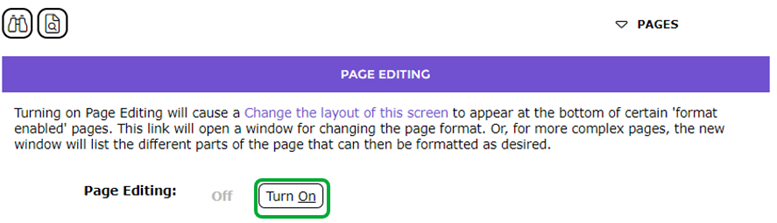
- The button will now read Turn Off.
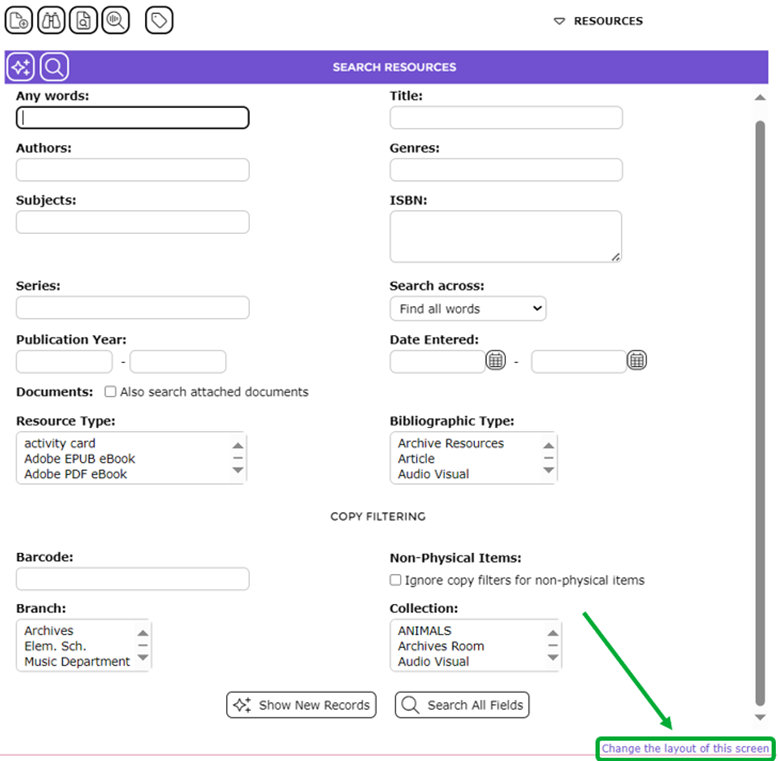
- Once the function is turned on the Change the layout of this screen link will display at the bottom of all page- editable screens. The following example is of the resource screen.

Access and Overview of a Pages Edit Screen
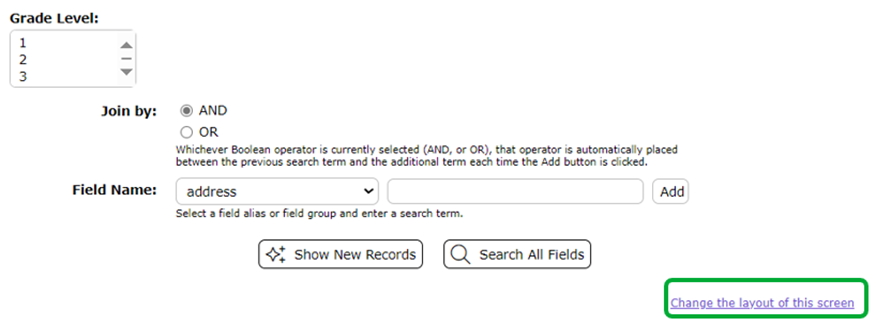
- Using a search checkouts as an example, click the Change the layout of this screen link located at the bottom of the screen.
- The Page Edit screen will display. The Page Edit screen, not the Page List screen, will display if you click on the Change layout…link from a resource screen as there is only one screen whose layout you can change.
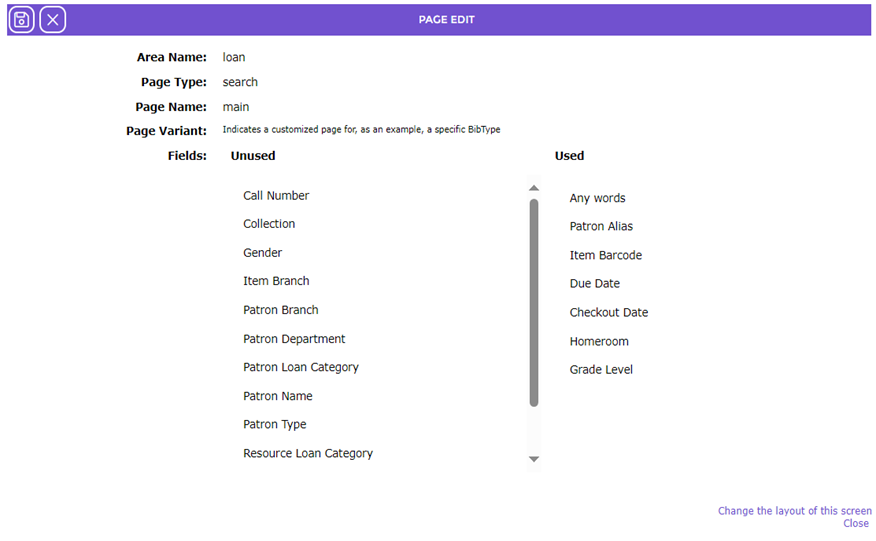

The table following contains a Name and Description of the fields in the Page Edit screen:
Field Name |
Description |
Area Name | The name displayed against this label indicates the name of the SQL table which relates to the screen from which the Page > Edit screen was accessed, in the above example, the Entity is loan.
|
Page Type | The name displayed against this label indicates the type of screen from which the Page > Edit screen was accessed, for example, the Edit screen.
|
Page Name | The name displayed against this label is a means for the system to ensure that the name of the page is unique.
|
Page Variant | The Page Variant field relates only to Cataloging and Patrons at present. Fields in the screens of either module are determined by the system depending on the User’s selection of, BibType in the case of Resources, and Patron Type in the case of Patrons. For example, a Bibtype of Serials will result in screens specific only to serials such as Component and Subscription becoming available. A Patron Type of Student will result in Homeroom and Year fields being included only on Add/Edit screens for applicable Patrons. |
Fields | There are two columns for this section. The fields listed in the left hand side column are those which currently are included on the screen from where the Page Edit screen was accessed. Any of the fields can be “removed” from the left hand side column to the right hand side column which will result in the field not displaying on the Add/Edit screen.
The fields in the right hand side column are those which are not currently included on the screen from the screen where the Page Edit screen was accessed. Any of those fields can be included if required by transferring them to the column on the left hand side. |

The Page List via the Page Detail Screen
If the User clicks the Change the layout of this screen link in either a Patron or a Resource Detail screen the Page List screen will first display as there is a possiblity that one of three screens could be subject to change:
- The Details screen
- The Related Resources screen
- The Copies screen (if the resource includes copies)

Access the Page List Screen
- Access the Details screen of a resource.
- Click on the Change the layout of this screen link.
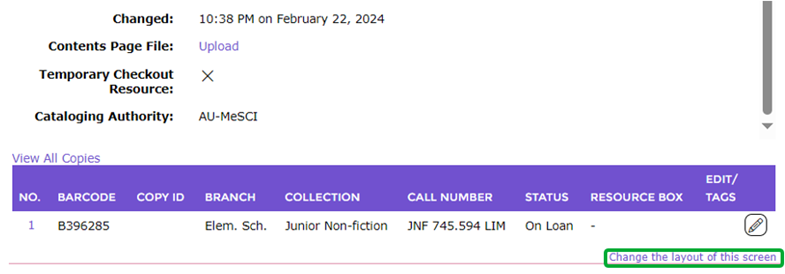
- The Page List screen will display.
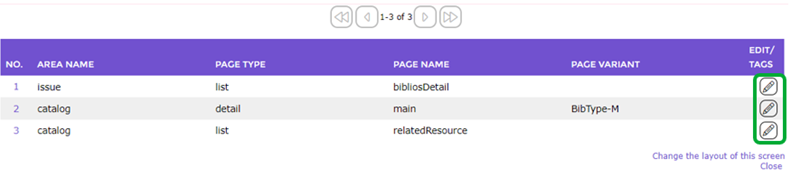
The Page List screen example above includes three Page (screen) Type options, the layout or which could be changed. The entity name of Issues for example, relates to Copies and it is only included in the Page List screen if there are copies tied to the Resource, from whose Detail screen, the Page List screen was accessed.
- Click on the corresponding Edit link to access the applicable screen you wish to add or remove a field from.
The following screen example identifies that the Edit link corresponding to the catalog/detail/main, was clicked.
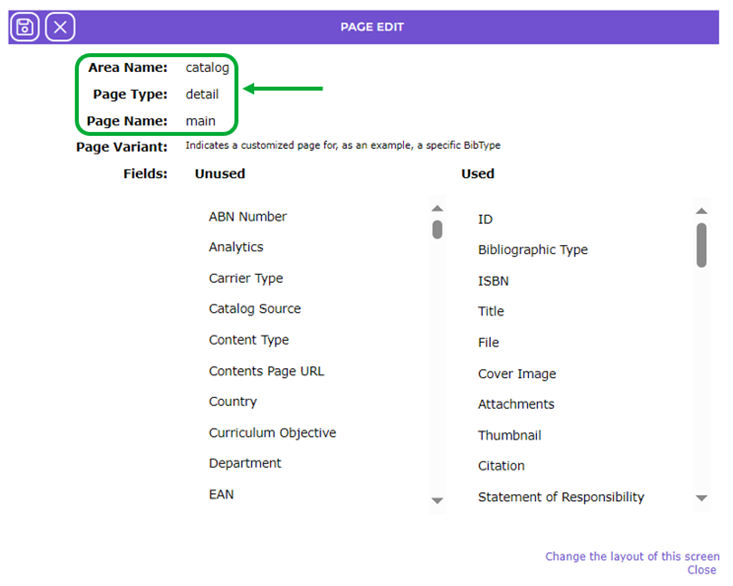
Change the Layout of a Screen
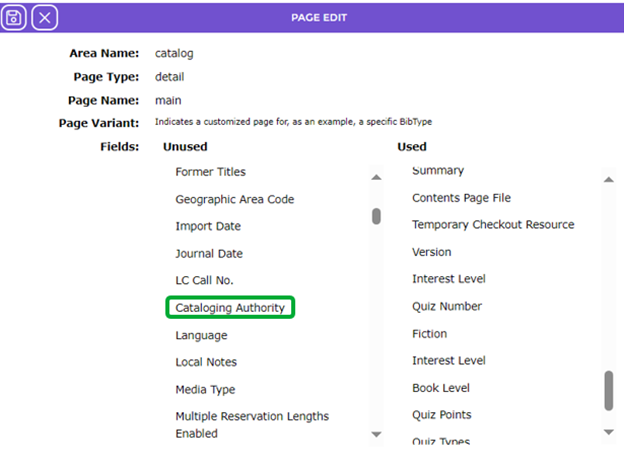
In screens which permit layout changes, fields can be included or removed and the fields within those screens can be repositioned. Users can perform a single add/edit/change or perform a number of add/edit/changes before saving the changes. In the following example the Cataloging Source field will be added to the Resource > Details screen, and its position adjusted (any fields transferred from the right hand side list-box to the left hand side list-box are automatically positioned at the bottom of the list of fields). In addition, the User Authority fields will be removed before saving the changes.
To include a field
- Access the Page Edit screen as explained earlier.
- Drag Catalog Authority from the right hand side column, then drop Catalog Authority in the left hand side column.
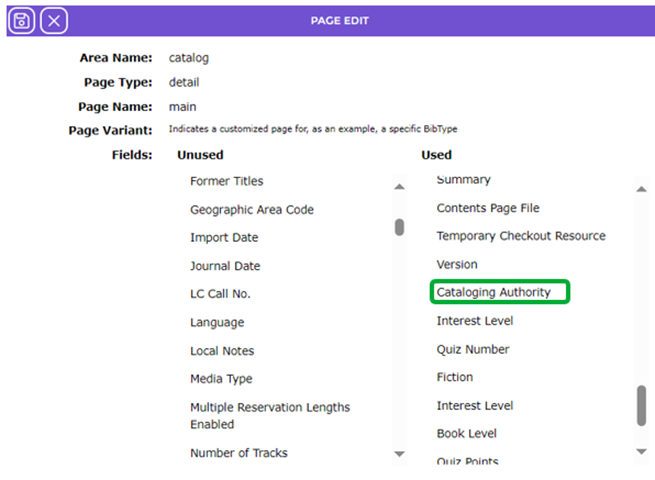
- The Cataloging Authority field will display in the left hand side column at the bottom of the list of fields. You may need to scroll down to confirm this.
More than one field can added to the screen and repositioned before saving by completing Steps 1-3.
To Re-Position a Field:
The fields in the Used list-box list in the order in which they appear in the Detail screen.
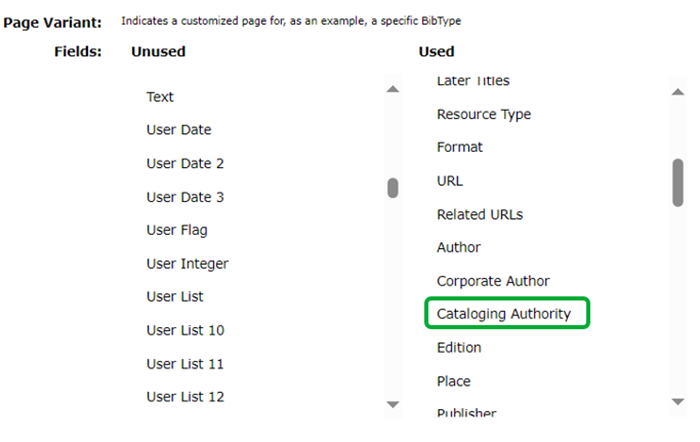
- Drag the field to be moved, for example Cataloging Authority and drop the field in the required position.
- The field has been moved up to a position directly below the Corporate Author field.
- If there are no other changes to be made such as adding, hiding or re-positioning other fields, do so before clicking the Save button.

Was this article helpful?
That’s Great!
Thank you for your feedback
Sorry! We couldn't be helpful
Thank you for your feedback
Feedback sent
We appreciate your effort and will try to fix the article