Step 1: Set up the sites
- Set up a “Classroom Resources” Branch in each site.
- Set up Collections for each classroom library with the format Grade Level – Teacher Name.
Step 2: Gather information from the classroom teachers
- Use the CL Template (attached) to record the title and copy information for each classroom library.
- Double check that the ISBNs are formatted properly - you may need to change the number format to ensure that all digits are showing.
- Save the template as a CSV file before importing.
Step 3: Import the records into each site
- Navigate to Management > Import, and select "CSV Data Sync"
- Select Import Type : Resource
- Choose file (be sure template is saved as CSV!)
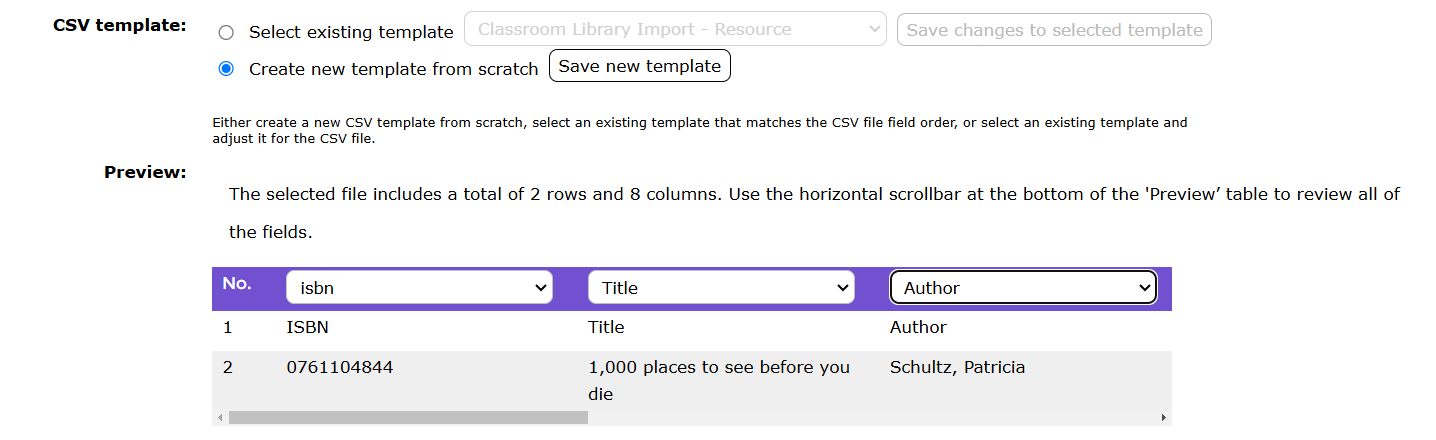
- If this is the first Classroom import, select the appropriate field to match each column under the Preview. Then, press "Save new template" and name it "Classroom library import". You can select this template to use in the future.
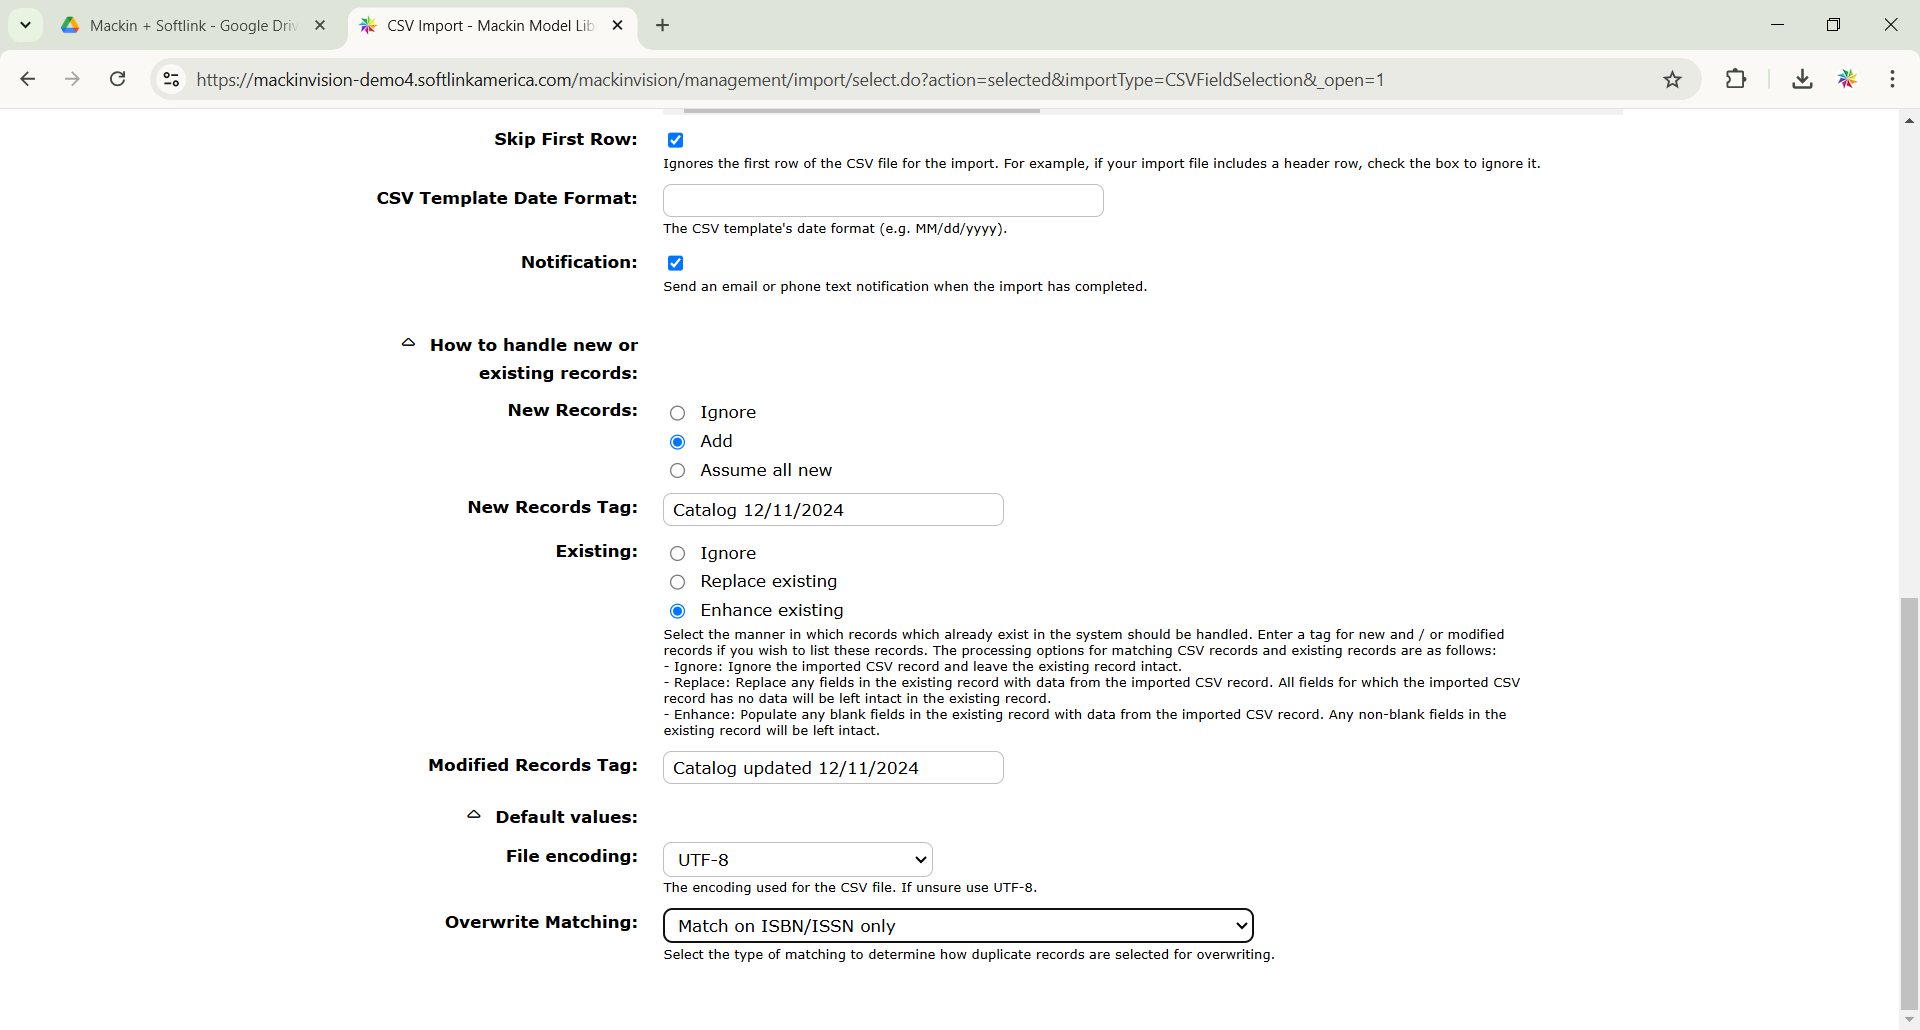
5. Adjust your settings to match the image below. Then, press the Import  button.
6. Check the Import Job Details to confirm the number of updated versus new records.
Step 4: Update records in BestMARC and re-Import
1. View new records (brief records created in the import) by clicking the "Tag Search" button.

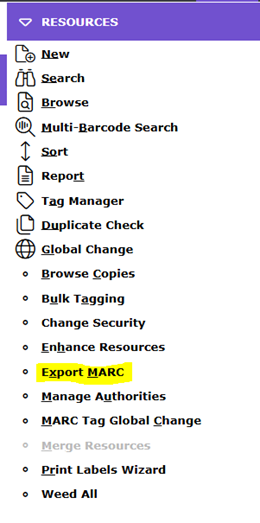
2. Then, select the "Export MARC" option from the Resources drop-down menu. Upload to BestMARC to make changes as needed.
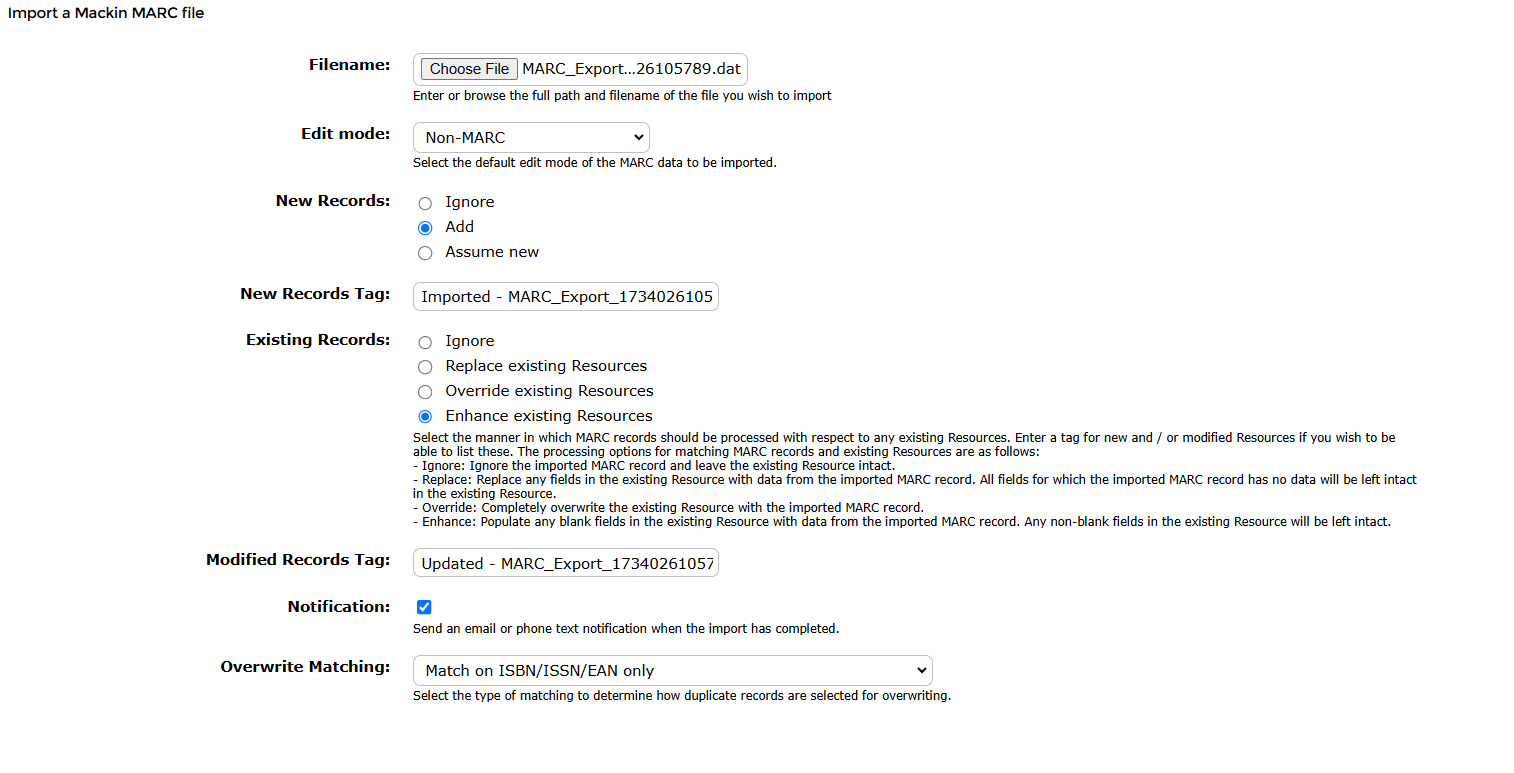
- Import the updated records from BestMARC back into MackinVision. Navigate to Management > Import and select "Mackin MARC".
- Choose file. Adjust your settings to match the image below, then press the Import
 button. (Update: In the Overwrite Matching field, choose "Match on ISBN/ISSN/EAN; otherwise Title and Author")
Was this article helpful?
That’s Great!
Thank you for your feedback
Sorry! We couldn't be helpful
Thank you for your feedback
Feedback sent
We appreciate your effort and will try to fix the article