Overview
Two new features have been added to MackinVision to make it easier to add or remove Tags from records.
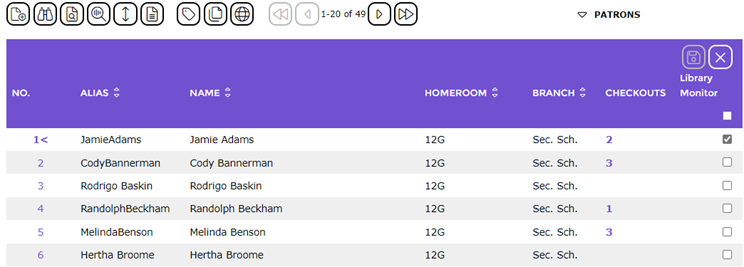
- A Select All check-box has been added to the Tag editing screen. This allows you to select or unselect all the check-boxes displayed on the current screen with a single click;
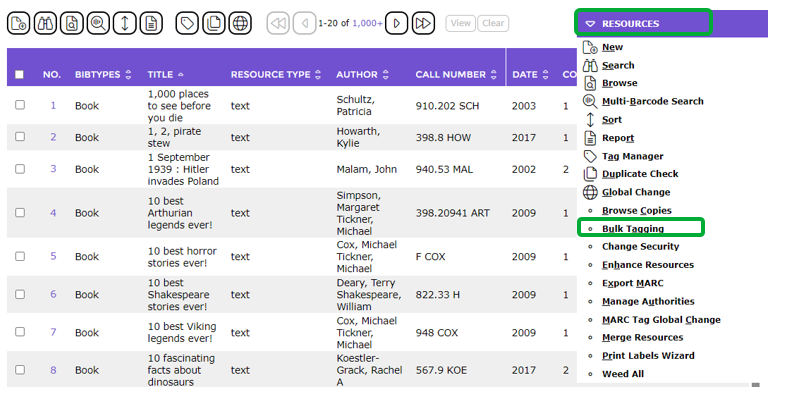
2. Bulk Tagging is a new option added to the Cataloging > Resources > List screen function menu. Bulk Tagging allows a Tag to be added to, or removed from, all the Resources in a list of Resources even if there are thousands of records to be changed. The change is not applied immediately but will be performed during the Housekeeping overnight.
Select All
The option to Select All is available on any screen where Tag Editing is permitted. In this example, the Circulation > Patron screen will be used but the option works the same on any Tagging screen.
In this example, the new Select All option of Tag Editing will be used to add the Tag ‘Library Monitor’ to all Patrons in Homeroom 12G.
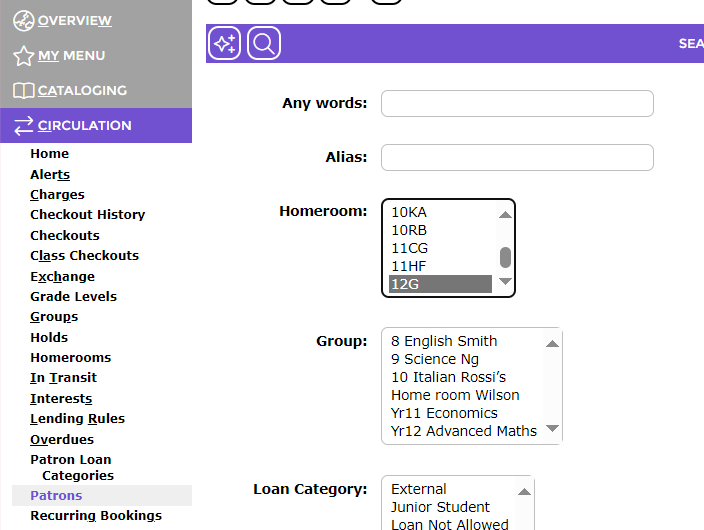
- Navigate to Circulation > Patrons and perform a search for the Patrons you wish to Tag, for example, Homeroom = ‘12G’.
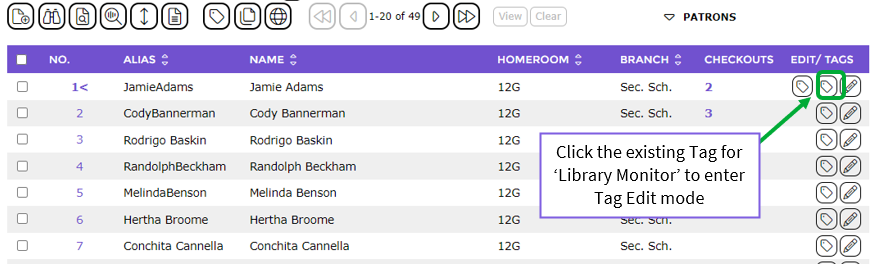
2. A list of the Patrons in Homeroom 12G will be displayed. One of the Patrons already has the Tag ‘Library Monitor’. Click the existing Tag icon  to enter Tag Edit mode.
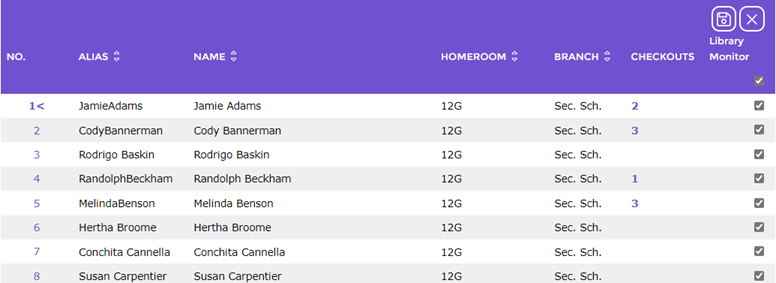
3. Click the Select / Unselect All checkbox to check all the Tag checkboxes on this page.
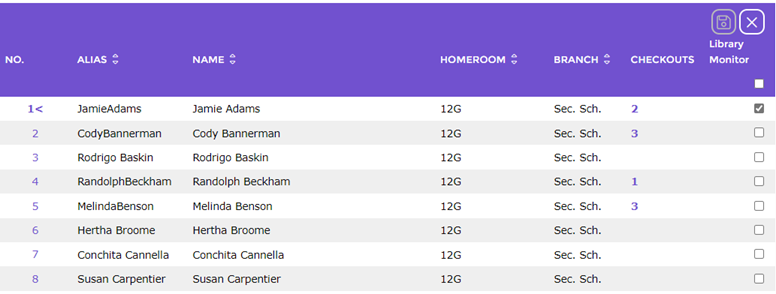
4. All the checkboxes on this page will be ticked. Click the Save icon  to save the changes to the Tags on this page.
5. If there is more than one page to the list:
- Click the
 icon to move to the next page;
 - Click the Select All check box to select all checkboxes on this page;
- Click the Save icon
 to save the changes made.
6. When all Tag editing has been completed, click the Exit icon  to terminate Tag Edit mode.
Bulk Tag Resources
Bulk Tagging allows a Tag to be added to, or removed from, all the Resources in a list even if there are thousands of Records to be changed. The change is not applied immediately but will be performed during the Housekeeping overnight.
You can queue more than one Bulk Tagging and each will be processed in order during Housekeeping.
If a very large number of Bulk Tags have been queued and not all can be processed during the time allotted to Housekeeping on the first night, the remainder will be processed during following Housekeepings until all the Bulk Tags have all been completed.
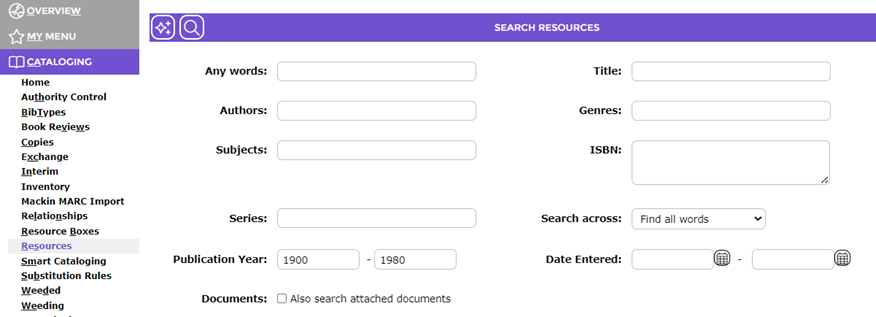
In this example, a search will be performed for resources with a Publication Year of 1980 or earlier and Bulk Tagging used to assign a Tag named ‘Old Resources’ to the 110 Resources returned by the search.
- Navigate to Cataloging > Resources and perform a search for Resources with a Publication Year between 1900 and 1980. Note: If the starting Publication Year was left blank, resources with no Publication Year specified would be included in the results.
2. A list of the ‘old’ Resources will be displayed. In this example, there are 110 Resources in the results list. Assigning a Tag to such a large number of Resources would have been a very time consuming process without Bulk Tagging.
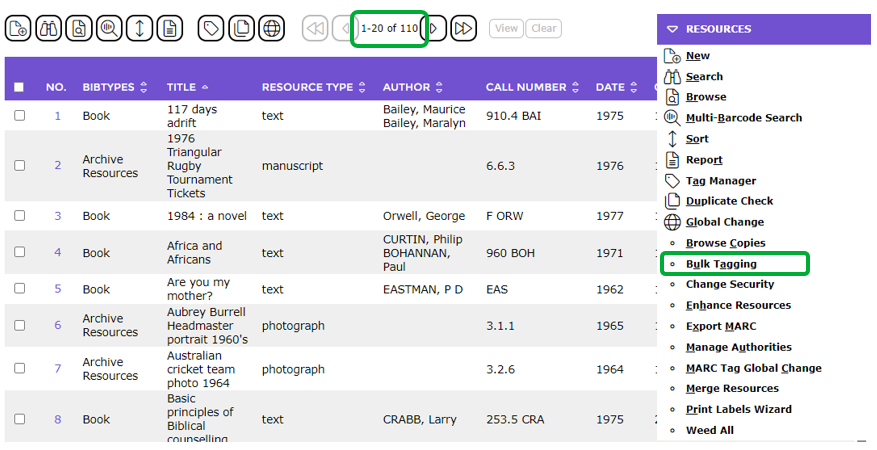
3. From the RESOURCES function menu, select Bulk Tagging. The BULK TAGGING popup window will be displayed.
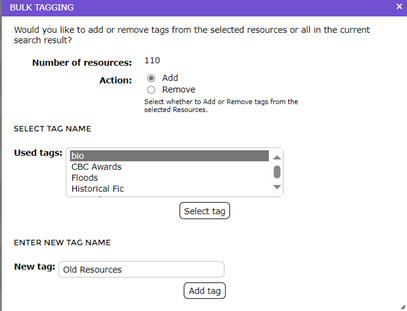
The default Action is to Add a Tag to the resources in the list.
Note: You can also Remove a tag by selecting the Action: Remove.
4. Specify the name of the Tag to Add or Remove by either:
- Selecting an existing Tag name from the SELECT TAG NAME section then and clicking the
 button; or
 - Entering a new Tag name in the ENTER NEW TAG NAME section and then clicking the
 button.
In this example, a new Tag name ‘Old Resources’ has been entered and the  button was clicked.
5. The message will be displayed at the top of the screen.

6. The Bulk Tagging will not occur immediately. It will be performed overnight as part of the Housekeeping. The job is scheduled outside normal library hours to prevent a resource intensive task like this from slowing the performance of MackinVision for all users.
Was this article helpful?
That’s Great!
Thank you for your feedback
Sorry! We couldn't be helpful
Thank you for your feedback
Feedback sent
We appreciate your effort and will try to fix the article