Summary
At least one branch must be added to the system, as it is a mandatory field on copy records added to the catalog.
This guide will provide an explanation of the applicable Parameter settings and the steps required to create a branch.
A separate guide provides the steps required to create Cataloging Groups for those libraries whose registration includes the feature.
Related Parameters
Parameters are accessed via the Management menu option on the main MackinVision Management screen and
should be completed by a staff member with the applicable User Privileges. A fuller explanation of how to edit parameter settings is provided in the Parameters guide.
Parameter No. 1011 - Branch Specific Opening Times. This parameter requires a Yes/No response.

The setting determines whether:
- Opening hours are subsequently entered against Parameter Nos. 1500-1506, which will then apply across all branches
Or
- The times for individual branches are different in which case the times are entered on each branch’s Detail record screen.
Choose No if the same opening hours apply to all of your branches. In this instance Parameters 1500-1506 will need to be completed.
Choose Yes if different opening hours apply to the libraries in your system. In this instance you would enter the times in the Branches > Add screen.
Add a Branch
The Branch Details screen comprises a significant number of fields not all of which are mandatory to complete. For example, if the opening hours are system wide, the Open hours fields in the screen do not require completion as they are set in Parameters. If the Cataloging Groups option is not included in your registration, then the corresponding field does not need to be completed. If In Transit functionality is not activated, the Hold Fulfillment Branches section does not need to be completed.
- Navigate to System > Branches.
- Click the New icon , select New from the Function menu, or type ne.

- The Add a new Branch popup screen will display.
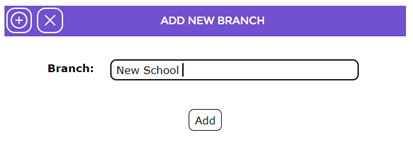
- Enter the name of the branch and click the Add button.
- The Branch Details screen will display.
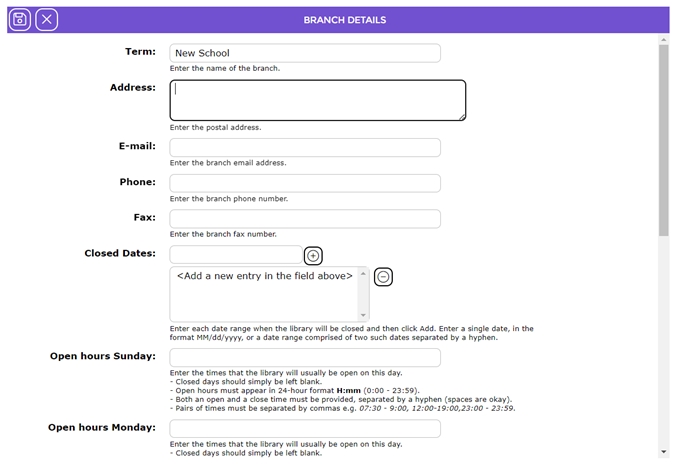
- The branch name entered in the popup screen displays in the Term field by default.
The following table provides the name and description of fields, preceding the Open Hours fields, in the Branch Details screen:
Field |
Description |
Address | Enter the postal address details for the branch in this text box.
|
Enter the email of the branch in this field. If the branch does not have its own email address enter the generic library email address.
| |
Phone | Enter the branch’s telephone number in this field.
|
Fax | If the library has a fax machine, enter the number in this field.
|
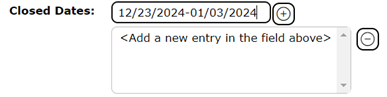
Closed Dates | Dates throughout the year when the library will not be open, such as Public and Bank holidays, are entered in the Closed Dates field.
For single dates, type the date in mm/dd/yyyy format, for example, 02/01/2024 then click the Add button. The date will be added to the list.
For date ranges, type in the Start and End dates separated by a hyphen, for example, 12/25/2024-12/26/2024 and then click the Add button.
Repeat the process for as many dates as are applicable. To remove a date highlight it and click the Remove button.
Note: Closed dates need to be edited on a yearly basis as some Bank or Public holiday dates such as Thanksgiving are subject to change.
|
Branch Opening Times
Branch opening hours can be set for individual libraries or applied as system wide depending on your requirements. A parameter enables you to apply the option required. If the libraries’ hours are the same, the open hours are added via parameters. For those library systems with branches operating on different opening hours, the hours are added as part of the process of creating each branch.
Open and closed times should be entered using the 24-hour clock format.
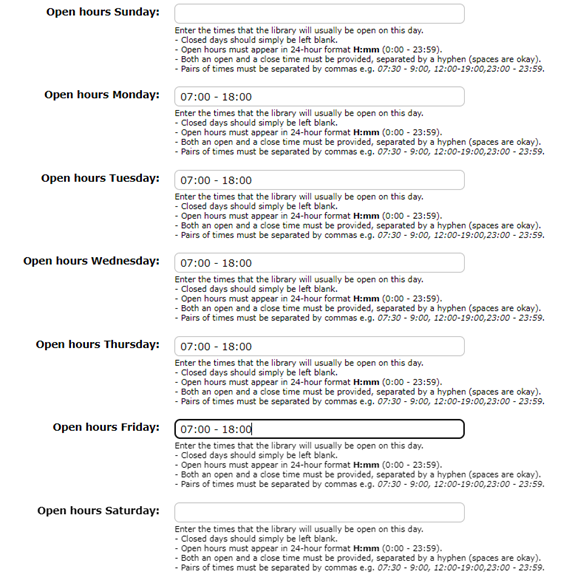
The Help text beneath each Open hours field provides information on the format required for the entry of applicable times. For day(s) that the library is closed, the corresponding field should be left blank.
Complete the following fields on the Details screen if they are applicable:
Field |
Description |
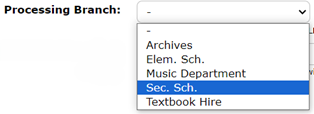
Processing Branch | If there is a designated ILL requests processing branch, select that Branch from this field’s drop-down list.
It is not mandatory to complete this field.
|
Cataloging Group | Cataloging Group is a registration controlled optional extra. If the library’s registration includes Cataloging Group functionality, select the applicable code from the field’s drop-down list. A brief explanation of this feature is provided at the end of this guide.
It is not mandatory to complete this field.
|
Hold Fulfillment Branches | See the Hold Fulfillment Branches Field section for a fuller explanation of this section.
If In Transit/Stock Rotation is not implemented for your library, the section does not need to be completed.
|
Color Themes
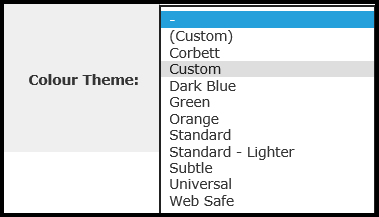
| You can customize the branch’s theme. To do so click on the down arrow of the Color Themes field and click on your preferred theme.
Note: the selection will apply to all of the systems for the branch not just the Search interface.
A branch Logo and Banner can also be added for the branch. This is done on Detail screen via the Upload links displayed in the Logo and Banner File fields. |
Hold Fulfillment Branches Section
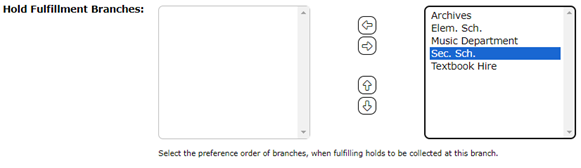
If the library has enabled the In Transit and/or Stock Rotation functionality, complete this section. This ensures the system will email, in a specified order, libraries in the system identified as having a copy of the reserved title available. The staff at the applicable branches that are there can then check the shelves for the copy and send it to the hold’s Pickup Branch.
- In the right-hand side list box highlight the branch that is to be the first to be sent an email if it has a currently available item, required by another branch, to fulfill a hold or reservation.
- Click on the left facing Arrow button to move the branch into the left-hand side list-box.
- Repeat the process for the next branch to receive an email if the first Branch either does not respond or marks their copy as unavailable.
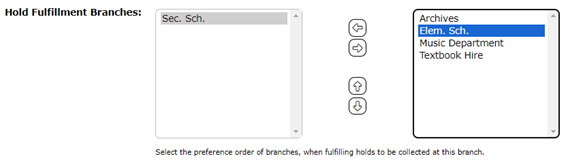
 When all branches have been selected and all details completed on the Branches > Edit screen,
click the Save button.
Cataloging Group Field
Cataloging Group functionality is a registration controlled optional extra. This functionality enables the identification of campus, country, branch, office, or section if call numbers differ depending on the place of cataloging. For example, organizations or offices may be part of a global group, and their location uses a different call number system or use an element in the call number as a means to identify the physical location of their resources.
If your registration includes this function, the Cataloging Group field will display. Click on the down arrow at the end of the field and select the applicable group.
Was this article helpful?
That’s Great!
Thank you for your feedback
Sorry! We couldn't be helpful
Thank you for your feedback
Feedback sent
We appreciate your effort and will try to fix the article