Summary
While any charges or fines relating to a patron can be viewed via the patron record payment, editing, and canceling charges can only be done via the Circulation Desk.
This guide will provide the steps required to pay a fine via the Circulation Desk. The same process applies to other charges.
Related Parameters
There are three parameters that relate to receipts:
Parameter No.3015 - Receipt Format. This parameter contains only one option, Client Receipt, which is selected by default.

Parameter No.5010 Receipt Sequence Last Number - This parameter stores the last receipt number that was printed. The initial value is 0, and it is automatically updated as each receipt is generated. If required, this parameter could be reset to 0 at the beginning of each new year or financial period.

Parameter No.5009 Receipt Sequence Date Format - This parameter determines the date and time format that is printed after the receipt number. The default value of yyyy displays the current year. Other date and time formatting options include MM/dd/yyyy hh:mm:ss.

Patron Record with Current Charges
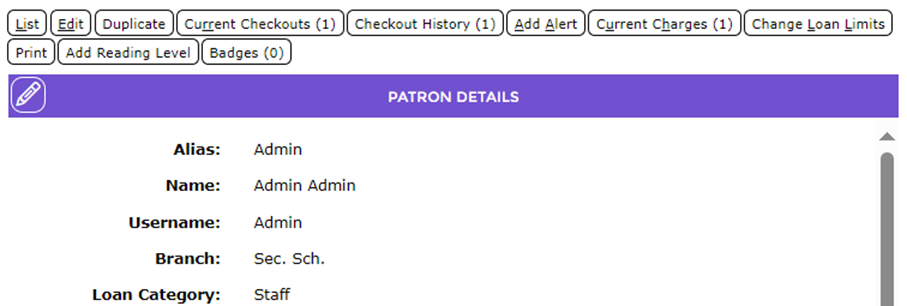
If a patron has incurred any fines of charges a Current Charges (x) button will on the Detail screen of their record. The number in brackets will identify how many fines/charges they have incurred.
Pay a Fine
1. Scan in or manually enter the patron barcode into the Circulation Desk.
2. Click on the Charge tab to view any charges on the patron’s record.
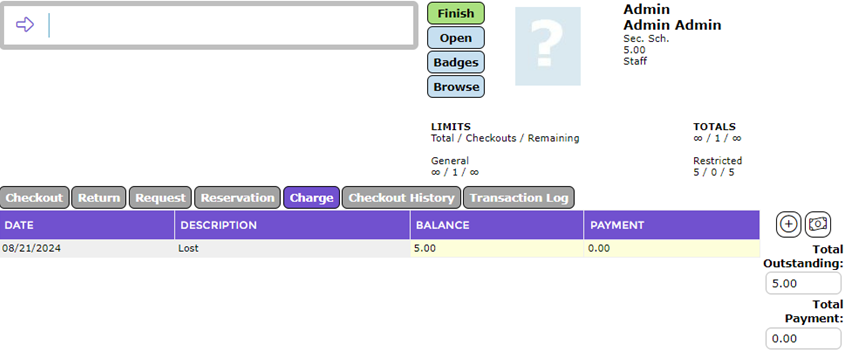
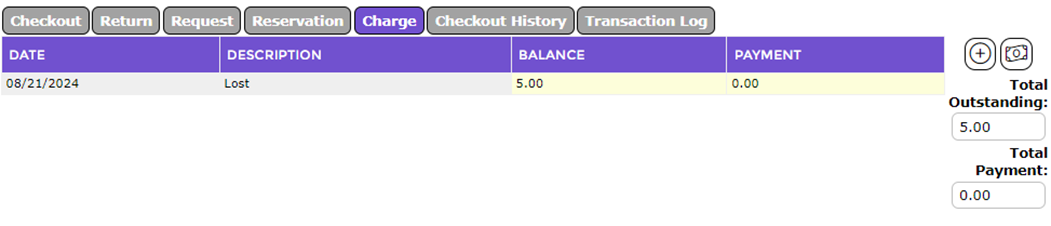
3. A line for each charge amount and the item to which the charge applies displays in the tab. There is also a total amount of all charges current for the patron
4. Click on the Pay icon 
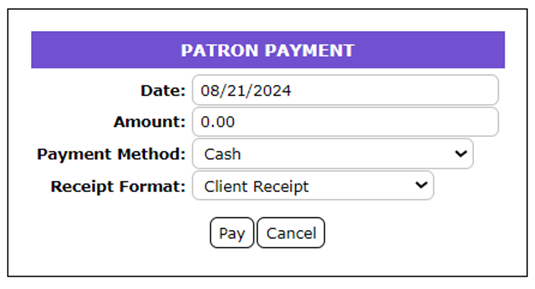
5. The Patron Payment popup screen will display.
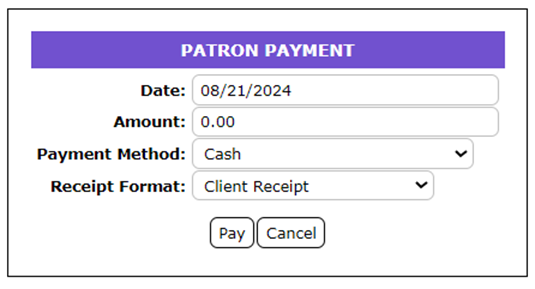
6. The date field contains “today’s” date by default.
7. By default 0.00 displays in the Amount field. Click in the field and enter the amount to be paid.
Note: The whole amount does not need to be entered if it is policy that you permit a debt to be paid off in installments.
8. Click on the down arrow at the end of the Payment Method if the default of Cash is not the required option.
9. The default selection of Client Receipt in the Receipt Option field is the only option available.
10. Click the Pay button to proceed with the payment.
11. The charge will be removed from the tab (and the patron record) and a Print message with a Check icon displays.
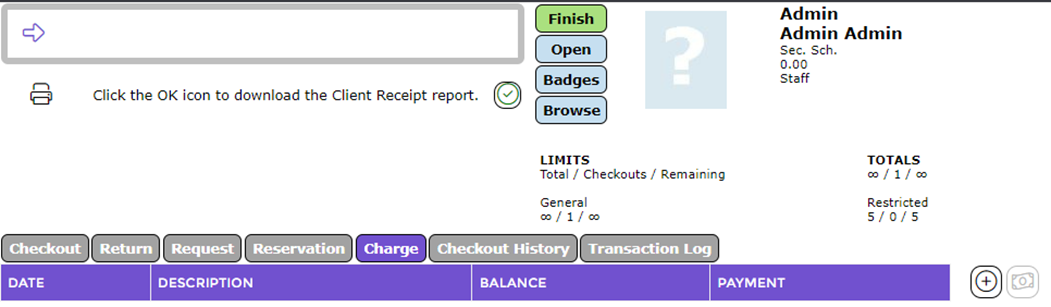
12. Click on the Check icon to download and print the receipt.
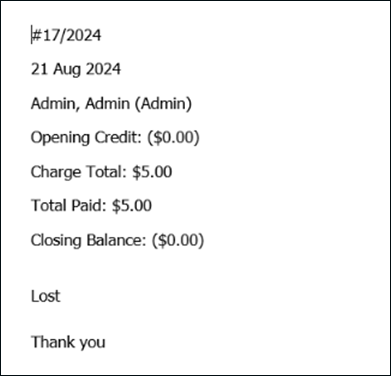
Receipt Report Example
The receipt information includes the receipt date, patron name and alias, charge total, GST amount, total paid and closing balance. It also identifies the title to which the charge applied.
Was this article helpful?
That’s Great!
Thank you for your feedback
Sorry! We couldn't be helpful
Thank you for your feedback
Feedback sent
We appreciate your effort and will try to fix the article