MackinVision provides the option to create up to 7 customized authority files. These types of authority files are called UserAuthority. This feature is especially useful for libraries in which material with terminology specific to the organization is cataloged so that staff can standardize the entry of their own unique authority terms.
This guide provides a brief overview on custom authorities and the steps required to create a customize authority file and add a term to that file. There are separate guides available that explain the process to add authority terms to the standard authority control files and importing files of Library of Congress (LoC) authority terms.
Overview
Libraries may have assets, resources or locations which use specific, unique terms that do not conform to the standard LoC MARC authorities, for example, Author, Subject or Series. This feature allows staff to create up to 7 specific authority control files, in which to add their own authority terms, to ensure the standardization of those unique “authorities”. The screen example below shows that one custom authority file (called UserAuthority2 in the system) has been created and is available to enter new terms to, search for and/or edit any existing terms.
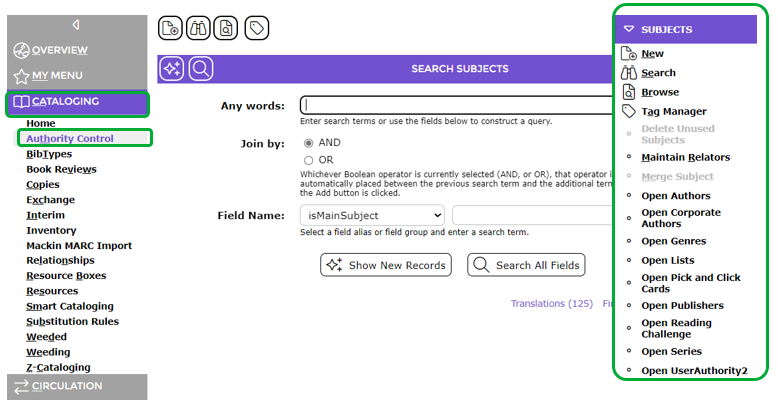
A scope note and notes can be added to any custom authority term record in the custom authority control file however, the options to add ‘See”, ‘See Also’, ‘Preferred’ and ‘non-Preferred’ terms are only available if the applicable Relator parameter is turned on for each custom authority. It is not mandatory to include relators. Customized authorities are indexed in the same manner as standard authority terms. This means that users can search on custom authority terms in the same way they would for standardized terms in either the Management area of the system or the Search interface.
User Authorities can be added to Resource Add and Edit screens of any resources included in the catalog that also include existing standard LoC authority terms.
The search options of Contains, Verified, and In Use are available when adding existing authority terms to a record while the option to add a new custom authority term in the same way as adding LoC terms on the Add/Edit screen is also available.
Add a User Authority Control File
If you wish to use Custom Authority Files, you must complete all or some of Parameter Nos. 2014 – 2027 depending on how many of the custom files and associated Relators you wish to create for use.
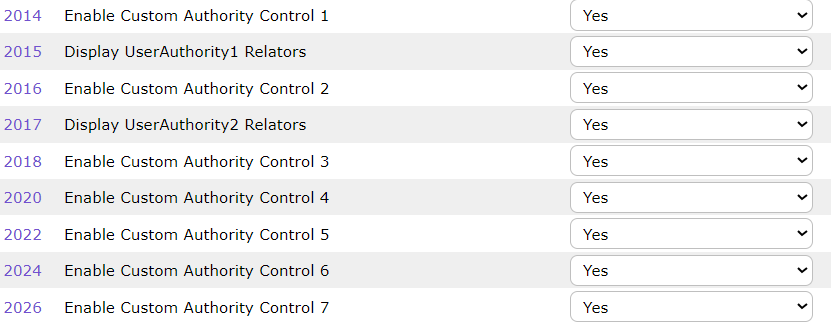
- Navigate to Management > Parameters and enter 2014 in the search field.
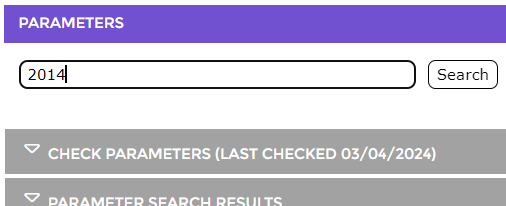
2. Click the Search button and the Resources section that includes Parameter Nos. 2014 – 2027 will display.
3. Click on the Edit button to activate the parameters for completion.
4. A Save and Cancel button will replace the Edit button. 
5. Scroll down to locate the parameters required.
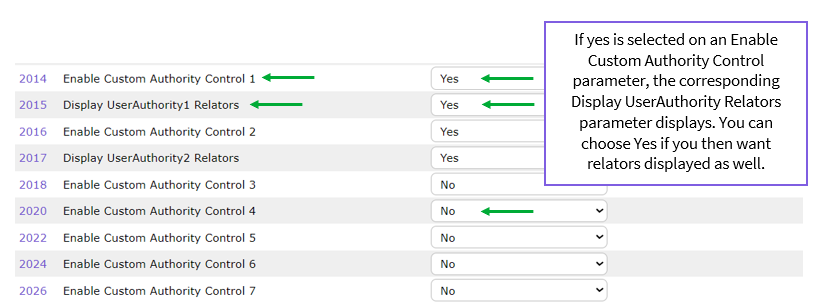
6. Click on the down arrow at the end of Parameter No. 2014 Enable Custom Authority Control 1 and choose Yes.
7. Select Yes on any other Custom Authority parameters required. If you only want three Custom Authority files then choose Yes on Parameter Nos. 2016 and 2018 only.
8. Click on the Save button. Then click on the Edit button again and the UserAuthority Relators parameters, associated with any of the Custom Authority Control parameters on which Yes was selected, will display.
TIP: Relators specify the relationship of an authority term for a single resource records. A common example would be an author who has also provided illustrations for their work. Although Relator terms can be set up for all of the Authority Control lists, the default relator terms are only for the Author and Corporate Author Lists. |
9. Click on the down arrow at the end of UserAuthority Relator parameter field and choose Yes if you want to display the relators as well.
10. When all the parameters for the number of custom authorities, you wish to create, have been completed click the Save button. 
TIP: If you have selected Yes on any/all of the User Authority and Relator parameters and you want the relators to display on the Search interface you will need to choose Yes on the applicable parameters in the Search > Display Options section in the Parameters screen. They are Parameter Nos.4212-4218.
Note that if, for example, only three of the User Authority Relator parameters are turned on, only two of the Display UserAuthority Relators parameters will be available to edit.
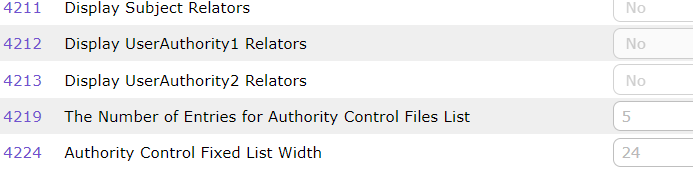
You can access the section by typing 4212 in the field at the top of the Parameter screen and clicking the Search button. |
NOTE: Custom Authority Files can be renamed via the System > Translations function.
Add a Term to a Custom Authority File (UserAuthority)
- Navigate to Cataloging > Authority Control. The Search Subjects screen will display.
- Hover over the Subjects menu in either the Search or the List screen and click on, for example, UserAuthority2.
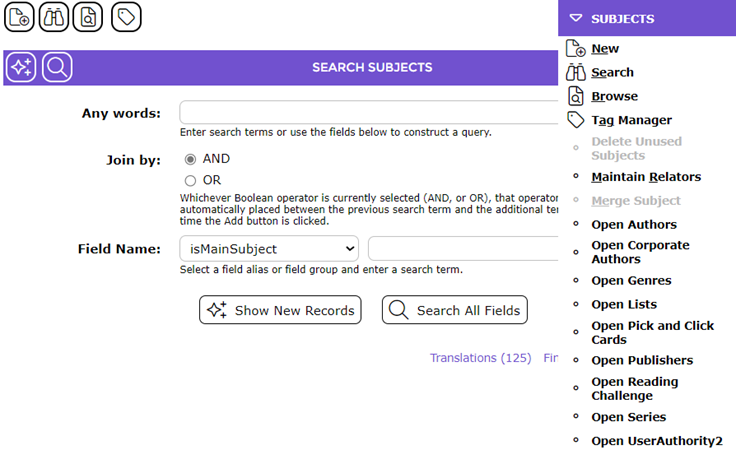
3. The UserAuthority2 > List screen will display.
4. Click on the New icon, select New from the User Authority File 2 menu, or type ne.

5. The Enter a new Lead term popup screen will display.
6. Enter the term you want included in the custom authority file and click the Add button.
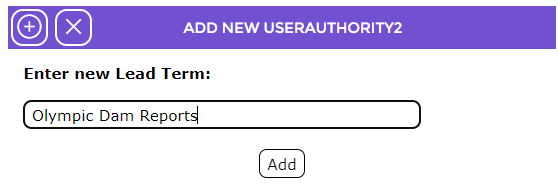
7. The Add screen will display.
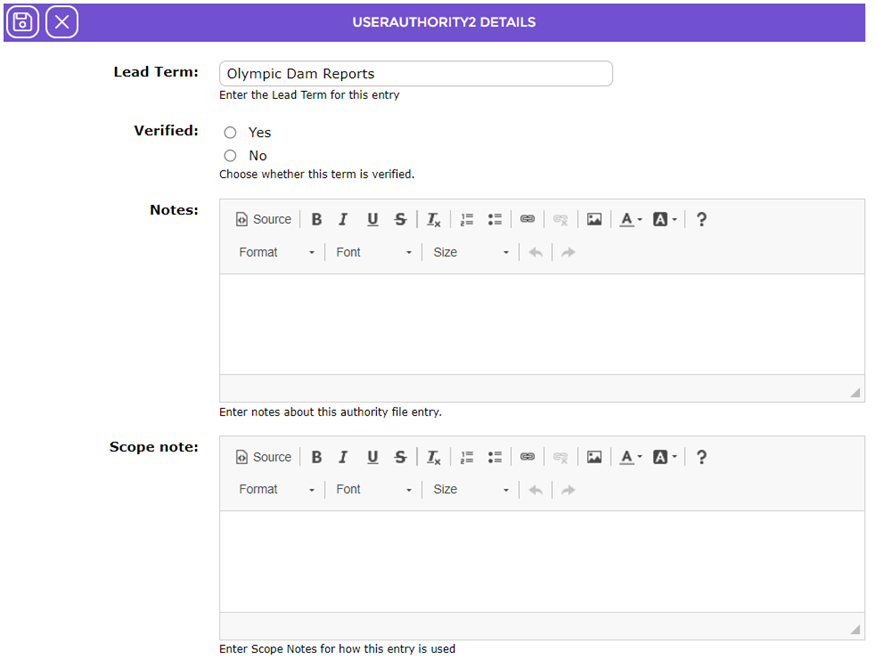
8. The term entered in the previous popup screen will display in the Lead Term field.
9. To verify the term, click in the Yes radio button. It is recommended that you do, as Verified is a search option available in the Resource Add/Edit screen. It enables users to restrict the user authority terms that will display, in the prediction list, when adding user authority terms to a resource.
10. If you wish to add a note, enter it in the Notes field. The text box includes Rich Text Format (RTF) tools that you can use to format the text of the note you enter. This is not a mandatory field.
11. If you wish, enter the text in the Scope note field. The text box is RTF enabled which enables users to format the text of the note entered. This is not a mandatory field.
12. When all the details have been completed, click on the Save button. 
13. The Detail Screen will display
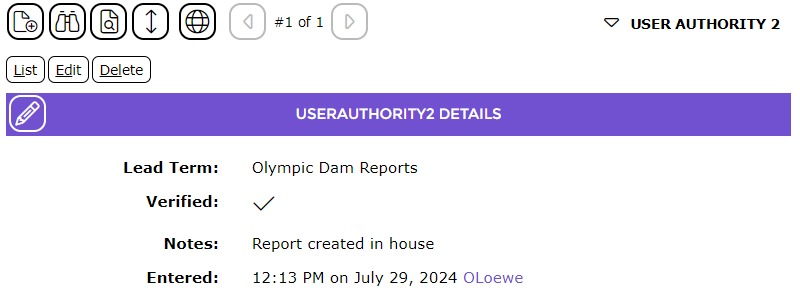
As the term is newly created, a Usage button does not display. Once the term is added to a record, a usage button with a number in brackets will become available. The number indicates how many records include the term.
Add and Verify a New UserAuthority Term via the Resource Add/Edit Screen
You can also add a new custom term in the applicable userAuthority field via the Resource Add/Edit screen. The following step will add a new custom term to an existing record.
- Navigate to Cataloging > Resources > Search.
- Complete a search for the resource required.
- In the resulting List screen click on the Edit icon, corresponding to the resource, to which a new custom authority term is to be added.

4. The Edit screen will display.
5. Scroll to locate the applicable UserAuthority field, for example, UserAuthority3
6. Enter the term, for example storytime then click on the Create a New Authority Control Entry button that displays when you enter a term that does not currently exist in that UserAuthority file.

7. The term displays in a list-box below the entry field.
8. To verify the term, click on term icon and then the Edit button next to the list-box.
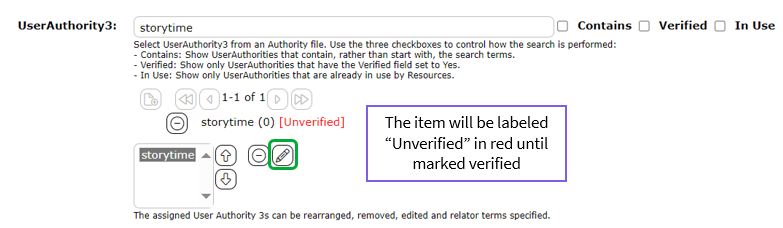
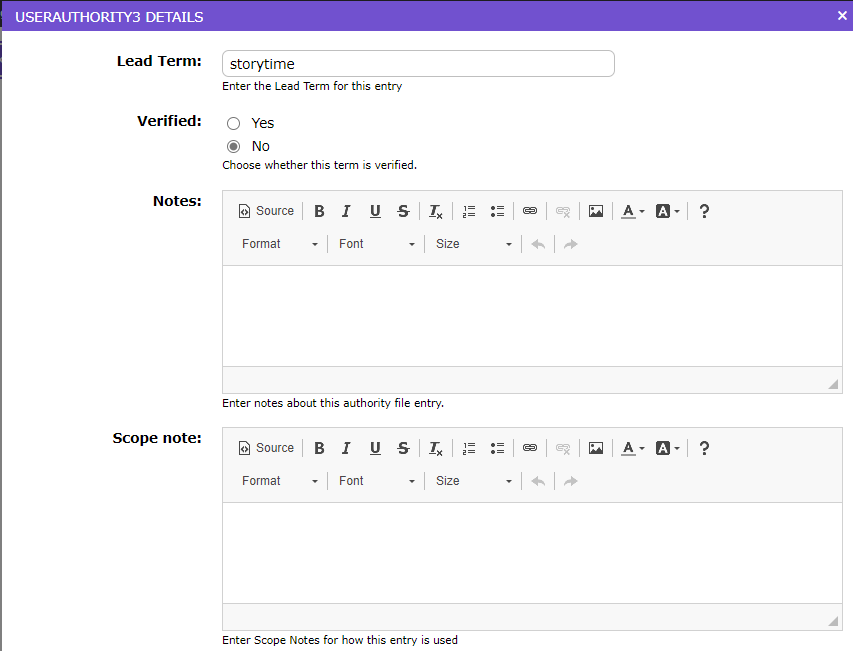
9. The Edit UserAuthority3 popup screen will display.
10. Click in the radio button next to Yes in the Verified field.
11. Enter notes in either or both the Notes and Scope Notes field if applicable and click the Save button.
12. You will be returned to the Resource Edit screen.
13. Click the Save button at the top left hand corner of the Resource Edit screen. 
You can search for newly add terms via the applicable UserAuthority, in this case UserAuthority3, in Cataloging > Authority Control.
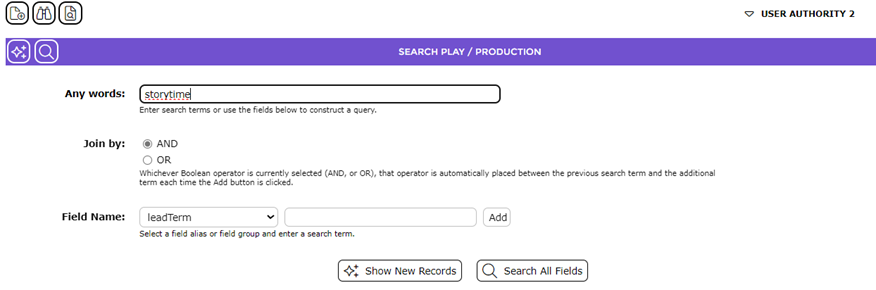
It will display in the List screen.
Note that the term chosen includes the value of 1 in the corresponding cell of the Usage column as it was created directly on a resource Edit screen.
Terms created via a UserAuthority Add screen, will not include a value in the corresponding cell of the Usage column until they are added to a resource record via the Resource Edit screen.
Was this article helpful?
That’s Great!
Thank you for your feedback
Sorry! We couldn't be helpful
Thank you for your feedback
Feedback sent
We appreciate your effort and will try to fix the article