Summary
The default checkout limits that apply to patrons are based on those set in Lending Rules for their Patron Type. However, the default Checkout Limits can be changed on a per Patron basis, if library policy permits.
This guide provides the steps to change the Checkout Limits on an individual patron record. Separate guides provide the steps required to complete patron searches and steps to set up Lending Rules.
Lending Rules
The established Lending Rules determine the types and number of checkout items and length of time items can be loaned to patrons according to their Patron Loan Category (PLC). This ensures that all Patrons with the same PLC, for example, Student, will have the same lending rules applied. However, the Change Checkout Limits option, available on individual patron records, provides flexibility for authorized staff to establish exceptions for one or more patrons. The checkout limits can be changed back at a later date, if applicable, to follow the default rules.
Related Required User Privilege Operation
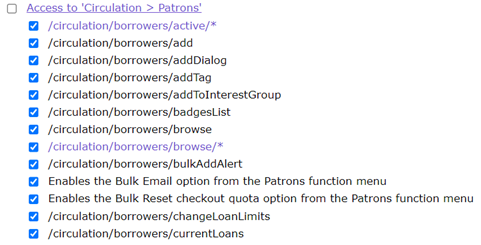
Only library staff with the circulation/patrons/changeLoanLimits User Privilege activated can change the checkout limits on individual patron records.
Change a Patron’s Checkout Limits
- Navigate to Circulation > Patrons and search for the required patron record.
- In the results List screen click on the number link corresponding to that patron, for example, 4.

- The Patron Details screen will display.
- Click on the Change Loan Limits button.
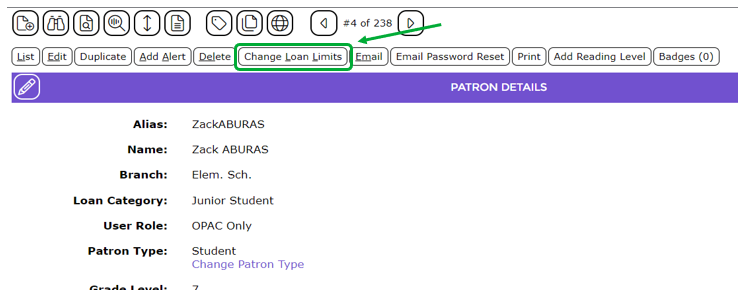
Note: This button will not display for logged in staff who do not have permission to change the checkout limits for any patron.
5. The Change Checkout Limits popup screen will display.
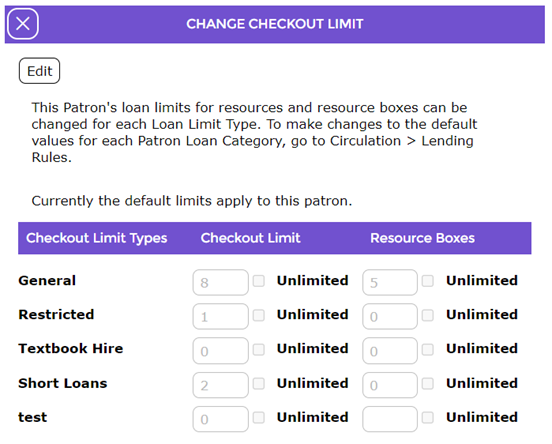
- The established lending rules limits that apply by default will be included in the box next to each limit type. In the above screen example, a checkout limit of 8 is entered in the field next to General.
- Click the Edit button to activate the screen.
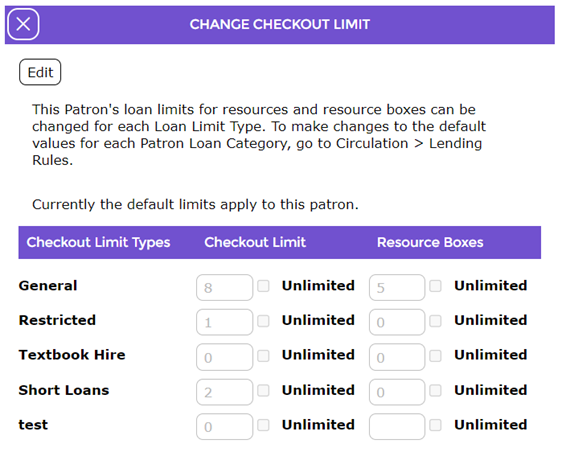
- A Save and Cancel button will display on the activated screen.
- Highlight the checkout limit number to be changed then enter the new limit, for example, 10 then click the Save button.
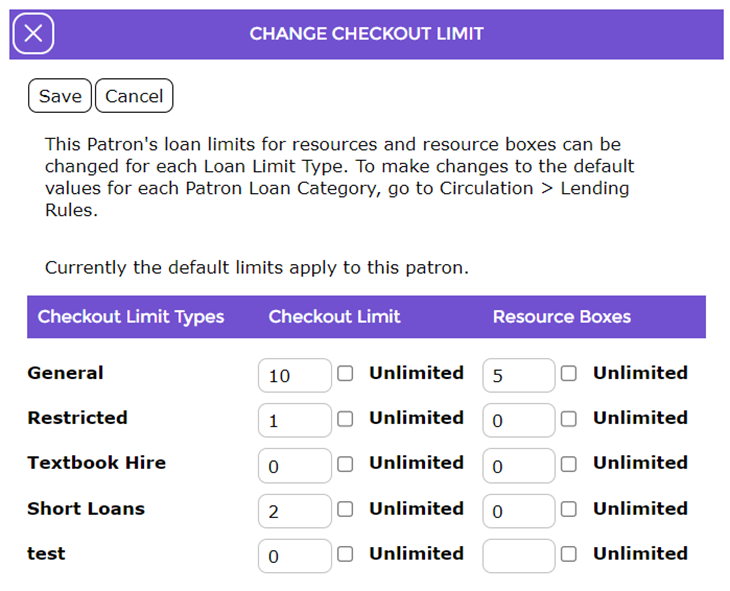
- The new limit will apply to this patron only.
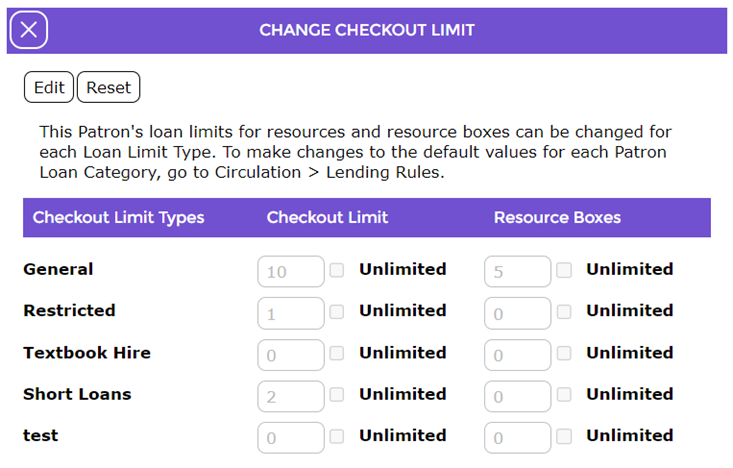
- The screen will refresh (note that the screen now includes a Reset button).
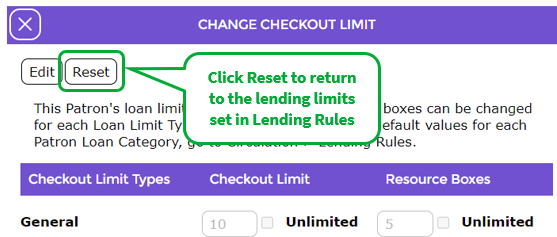
- To exit click on the ‘X’ in the top left-hand corner of the popup screen.
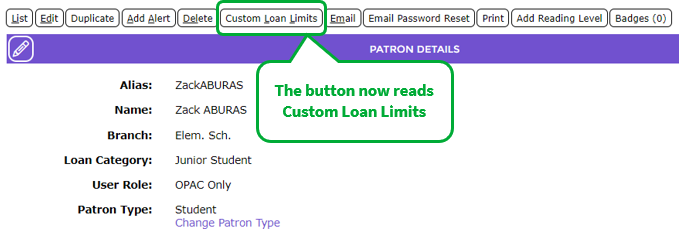
- You are returned to the Patron Details screen.
- The Change Patron Limits button is now re-labeled Custom Checkout Limits to identify that the checkout limits on this patron’s record do not conform to the system set Checkout Limits.
Reset the Custom Checkout Limits
If the customized Checkout Limits on a patron’s record are to be reset to the system default Lending Rules:
- Search for the patron record then access the Patron Details screen in the usual manner.
- Click on the Custom Checkout Limits button.
- The Change Checkout Limit screen will display.
- Click on the Reset button.
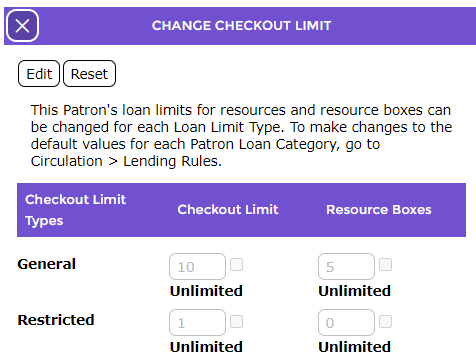
- The checkout limits that were changed will be restored to the default Lending Rules limits. Note that the Reset button no longer displays.
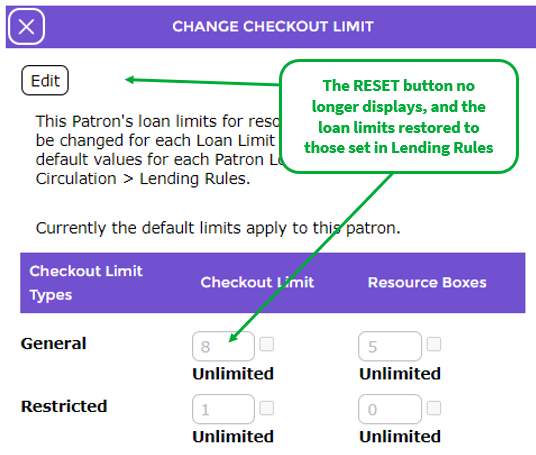
- Click on the ‘X’ in the top right-hand corner of the popup screen to return to the patron’s Detail screen.
- The button on the Detail screen has reverted to Change Checkout Limits.
Was this article helpful?
That’s Great!
Thank you for your feedback
Sorry! We couldn't be helpful
Thank you for your feedback
Feedback sent
We appreciate your effort and will try to fix the article