The fields displayed on the Checkout & return screens in Teacher's Library Portal can be adjusted using the page layout functionality located via System > Pages. This functionality allows the customization of which fields are displayed, and in which order the fields are displayed and be different for the Checkout and Return screens.
a. Navigate to System > Pages. The Search Pages screen will be displayed.
b. Type pagename=teacher* in the Any words field. Two pages will listed - teacherPortalLoan (Checkout) and teacherPortalReturn (Return).
c. Click the Edit icon next to the screen to change, e.g. teacherPortal Loan. Two columns (Unused and Used) will display.
Unused are fields which are not currently displayed. Used is a list of field which are currently displayed.
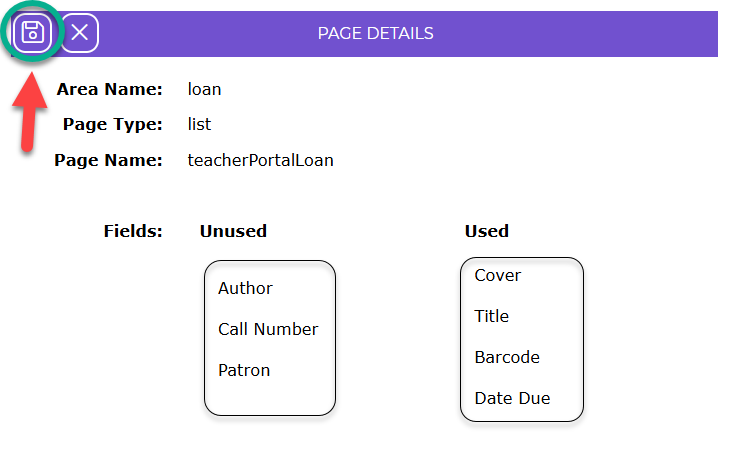
d. Using the mouse, drag and drop fields into the Used column that should be displayed. Drag and drop fields into the Unused column that should not be displayed. The order that the fields are listed in the Used column determines the order they are displayed on the screen. The field listed at the top of the Used column will display to the left, while the field at the bottom will be displayed on the right. Use the mouse to adjust the ordering of the Used column.
e. Once all all adjustments have been completed, click the Save icon.
f. Click on the Teacher's Library Portal icon and navigate to Circulation > Checkout & return. The Checkout tab lists the fields as configured in System > Pages, as per step (d).

Was this article helpful?
That’s Great!
Thank you for your feedback
Sorry! We couldn't be helpful
Thank you for your feedback
Feedback sent
We appreciate your effort and will try to fix the article